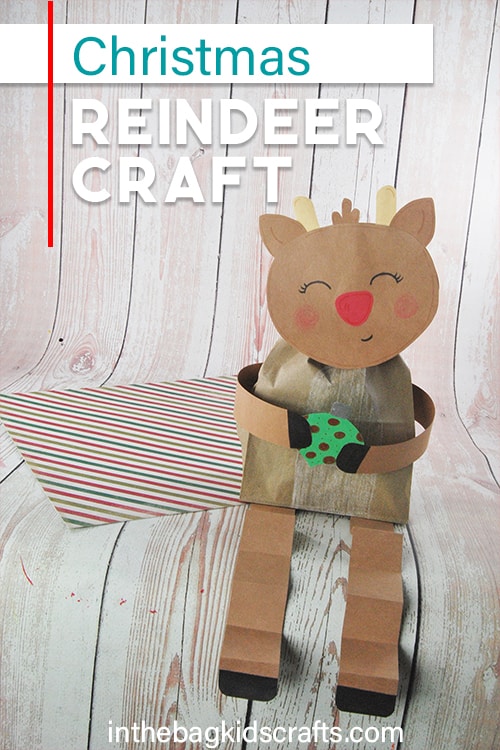
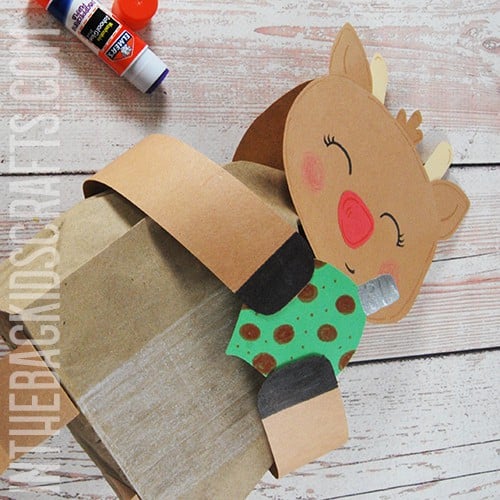
Christmas Reindeer Craft (Rudolph!)
This Christmas reindeer craft can be any of Santa’s reindeer that you want. We gave him a red nose as Rudolph. It starts with a simple paper lunch bag and then becomes an adorable reindeer that you can use as a Christmas decoration or play with, making up all kinds of amazing stories about the journeys he’s been on. There is no limit to the fun you can have with this one.
Note that if you’re planning to do this craft with a little one, lots of help will be needed. There are plenty of steps and some more advanced scissors skills required. But it can still be an enjoyable craft that you complete together. Be sure to let your kiddo be as independent as possible without the task leading to frustrations (for both of you).
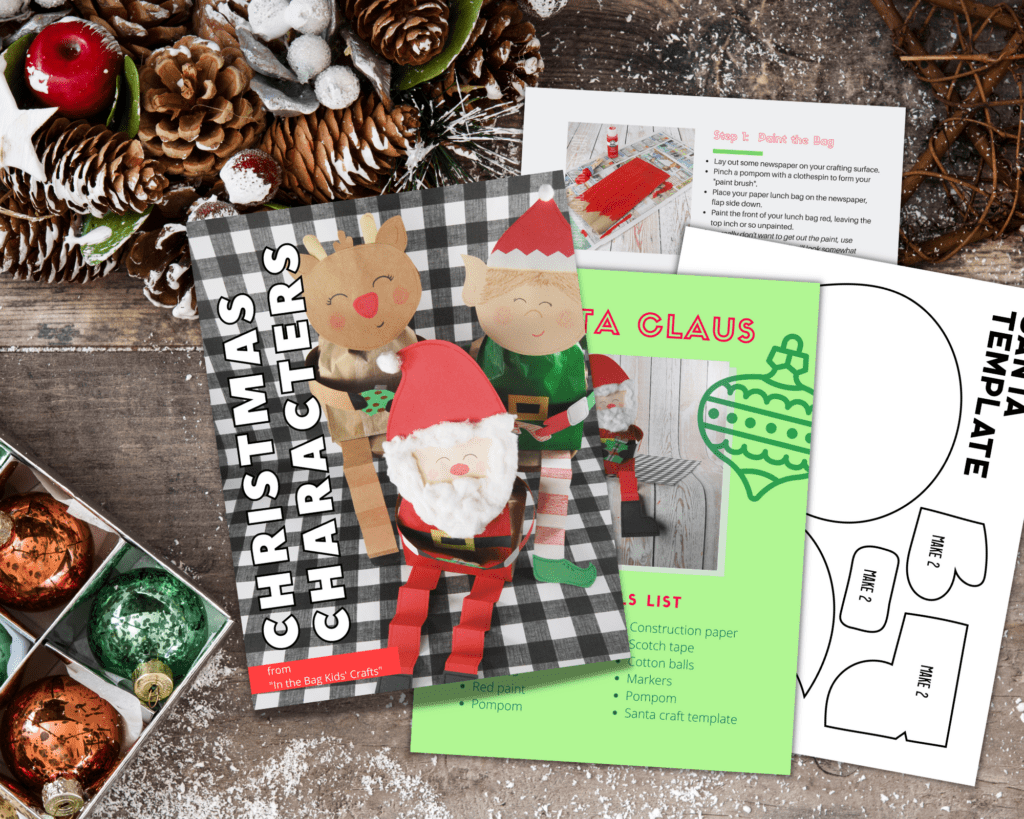
Get the templates for our trio of Christmas characters and make them all this holiday season…
Fun Facts about Santa’s Reindeer
- Another name for reindeer is caribou
- Though typical reindeer don’t fly, they are very fast…running as quikcly as 48mph.
- Santa didn’t always have reindeer.
- Donner and Blitzen used to have different names. In 1823, they were referred to as Dunder and Blixem.
- Rudolph was not one of the original reindeer and joined the crew about 100 years later.
- Santa’s reindeer are all girls. We know this because they still have their antlers by Christmas. Male reindeer shed their antlers by early December.
- Some people think that Santa has more than just the 9 reindeer that are part of most stories.
To learn more about each of Santa’s reindeer, check out this article from “I Spot Santa”.
All activities require adult supervision. By using this site, you are agreeing to our terms of use. This post contains affiliate links, which means if you make a purchase through these links, I may receive a small commission at no extra cost to you. Click here to read my full disclosure policy.
Combine Reading with Crafting
The best way that I can think of to elevate any crafting experience is to combine it with reading a good book. And there are so many Christmas themed books that talk about the reindeer. Here are some of our favorites…


SUPPLIES FROM THE BAG
- Paper lunch bag
- Newspaper
- Crayons
- Construction paper
- Scissors
- Glue stick
- Scotch tape
- Markers
- Reindeer craft template
The master list that we use for every single craft project we make here is like a capsule wardrobe…but for crafts. Once you fill your bag with the basic, just mix and match for hundreds and hundreds crafts…so much creativity. No more running to the store ten times and then never actually getting around to crafting in the end.
Save this Rudolph craft for later. Pin it to your favorite Pinterest board…

How to make a Christmas Reindeer Craft
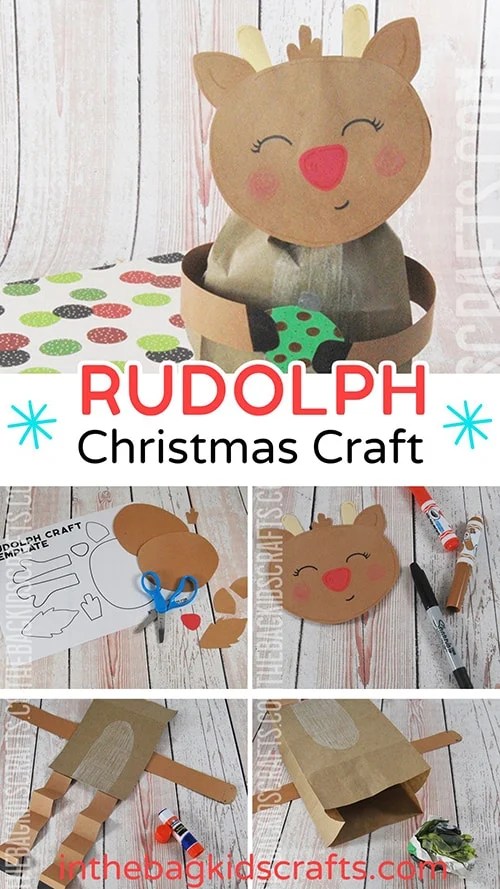
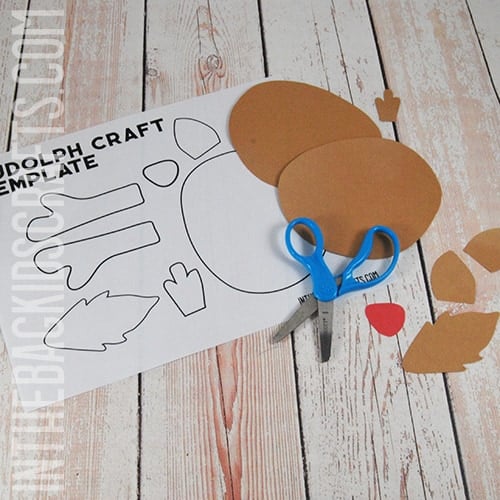
Step 1: Use the Reindeer Craft Template
- Download and print your Reindeer craft template.
- Use the template to cut out all of the parts for your Rudolph craft.
- We cut all of the parts except the nose from brown paper, as close to the color of the paper bag that we could find.
- For the nose, cut it out of red or black, depending on what reindeer you want to make.
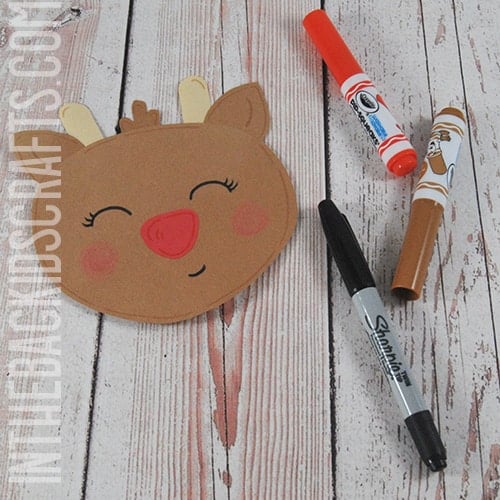
Step 2: Decorate the Reindeer’s Head
- Glue the ears, antlers and hair tuft onto your reindeer.
- Then place the nose.
- Use the markers and crayons to draw on your reindeer’s face.
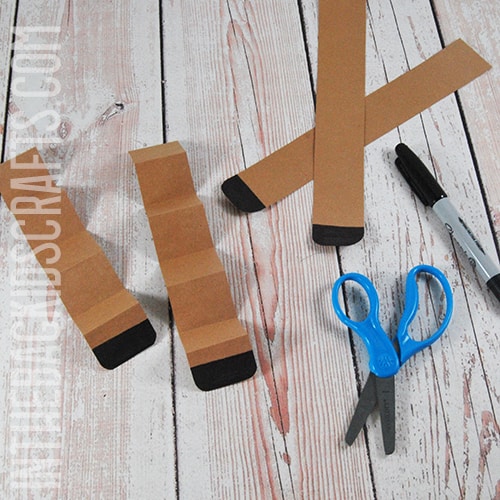
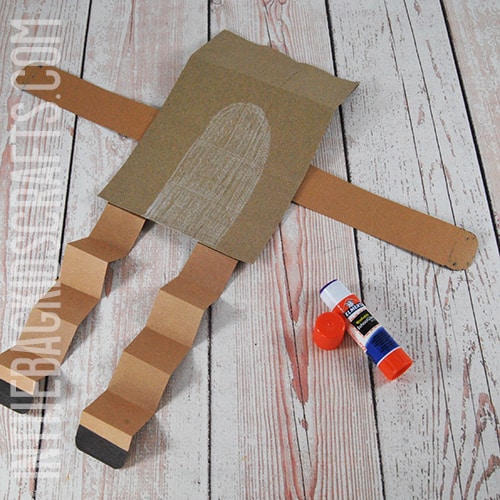
Step 3: Create the Legs and Arms
- Cut 4 strips of brown paper about an inch wide each.
- For 2 of the strips, fold them into an accordion. These are his legs.
- Draw hooves on with black marker.
- Also use your marker to add hooves onto the front paws.
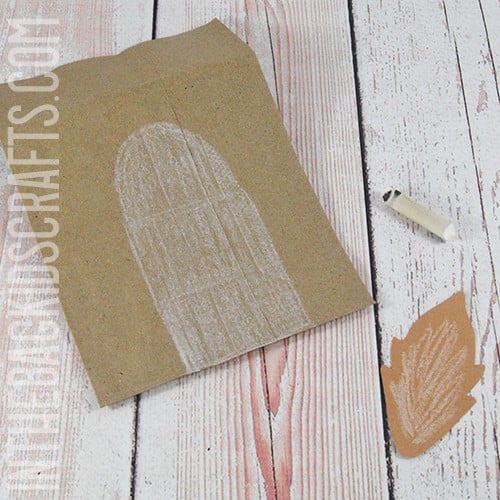
Step 4: Make the Body
- Cut the top 2 inches or so off of your paper lunch bag.
- Use the white crayon to draw a half oval on the front of the bag for the deer’s tummy.
- Then add a little white to the tail.
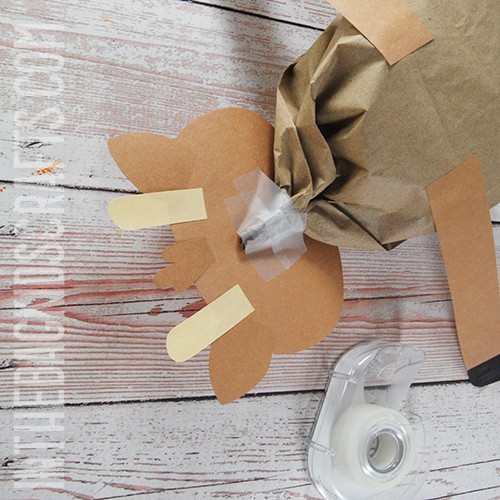
Step 5: Build the Body for Your Christmas Reindeer Craft
- Using your glue stick, attach the legs to the back of your paper lunch bag at the bottom.
- Then trim down the arms until they are a length that will reach around and just barely touch in the front when the bag is fully opened.
- Glue each of the arms in place so that they are sticking out at a 90 degree angle on each side of the paper bag, just above the belt. *Be careful not to glue them onto the bag’s flap.
Step 6: Stuff It
- Open up your paper lunch bag fully.
- Tear strips of newspaper and crumple them into balls.
- Place the balls one at a time until the bag is stuffed but not over-filled.

Step 7: Attach the Head
- Gather the top of the lunch bag, twist it and put scotch tape around the top.
- Then use tape again to attach the reindeer’s head to the gathered up top of the bag (as pictured).
Step 8 (optional): Add the Tail
- Attach the tail to the back end of your reindeer craft using a glue stick.
- To clean things up, also add the mirror image of your reindeer’s head to the back of the craft.
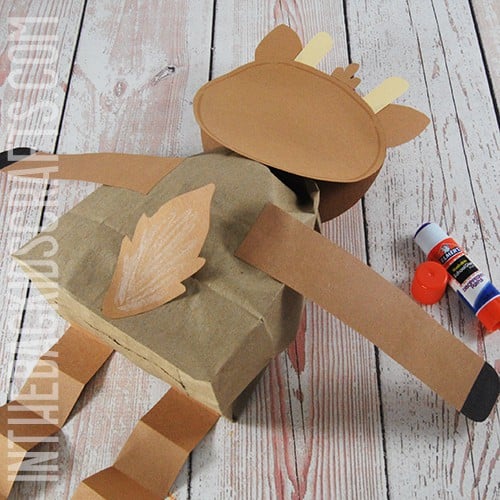
Step 9: Have Him Hold Something
- Now cut out something for reindeer to hold. We created a little Christmas ornament from scraps of paper.
- Use the glue stick to place his hands on each side of the item.
Now that you know how to make this Christmas reindeer craft, it’s time to make him some friends. Get the entire collection of Christmas character templates to make Santa Claus and an Elf too. They make great DIY Christmas decorations or play things.
Enjoy this reading of “Rudolph the Red Nosed Reindeer” together…
Save this Christmas Craft for later. Pin it to your favorite Pinterest board…