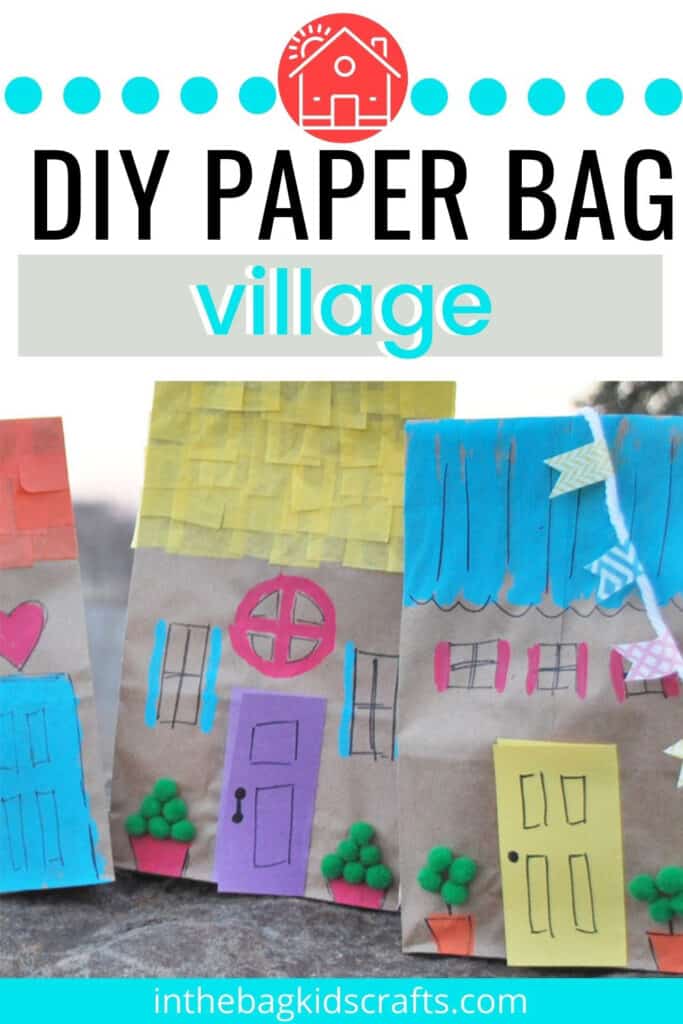
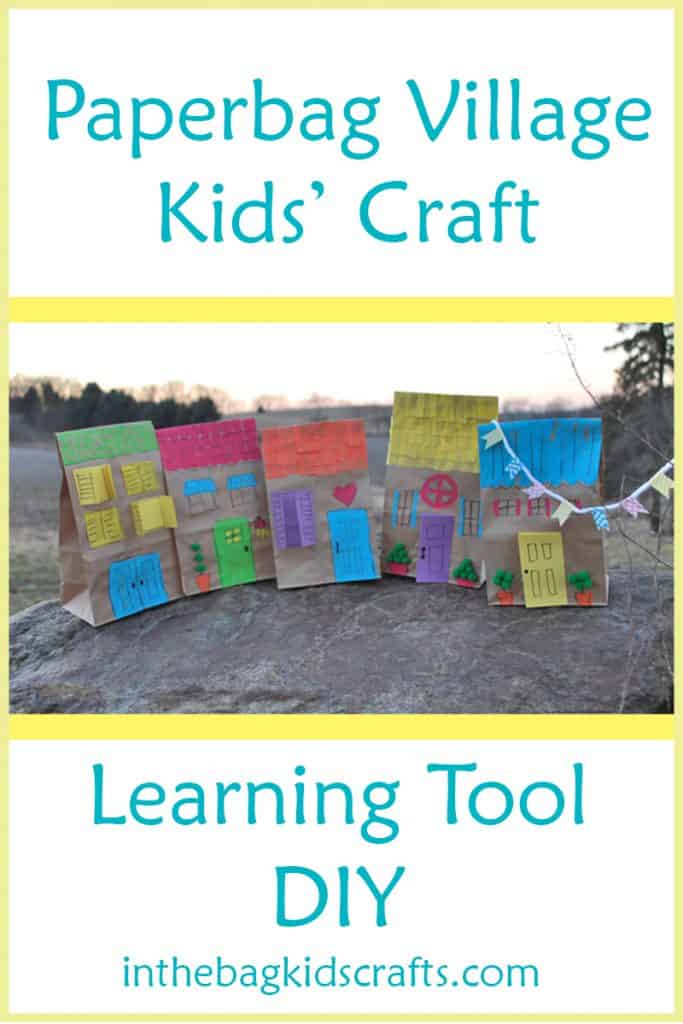
Paper Bag Village Kids’ Craft DIY
I AM SO EXCITED ABOUT THIS PROJECT THAT I COULD WRITE THIS ENTIRE POST IN CAPS TO EXPRESS MY EMOTION. But I will spare you. What is making me this paper bag village… just little paper bag houses? It’s because there is so much scope for imagination! (Shout out to my fellow Anne of Green Gables fans!!!)
Most craft projects take you step by step through a process to get to a final product. And that is great, but it does at times limit the most important element in any craft…IMAGINATION!…which is exactly the element that this paper bag village craft needs most. (For you type A peeps, hold to the end, and I will give you what you need to sleep tonight.) If your child wants to scribble all over his paper bag, then cover it in wiggly eyes and pompoms, LET HIM! (Actually, that sounds like a very cool monster house…he may have something there…you should definitely put that on Pinterest!)
When my boys were little they would build little towns out of all kinds of household items and then play out elaborate scenarios. They would use shoe boxes, blocks, pots and pans, whatever. Then all of their stuffed animals would become characters in their stories. Of course, when my oldest was very little he didn’t need stuffed animals because he had little imaginary friends that were regulars in our house. Did you know that Wayne Gretzky is only 3 inches tall, can be held in the palm of your hand and will show up uninvited any time you take a car trip with your kids? And he’s not the only one…there were several well known football players, random celebrities and baseball players. These were my son’s imaginary friends. They would have loved this village! 🙂
If you like this paper village bag craft you will also like our other community based and seasonal crafts like; Community helper craft , easy Popsicle stick picture frame, Popsicle stick pencil holder, 20+ paper bag kids puppets and these two characters crafts a Christmas tree character craft and Candy Cane character craft for a winter village.
Skills This Village Craft Builds
- Fine motor skills
- Hand-eye coordination
- Creativity
- Storytelling and imaginative play
- Problem-solving
- Social skills (when building a collaborative classroom village)
Save this Paper Bag Village for later. Pin it to your favorite Pinterest board…
The best crafts are ones that are simple, invoke creativity and can be used for an opportunity to play when they are finished. They let the child research life and find the answers out for themselves. They will have decisions to make and problems to solve. LET THEM! These decorated paper bags are the craft that keep on giving too. I guarantee that before these finally met their eventual tragic end (like the dog deciding that it is super fun to treat it like a chew toy…or whatever the chaos is at your house), they will be used for hours and hours of interactive play. Stick around to the end for more ideas on adding elements to your village in order to bring it to life.
Best Ages for This Paper Bag Village Craft
Preschool
Preschoolers will enjoy decorating their own paper bag houses with a little adult assistance for cutting and assembly. This craft encourages creativity, fine motor development, and imaginative play while introducing simple concepts about homes and neighborhoods.
Kindergarten
Kindergarten students can complete much of the village craft independently while practicing cutting, gluing, and following directions. It’s a fun hands-on activity for community helper units, neighborhood lessons, and creative storytelling.
Elementary
Older children can design an entire paper bag village by creating unique houses, buildings, and decorations. This project encourages problem-solving, creativity, collaboration, and imaginative play while allowing kids to build their own miniature community.
All activities require adult supervision. By using this site, you are agreeing to our terms of use. This post contains affiliate links, which means if you make a purchase through these links, I may receive a small commission at no extra cost to you. Click here to read my full disclosure policy.
SUPPLIES FROM THE BAG
- Paper lunch bags
- Plus Everything Else in the Bag!
We’re so glad to have you here at In the Bag Kids’ Crafts! Our mission is to help you make crafting with your kiddo a habit using fun, easy ideas with supplies you already have on hand.
Be sure to visit the “Fill Your Bag” page for our go-to supply list—we use it for every project to keep crafting simple, affordable, and mess-free. No extra store runs, no missing pieces—just grab your bag and start creating!
Want to make it even easier? Check out our quick shopping list on Amazon and Walmart to stock up on everything we love.
And if you use our printables, don’t miss our Favorite Printing Essentials list. We’ve found a reliable, no-hassle printer that won’t leave you dealing with constant issues or dried-out ink—plus all the extras you need so you can print and craft without the frustration.
Classroom Uses
- Winter village display (if appropriate)
- Halloween town display (if appropriate)
- Community helpers
- Neighborhood units
- Social studies
- Creative writing
SIMPLIFLIED INSTRUCTIONS
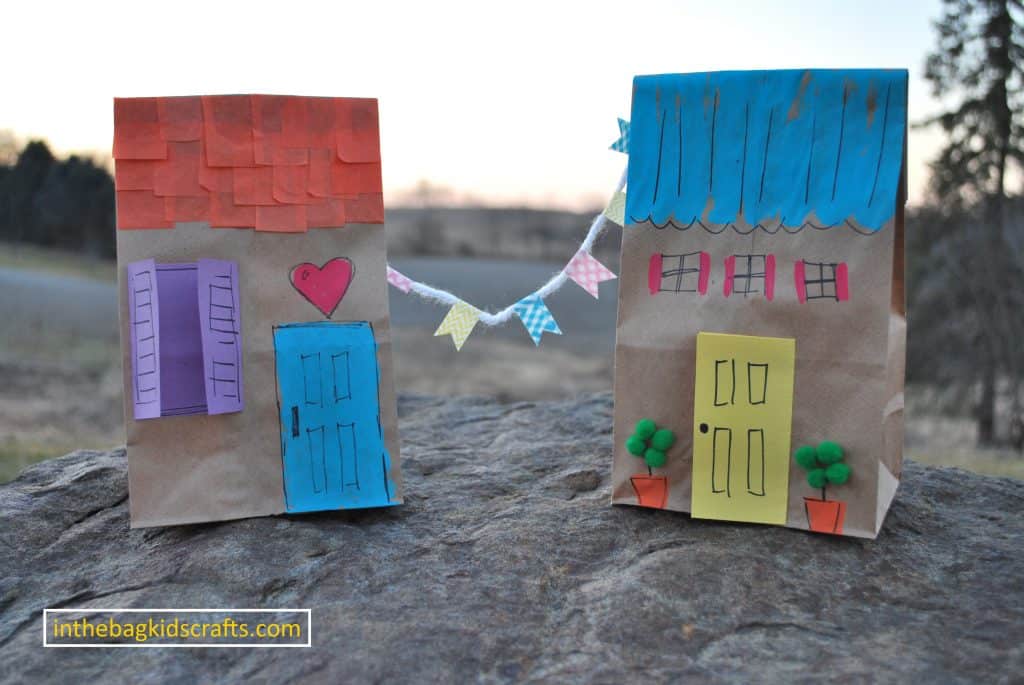
Here is all you really need to know to get started, it is easier to decorate the bags flat. So, just fold over the top of the bag (don’t tape it yet) and have your child make the front look however they want. When the adorning is complete, open up the bag to its full size and tape down the top flap. Once it is set up, they can decorate the sides and back if they so choose.
STEP-BY-STEP PAPER HOUSE INSTRUCTIONS
For those of you who don’t want to just wing it and go at this project with no direction at all (And that is totally OK!) I implore you, let your kids go nuts with this one and just use their imaginations. There is no wrong way to make these adorable little houses!
STEP 1: Fold
- First, fold the top of the bag (do not tape in place yet)
- Vary how much is folded over from bag to bag so that buildings in the village will be different heights
STEP 2: Make the Roof
- Pull out the glue stick and a set of tissue paper squares
- Glue rows of tissue paper squares beginning at the top of the paper bag until you have a roof that is your desired size (approximately 3-4 rows)
STEP 3: Cut Out Some Pieces for Your Paper Bag Village
- Take from your supplies a piece of construction paper (color of your choice), scissors and a glue stick
- Next, fold the piece of construction paper in half
- Cutting away from the fold, cut out a rectangle for the door of the building (approximately 2″ wide by 3-4″ high)
- Glue the door in place
STEP 4: Add Details
- Take the black sharpie marker from your supplies
- Draw on details, such as doorknob, windows, etc. as desired
STEP 5: Give It Some Color
- From the bag, get out a favorite paint color and a q-tip
- Add a little color to the project, such as curtains on the windows, shutters, a porch light, etc.
- Allow the paint time to dry (this should be pretty quick)
- Once the paint has dried, use your black sharpie marker to go around some of the decorative elements
STEP 6: More Details
- Grab a couple of scraps of construction paper, scissors, some green pompoms, Elmer’s glue and the glue stick from the bag
- From the scraps of paper cut 2 matching pot shapes (keep it simple, people)
- Glue the pots in place on either side of the door using the glue stick
- Now use the Elmer’s glue to make mini topiary out of the green pompoms. I chose to make a triangle pattern, but please use your imagination on this one.
STEP 7: Finish Off the Paper Bag Houses
- Open the bag to its full size
- Fold the top back over and tape closed
- You do not need to put anything in the bag, but if you want a little more weight to it, you can fill it with some crumpled up paper bags (or whatever you have on hand, like small stones, beans, rice…)
STEP 8: Play!!!
- Once the glue has dried, PLAY!!!
As promised, here are some other ideas that have been swirling around in my head while working on this project…
To add some life to this village, here are some ideas of toys to incorporate with this craft:
- Lego mini figs
- Old fashioned miniature cowboys and Indians (but let’s keep it PC please)
- Army guys
- Marbles
- Polly Pockets (those are still a thing, aren’t they?)
- Any of the Safari Limited sets (like FAIRIES & DRAGONS or PIRATES)
- Finger puppets
- Current cartoon miniatures like Paw Patrol figures
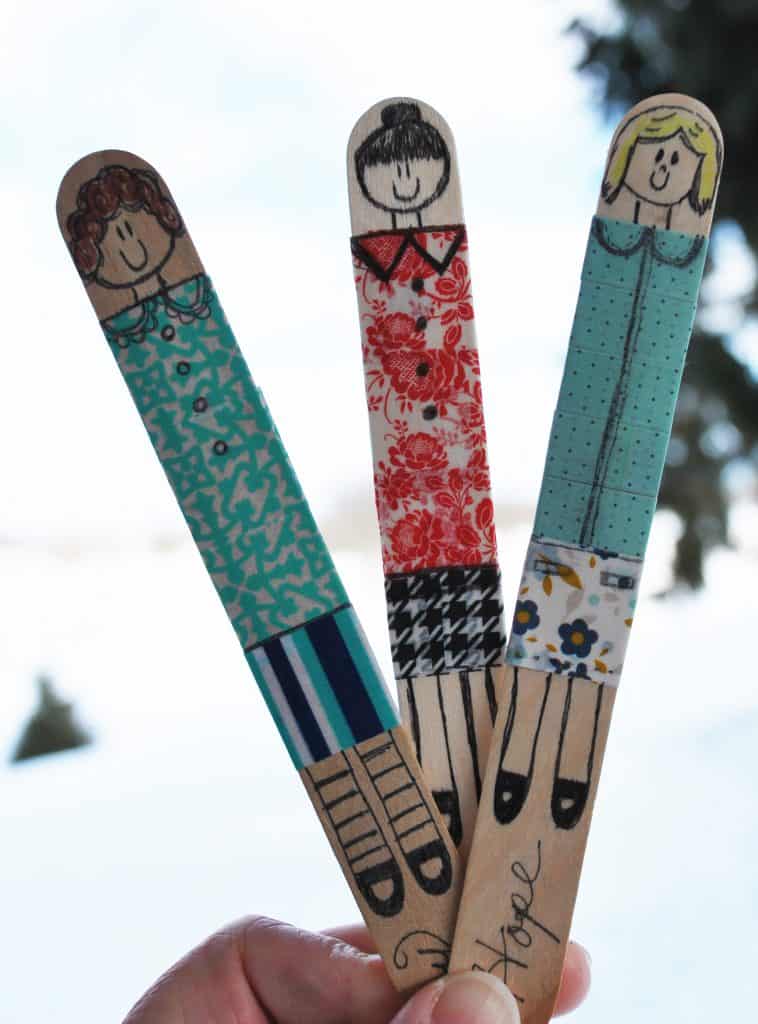
Here is an even better idea…keep the creativity going by having your kiddo make his own characters. This can be done with items that are in the bag. You can keep these popsicle stick figures in place by using a little bit of play dough at the base. They can easily be removed from the play dough for acting out scenes. Here is my version of some of these dolls. Aren’t they cute? I would love to see your version.
You can also add other elements to your village. Here are a few ideas:
- Lamp posts drawn or painted onto popsicle sticks
- Penants like the one seen in the picture above…place pieces of washi tape over a piece of string and cut into whatever banner shape you would like (triangle, etc.)
- Trees or bushes
- Snow by pulling cotton balls apart and gluing in place
- Fall leaves on the ground by snipping up pieces of Autum colored construction paper
- 3D awnings on the buildings using construction paper folded and glued to stick out
- Try this one using an old (or recent) photo that you cut into a silhouette. Make a surprise interactive element out of a door or window.
I cannot wait to see all of the creative choices that your kiddos make, and I would love to share them with the “In the Bag” family. Just email me your finished projects, and I will feature them (along with proper credit given, of course) in our gallery. Now, get out there, and get crafting!
Save this craft for later…pin it to your favorite board!
Village Craft Variations
If your kids enjoyed building their own paper bag village, they will also love exploring more hands-on community and imaginative play crafts. Try creating a full neighborhood with our community helper activities, where kids can design fire stations, schools, and other important places in a town. Y
ou might also enjoy our other paper bag crafts and building-style activities that encourage creativity and storytelling while kids design their own worlds. For seasonal fun, pair this village craft with our holiday and winter crafts to create festive themed villages throughout the year.
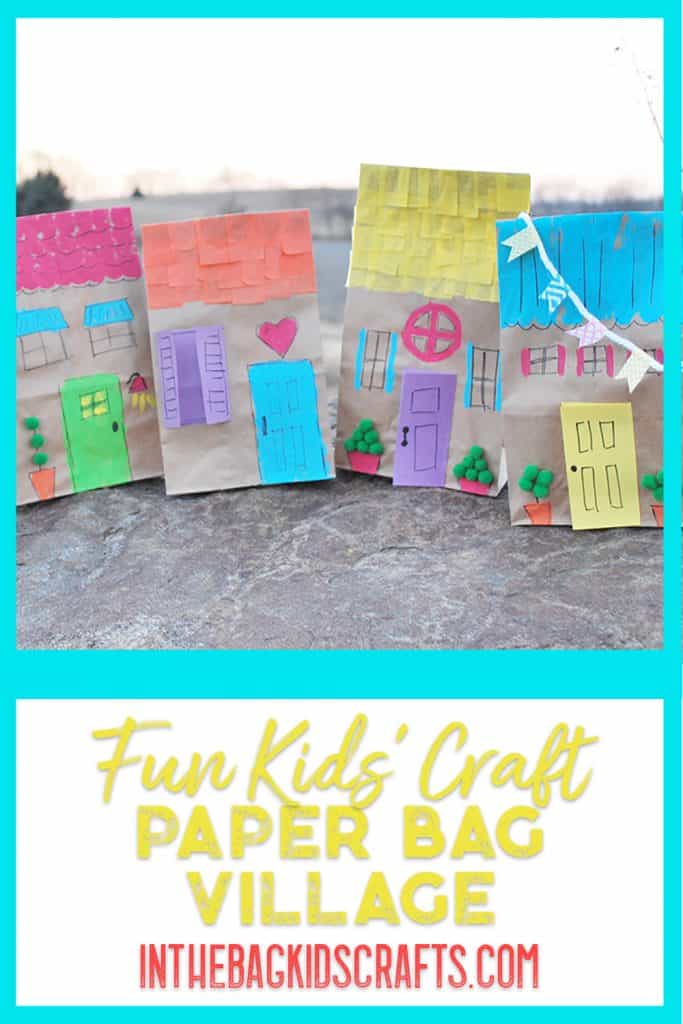
Neighborhood Village
Create a colorful neighborhood by designing several different houses and arranging them into your own miniature community. Kids can imagine who lives in each home and create stories about their village.
Holiday Village
Decorate each paper bag house with holiday lights, wreaths, snow, or festive decorations to create a cheerful holiday village display that’s perfect for winter crafting.
Fairy Village
Transform the paper bag houses into magical fairy homes by adding flowers, tiny doors, colorful windows, mushrooms, and other whimsical details.
Community Helpers Village
Turn each building into an important place in your community, such as a fire station, school, library, post office, or hospital. This variation pairs perfectly with community helper lessons in the classroom.
Seasonal Village
Decorate the village to match your favorite season by adding pumpkins for fall, flowers for spring, sunshine for summer, or snow for winter.
Storybook Village
Encourage imaginative play by creating characters who live in each house. Kids can use the finished village as the setting for storytelling, puppet shows, or creative writing activities.
FAQ ???
Yes! Standard brown lunch bags work perfectly for this craft and are inexpensive, easy to find, and just the right size for creating miniature houses.
Yes! Standard brown lunch bags work perfectly for this craft and are inexpensive, easy to find, and just the right size for creating miniature houses.
Yes! One of the best parts of this craft is encouraging creativity. Children can personalize each house with different colors, doors, windows, flowers, roofs, and decorations to create a one-of-a-kind village.
Definitely! Creating several paper bag houses allows kids to build an entire neighborhood or village. Add roads, trees, parks, schools, and community buildings to turn the craft into an imaginative play set that can be enjoyed long after crafting is finished.