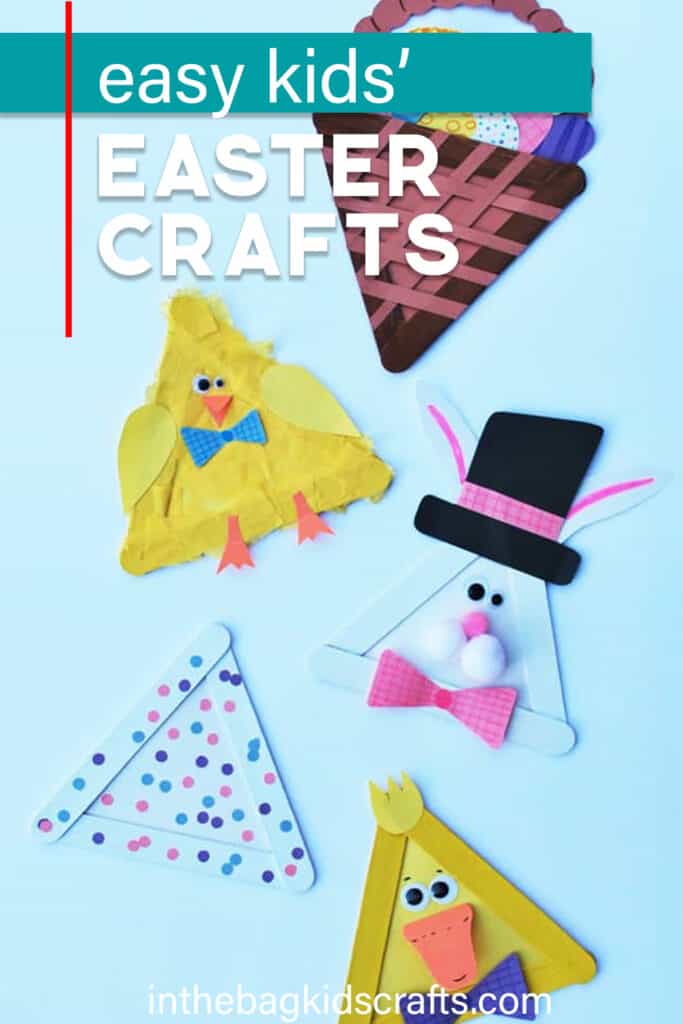
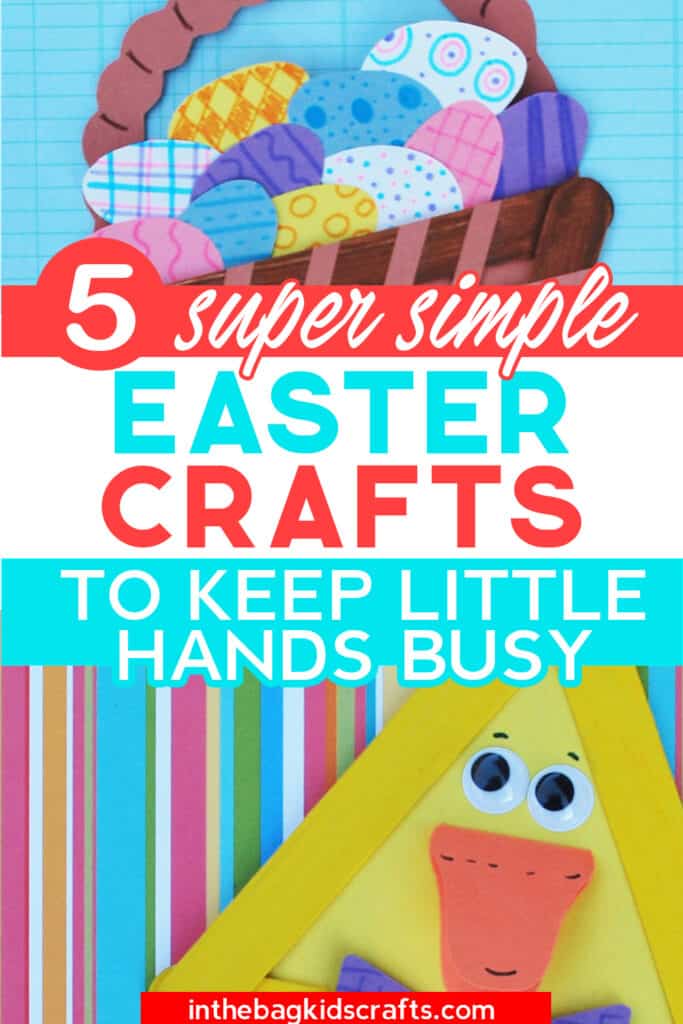
5 Easter Crafts Ideas You Will Love
These Easter Crafts Ideas are a fun collection of some of our favorite simple Easter crafts. Each one starts with a basic triangle popsicle stick frame and goes from there. I know, triangle shaped eggs are unorthodox, but they turned out so cute. Plus they are a easy for little ones to make and leave room for imagination. Get the Easter crafts printable to make it even easier to create.
Save these paper Easter crafts for later. Pin it to your favorite Pinterest board…
This post contains affiliate links, which means if you make a purchase through these links, I may receive a small commission at no extra cost to you. Click here to read my full disclosure policy.
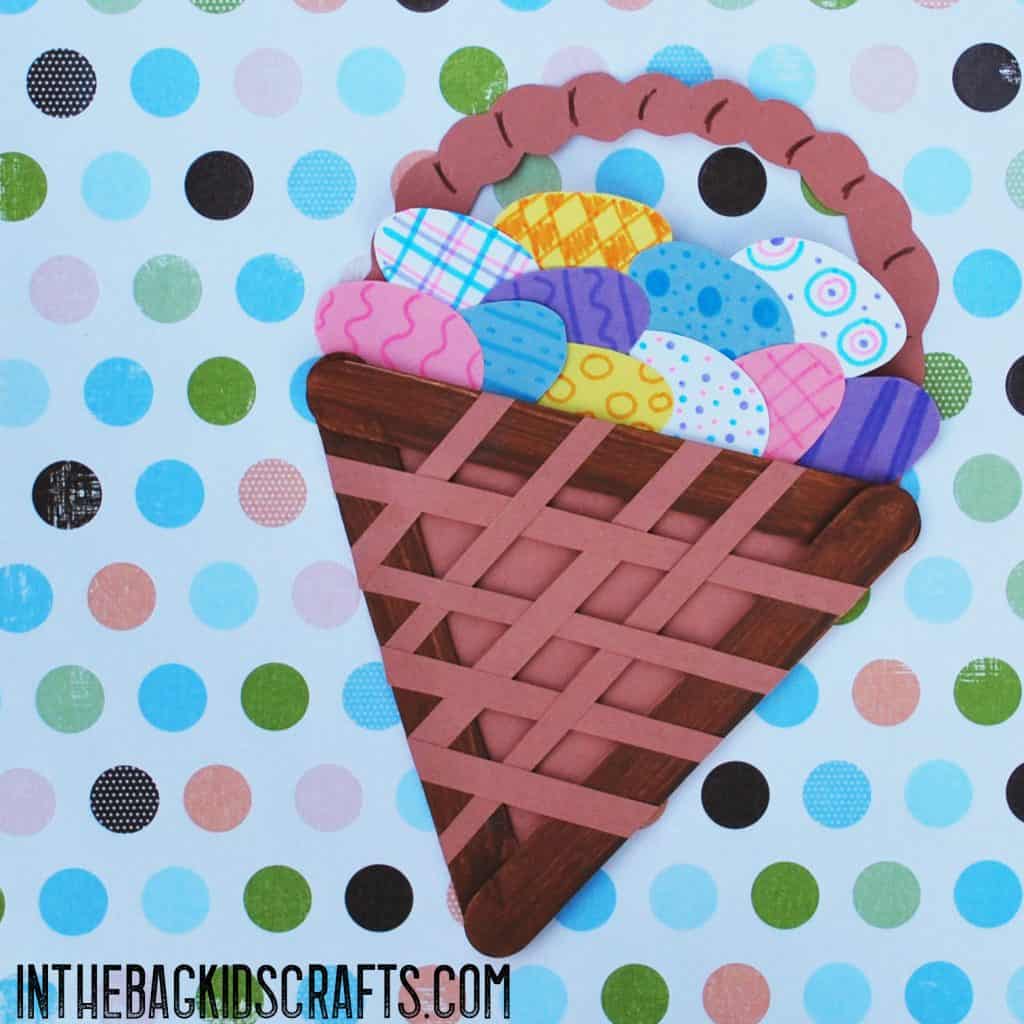
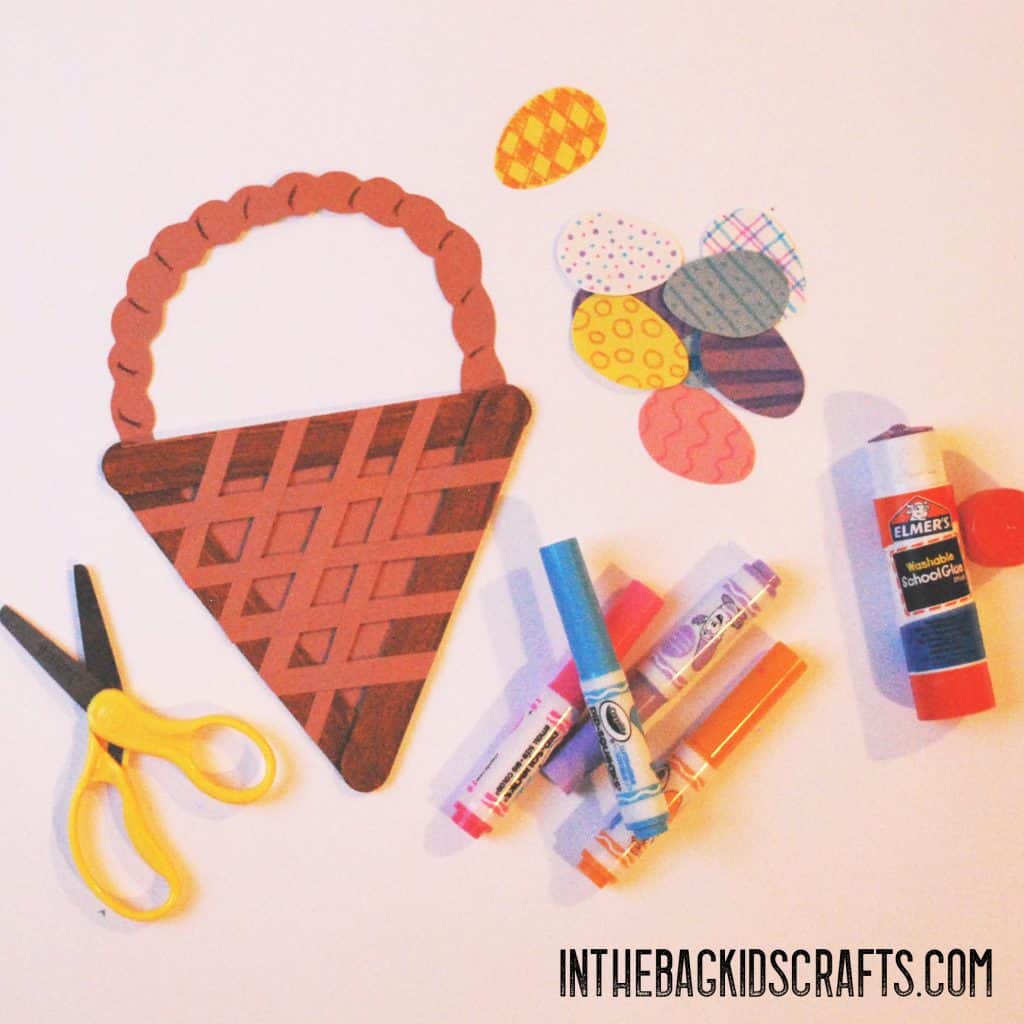
CRAFT #1: Popsicle Stick Easter Basket
SUPPLIES FROM THE BAG
- 3 Large popsicle sticks
- Brown paint
- Newspaper
- Medium pompom
- Clothespin
- Elmer’s glue
- Glue stick
- Brown construction paper
- Scissors
- Pencil
- Scraps of colored construction paper
- Markers
- Easter Basket Template
Welcome to a new way of doing crafts with your kids! These Easter crafts ideas, along with everything on this blog you will only find simple and do-able crafts which can be easily adapted for any age (not crafts that were clearly made by adults, for adults). And the best part is they are all made from the same master list of supplies that fit nicely into one bag! That way, you can stock up once and be ready to create a moment’s notice…easy peasy!
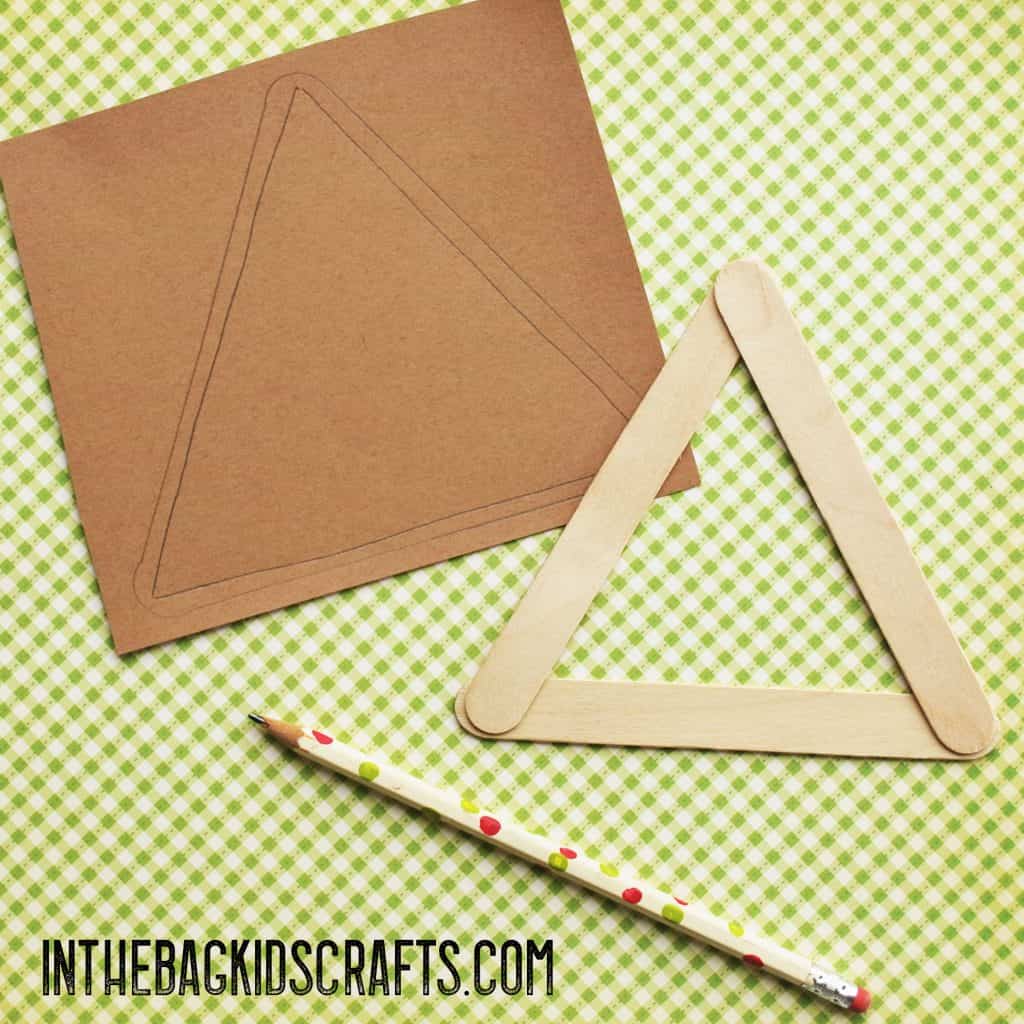
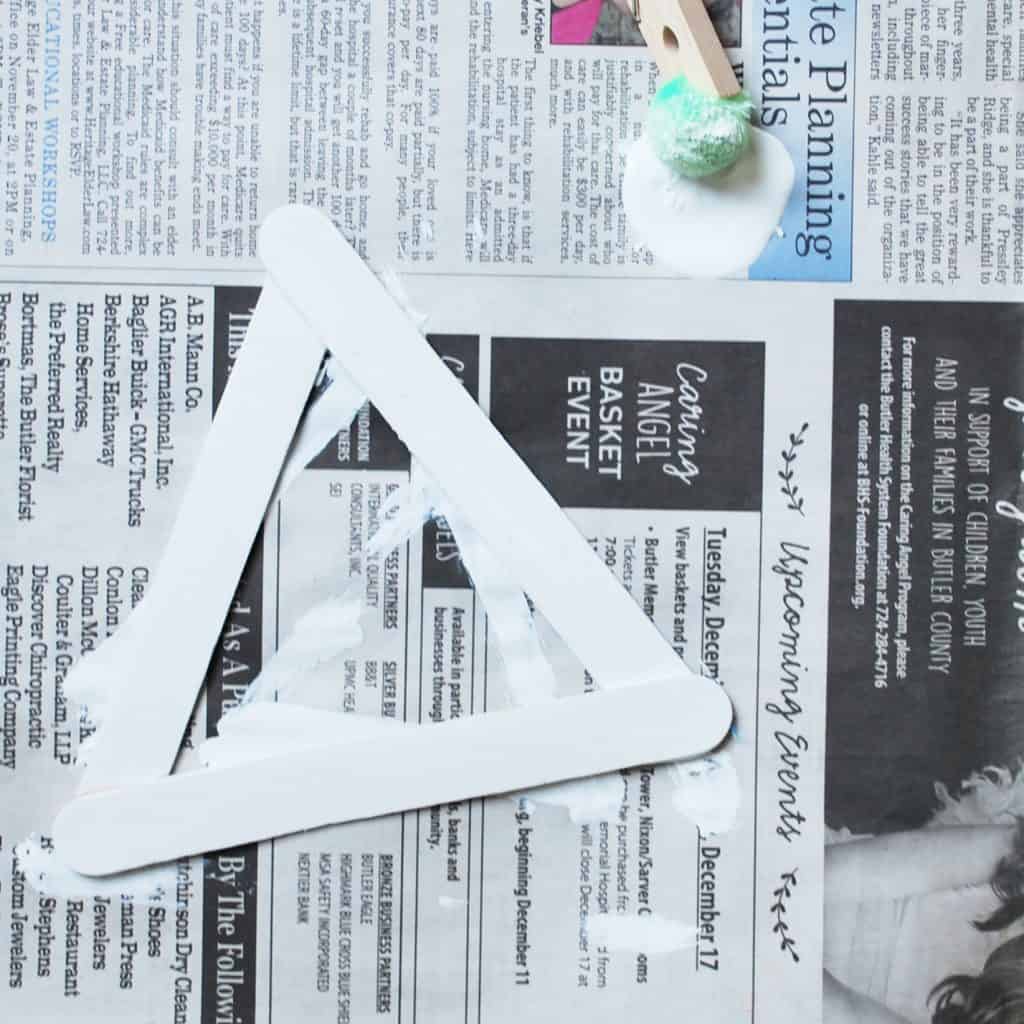
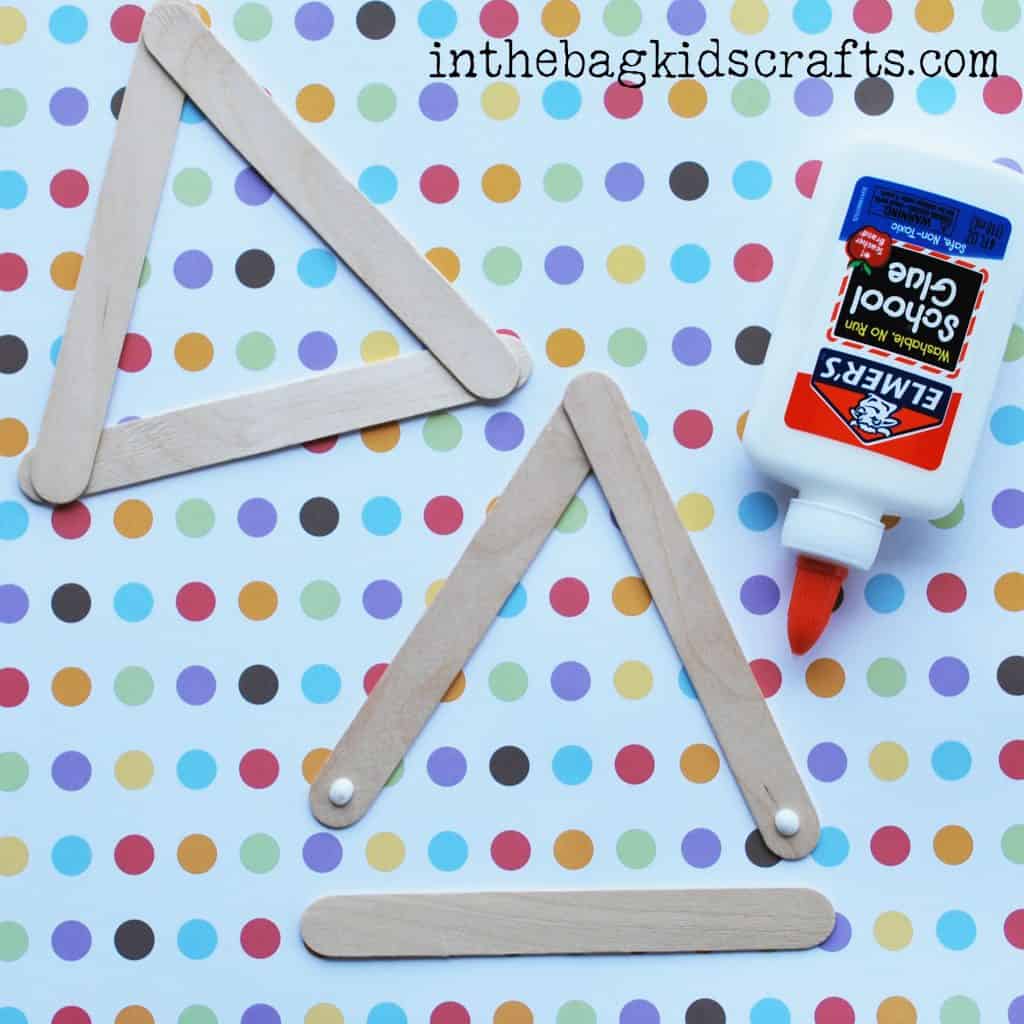
Step 1: Glue the frame
- Glue 3 large popsicle sticks into a triangle shape
- Allow the glue to dry thoroughly
- *You may want to do this step the night before to give it plenty of time to dry. Make a bunch so that you are ready to craft away.

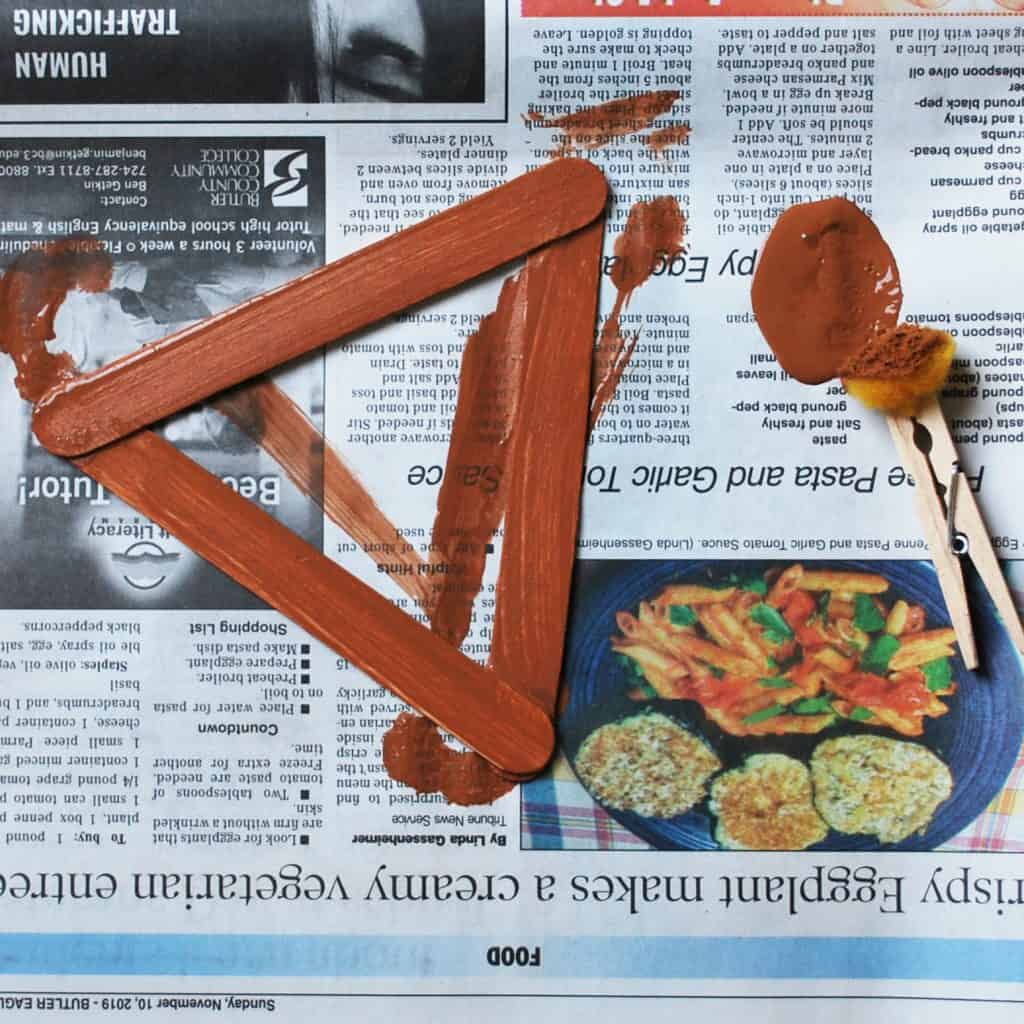
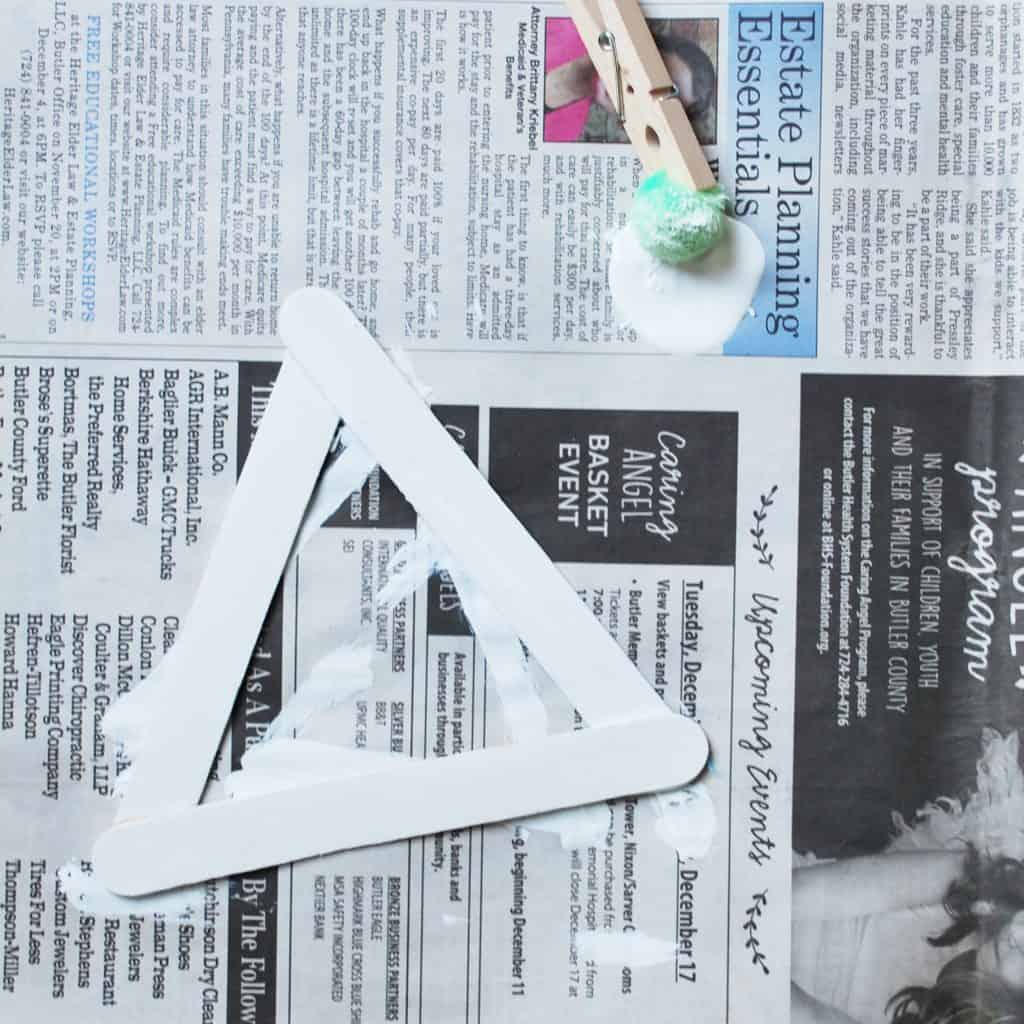
Step 2: Cut
- Place the triangle on the newspaper and squeeze out a little brown paint
- Pinch the pompom with the clothespin to form a “paint brush”
- Paint the triangle frame brown and let the paint dry
Step 3: Make the basket
- Place the painted frame on top of the brown construction paper and trace around it with your pencil
- Then draw a second triangle just inside that one, about 1/8″ or so
- Cut out the inside triangle and use the glue stick to adhere it to the back of the frame
- OR…you can use the printable Easter basket template for this step and the next step.
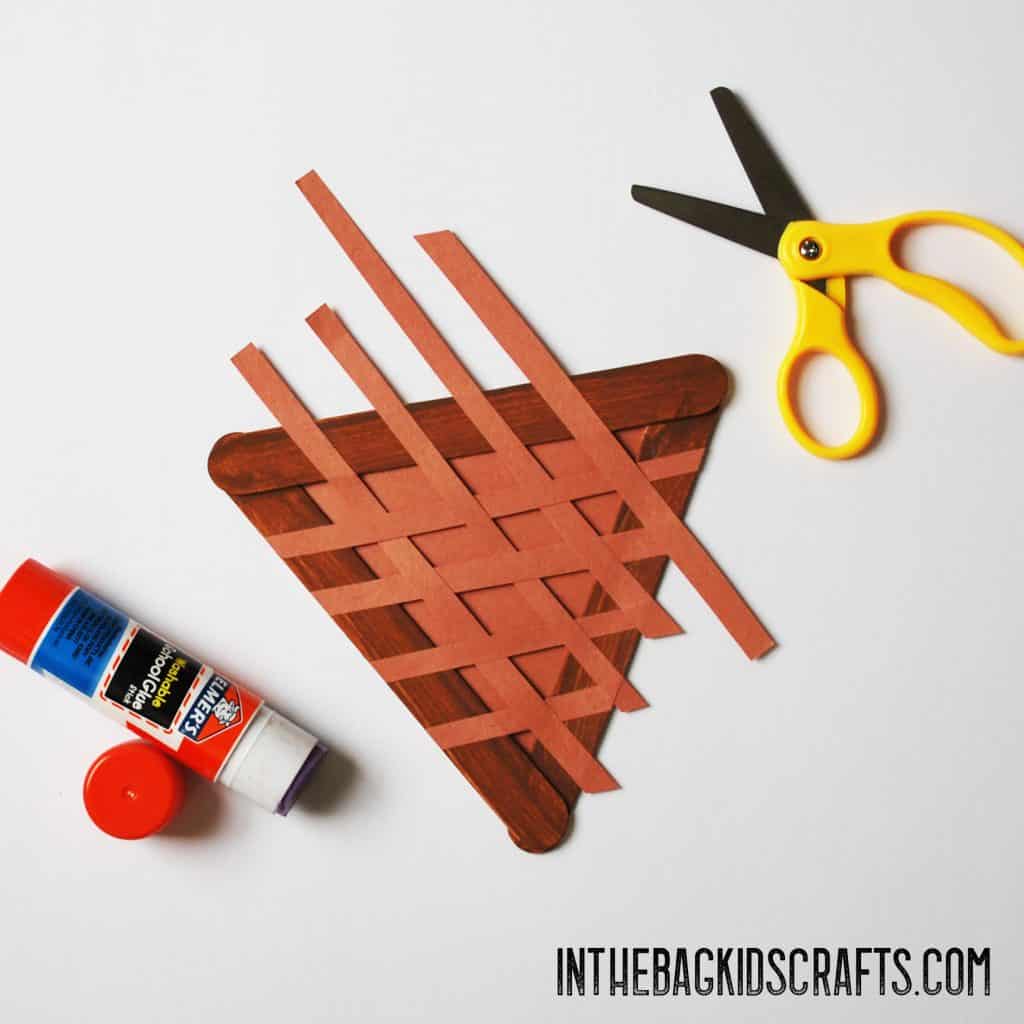
Step 4: Weave
- Cut 8 strips of brown construction paper, approximately 1/4″ wide and 5-6″ long
- Glue 4 of the strips onto the front of the triangle, spaced apart. Then trim off the excess that hangs over the edges.
- Weave the remaining 4 strips through the ones glued in place and glue in place. Trim away the excess.
- *For little ones you can skip the weaving step and just keep the basket basic.
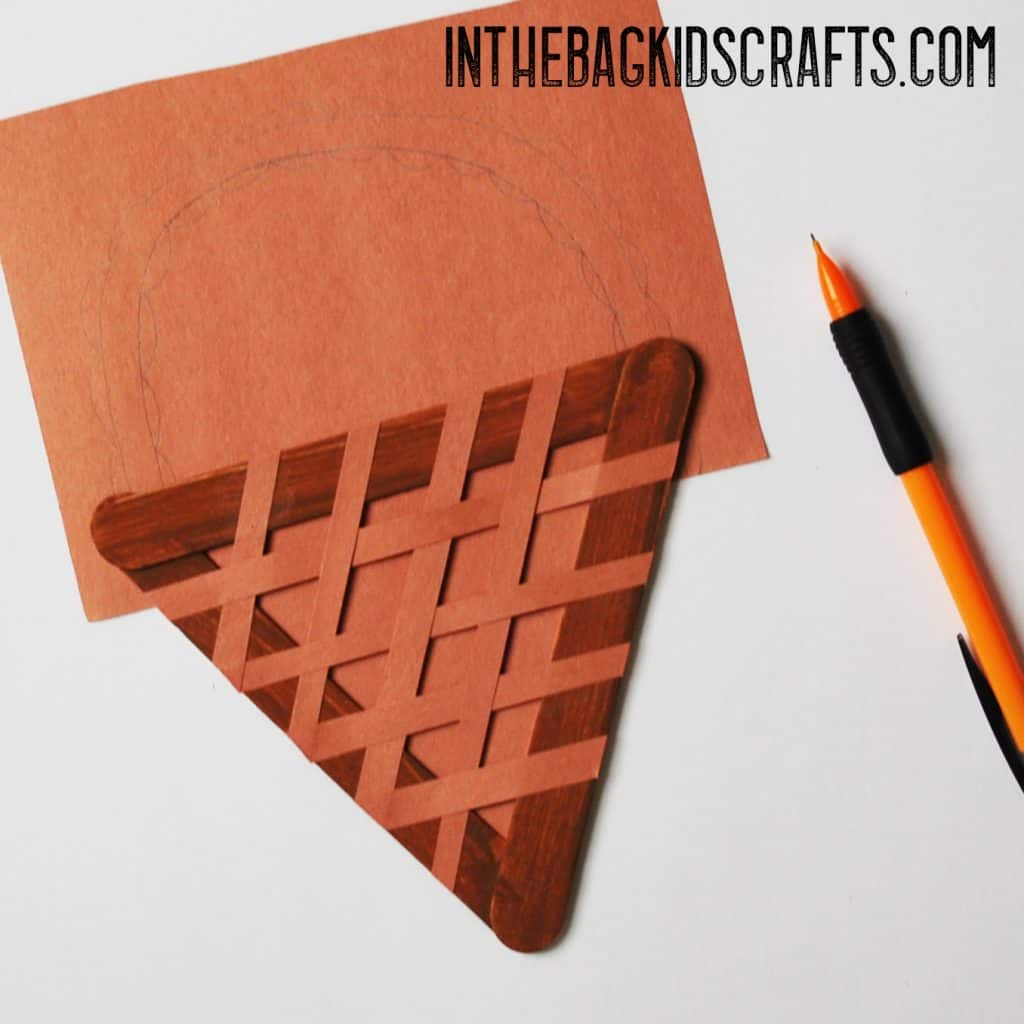
- Give your basket a handle. It doesn’t have to be fancy. (Included in printable Easter basket template).
Step 5: Make the eggs
- Cut some Easter eggs out of various colors of construction paper. Once you have one cut out, use it as a pattern for making more. Fill you basket with as many eggs as you would like.
- Decorate the eggs with your markers.
- Glue the eggs into the basket using your glue stick.
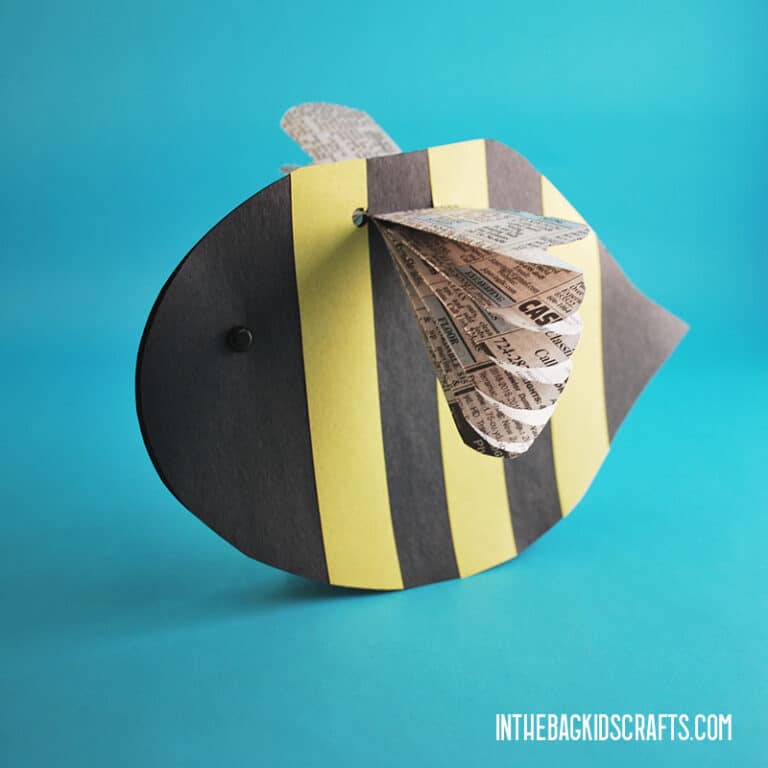
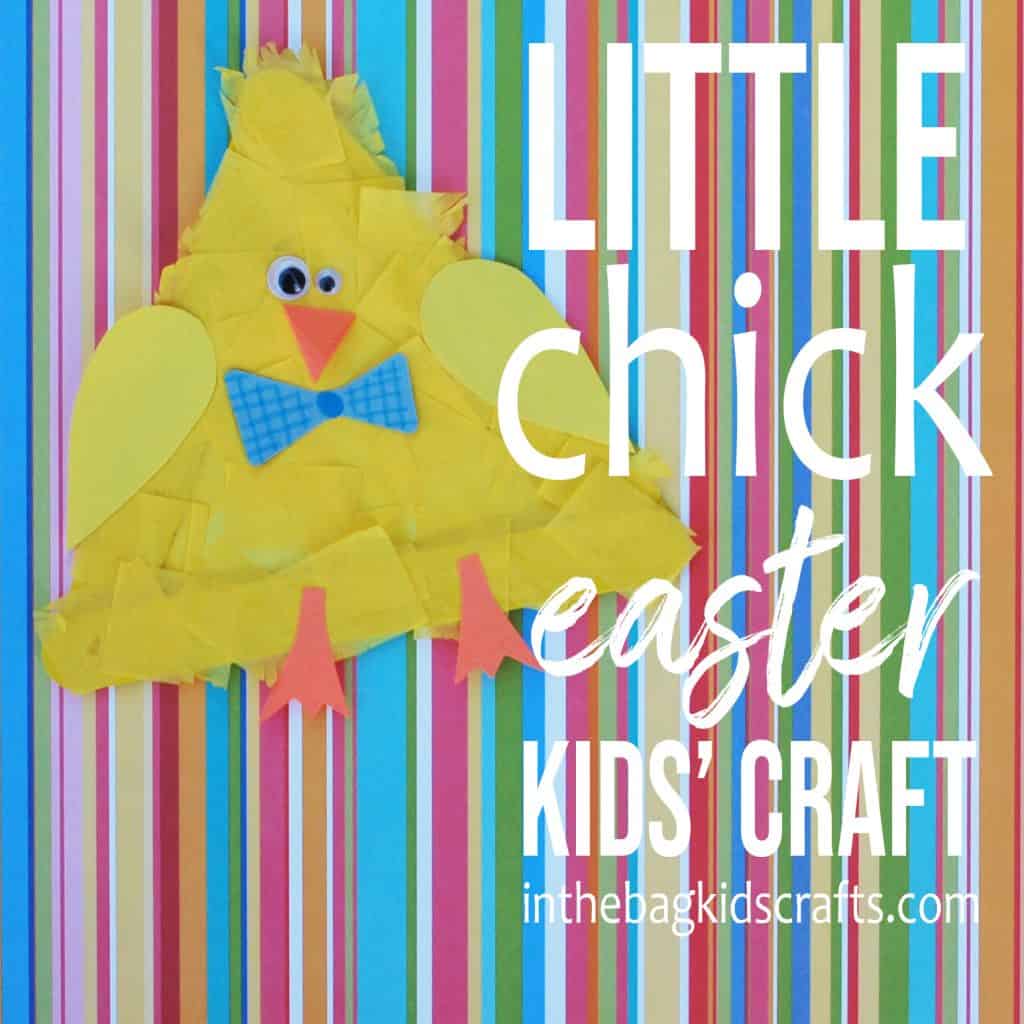
CRAFT #2: Easter Chick Craft
SUPPLIES FROM THE BAG
- 3 Large popsicle sticks
- Yellow paint
- Newspaper
- Clothespin
- Medium pompom
- Elmer’s glue
- Yellow construction paper
- Glue stick
- Yellow tissue paper squares
- 2 Small googly eyes
- Scraps of orange, yellow and blue construction paper
- Scissors
- Markers
- Pencil
- Easter Chick Printable Template
Step 1: Glue the frame
- Form 3 large popsicle sticks into a triangle and glue them together at the corners using Elmer’s
- Allow the glue to dry thoroughly
- *You may want to complete this step the day before and allow the glue to dry overnight. Prepare several so that you can make as many little chicks (or other projects) as you want!

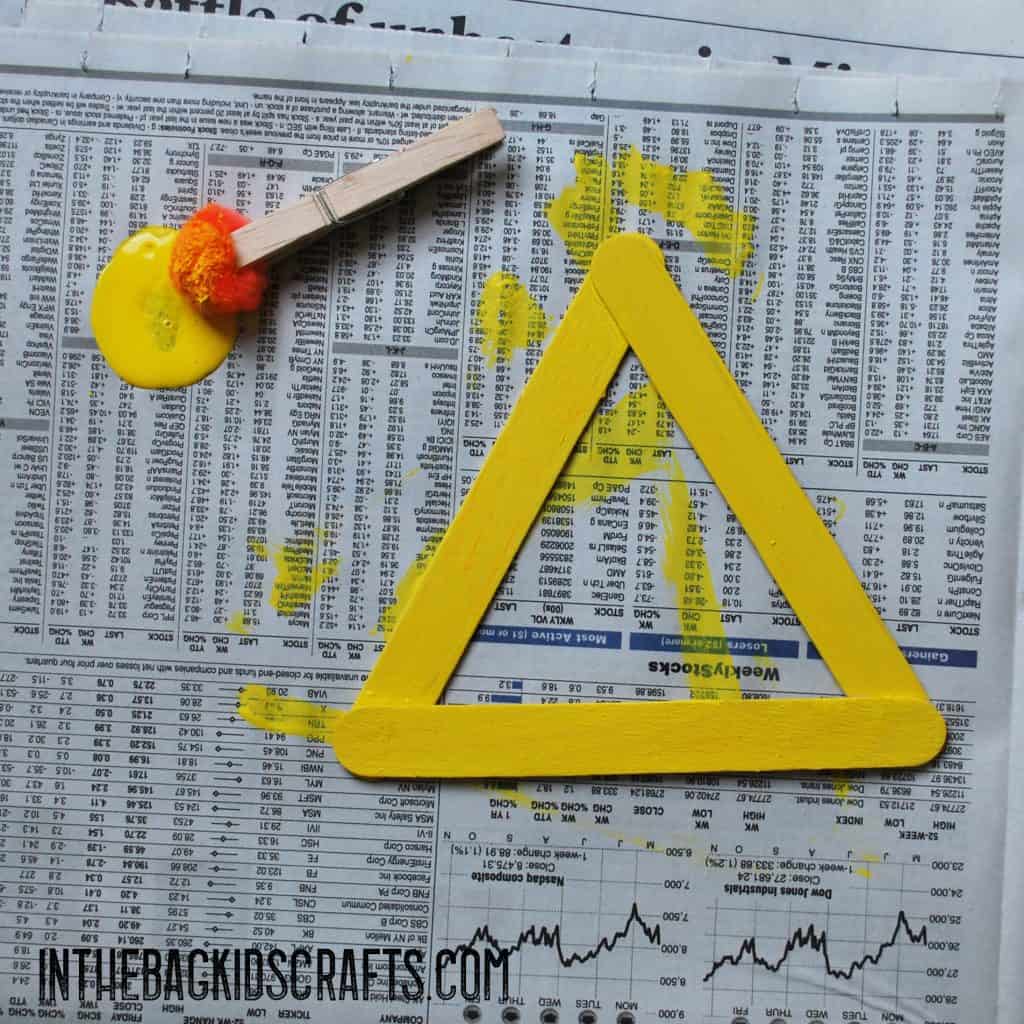
Step 2: Paint
- Place the triangle frame on the newspaper
- Pinch the pompom with the clothespin to form a “paint brush”
- Squeeze a little yellow paint onto your newspaper
- Paint the frame and allow it to dry
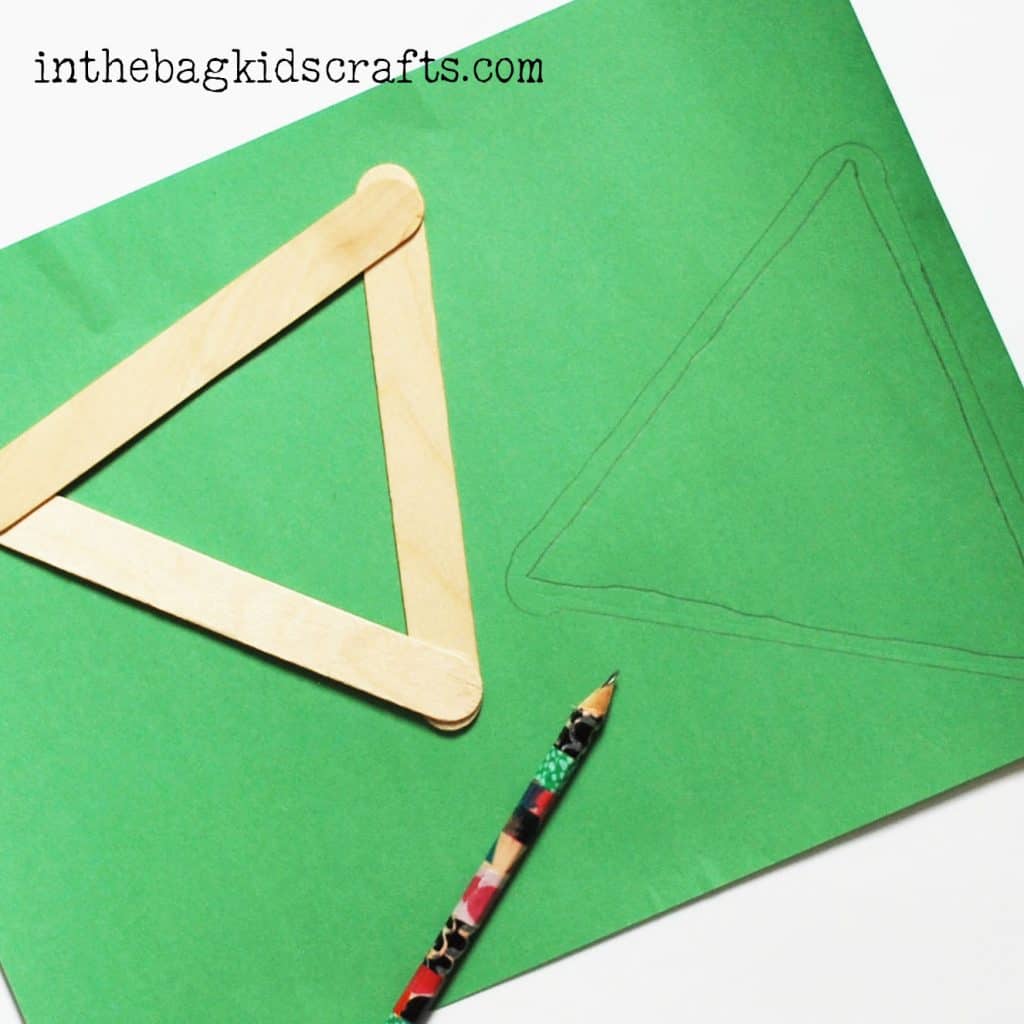
Step 3: Cut and glue
- Place the triangle frame on top of the yellow construction paper and trace around the the outside
- Draw a second triangle inside the one you have traced, about 1/4″ or so
- Cut out the paper triangle
- Last, use the glue stick to glue it to the back of the frame
- OR…you can use the printable Easter chick template for this step and the next step.
- *Ignore the fact that the sample is not being completed in yellow…yours will be yellow
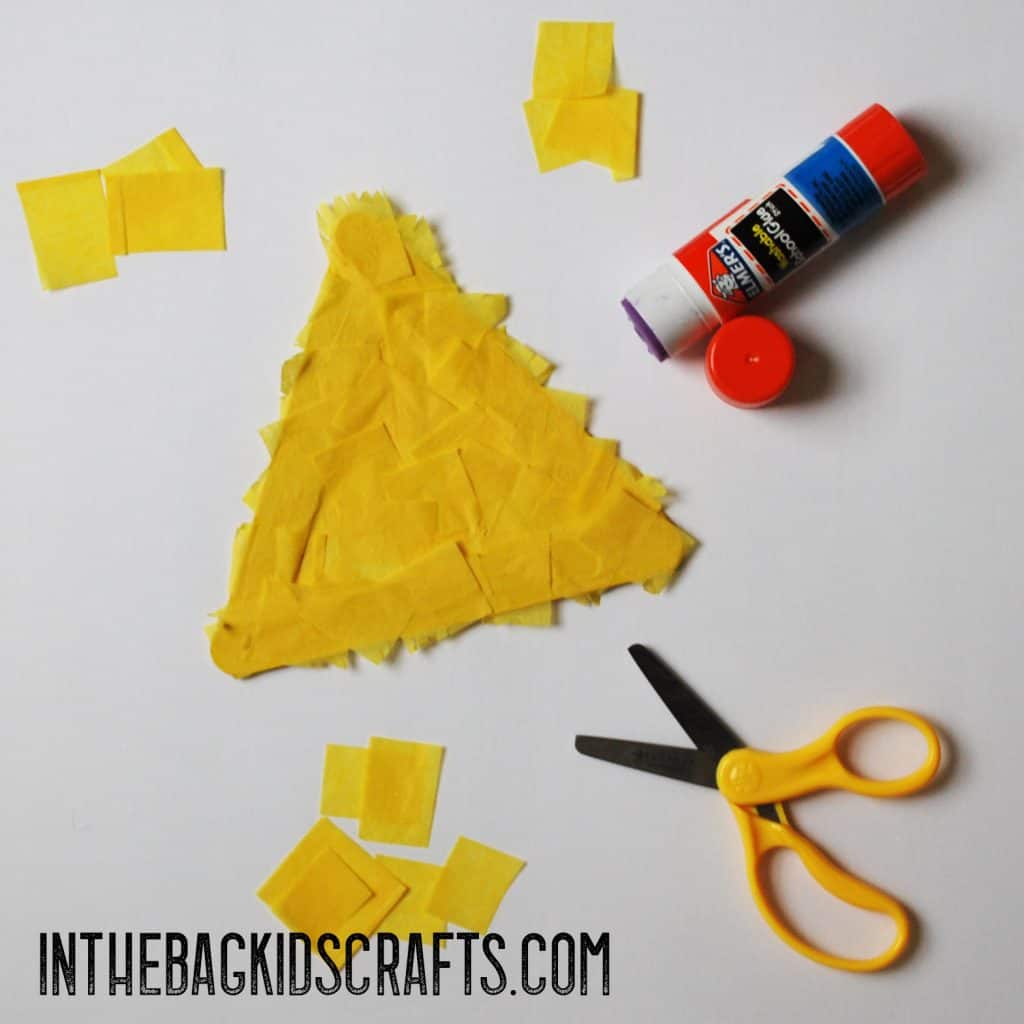
Step 4: Add the fluff
- Glue the pieces of yellow tissue paper squares all over the triangle
- You can leave little edges not glued down and some that go over the edges
- Slip the edges of the tissue paper to make the chick even “flufflier”

Placing tissue paper pieces onto this craft is a great activity to use for practicing fine motor coordination. Encourage your child to use his index finger and thumb together in a tip pinch which picking up the pieces. Spread them out to make it easier to pick up one at a time. Plus, with the proper set up, you can also practice the skill of crossing midline. Now, I know that this may be a term you are not familiar with, but it is an important foundational skill for so many other motor activities. Learn a little more about crossing midline HERE.
To practice crossing midline when working on this craft, place the tissue pieces opposite your child’s dominant hand. If they are not yet demonstrating a hand dominance, take note of what hand they are preferring for this task and then place the pieces on the other side. Then keep encouraging them to use that hand, while reaching across the body to pick up the tissue paper.
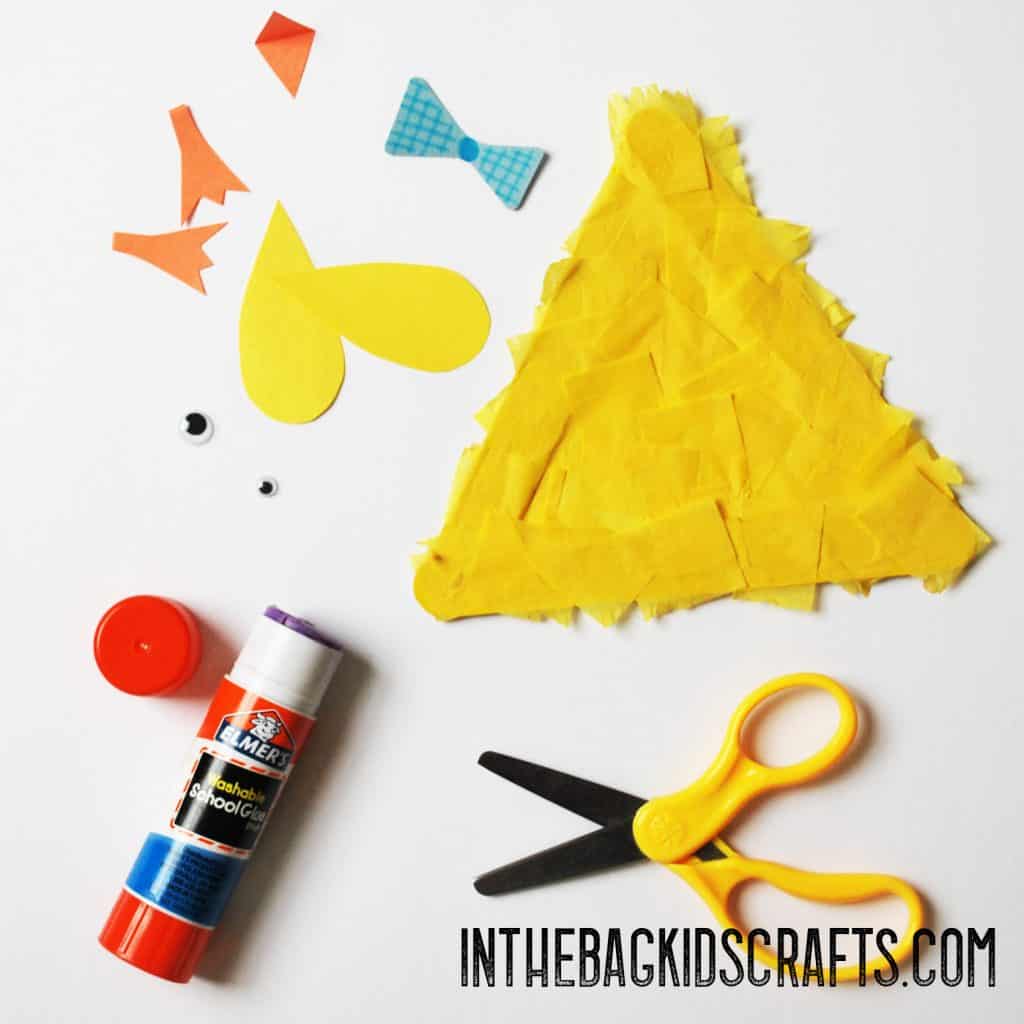
Step 5: Now for the details
- First, cut 2 large teardrop shapes from the scraps of yellow construction paper for the chick’s wings
- Then cut a couple of details from the other scraps, including a beak, feet, and a bow tie
- Last, glue all of the details in place, including the googly eyes
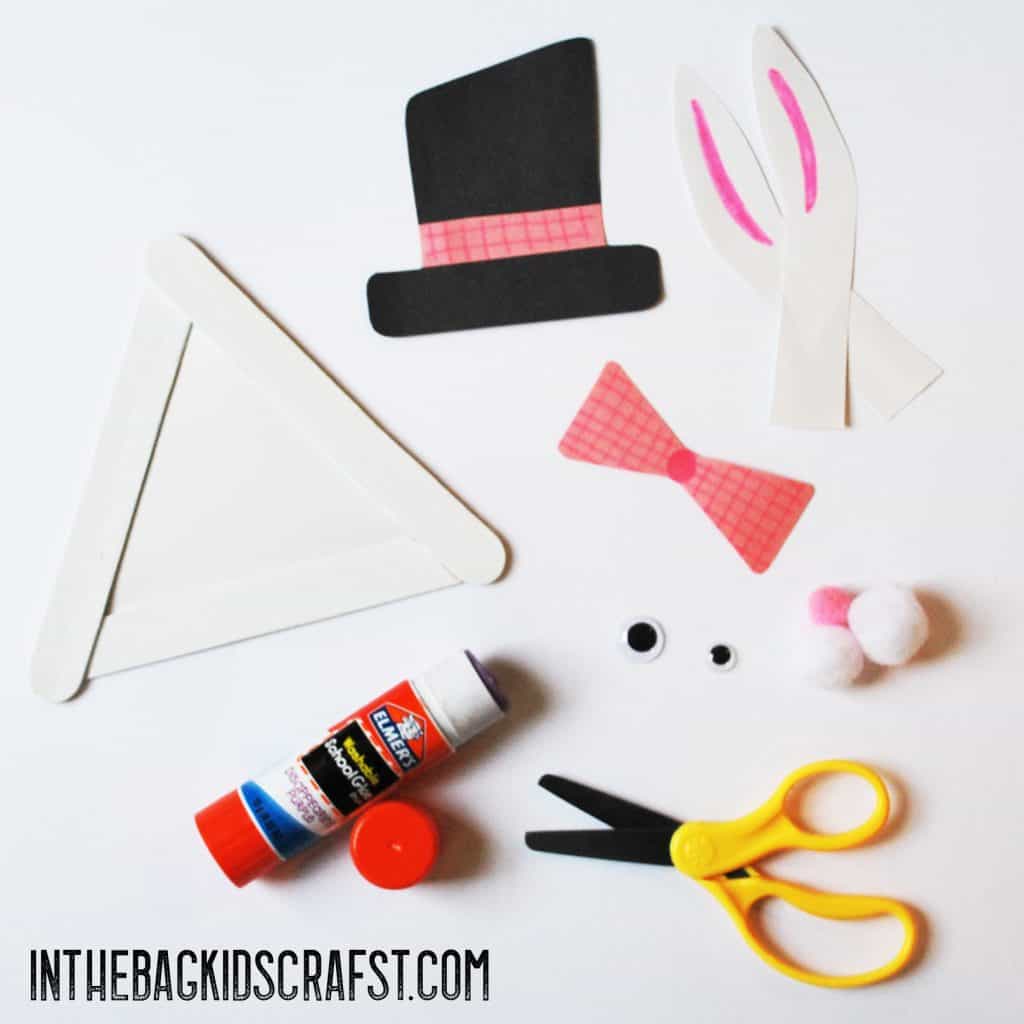
CRAFT #3: Easy Easter Bunny Craft
SUPPLIES FROM THE BAG
- 3 Large popsicle sticks
- Elmer’s glue
- White paint
- Medium pompom
- Clothespin
- White construction paper
- Glue stick
- Pencil
- Scissors
- 2 Small white pompoms
- 1 Mini pink pompom
- Newspaper
- 2 Googly eyes
- Scraps of black and pink construction paper
- Markers
- Easter Bunny Printable Template
Step 1: Glue the frame
- Glue 3 large popsicle sticks into a triangle shape
- Allow the glue to dry completely
- *You may want to make the frames the day before and allow them to dry overnight. Make a bunch so that you can keep crafting!
Step 2: Paint
- Place the frame on the newspaper
- Pinch the medium pompom with the clothespin to form a “paint brush”
- Squeeze a little white paint onto the newspaper and paint the frame
- Let the paint dry
Step 3: Cut and glue
- Place the painted frame on the white construction paper and trace around it with your pencil
- Draw a second triangle just inside the first (about 1/8″ or so)
- Cut out the smaller triangle
- Use the glue stick to adhere the white triangle to the back of the triangle frame
- OR…you can use the printable Easter bunny template for this step and the next step.

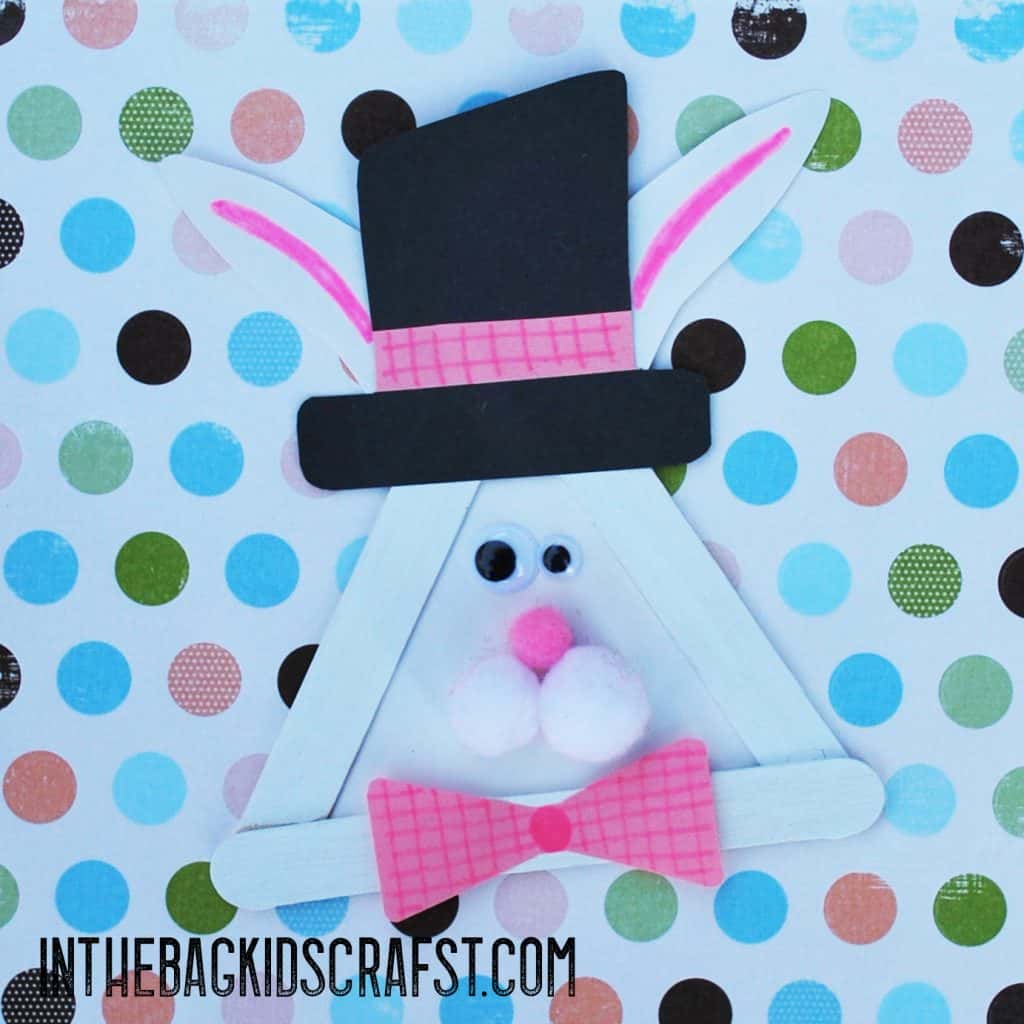
Step 4: Add the details
- Glue the 2 white pompoms onto the bunny’s face, with the mini pink pompom just above them for the nose
- Glue the googly eyes in place
- Cut 2 long ovals (or whatever shape you choose) out of the white construction paper for the bunny’s ears. Use the pink marker to make the center of the ears.
- Place the ears in place using your glue stick.
- Cut out other details from your scraps of paper. I made a hat and bow tie, but you should make your Easter bunny look however you like! It’s yours, and it should be as unique as you are!
CRAFT #4: Easter Egg Art-the Perfect Easter Craft for Preschoolers

SUPPLIES FROM THE BAG
- 3 Large popsicle sticks (per egg)
- White construction paper
- Elmer’s glue
- White paint
- Newspaper
- Medium pompom
- Clothespin
- Pencil
- Scissors
- Glue stick
- Variety of pastel construction paper
- Hole punch (optional)
Step 1: Make the frame
- Glue 3 large popsicle sticks together into a triangle shape
- Allow the Elmer’s to dry completely before moving on
- *You may want to make the frames the night before and allow them to dry. Make several so that you are ready to make lots of crafts!
Step 2: Paint
- Place the frame on the newspaper and squeeze out a little white paint onto the paper too
- Pinch the pompom with the clothespin to form a “paint brush”
- Last, paint the frame white and let it dry
Step 3: Cut and glue
- First, place the triangle on the white construction paper
- Then, trace around the triangle with your pencil
- Inside that triangle, draw a second triangle about 1/8″ inside the border
- Last, cut out the smaller triangle and glue it onto the back of the white triangle frame
- *For little ones who are just learning to cut simple shapes, trace over the triangle to be cut with a sharpie marker so that it is easier to cut
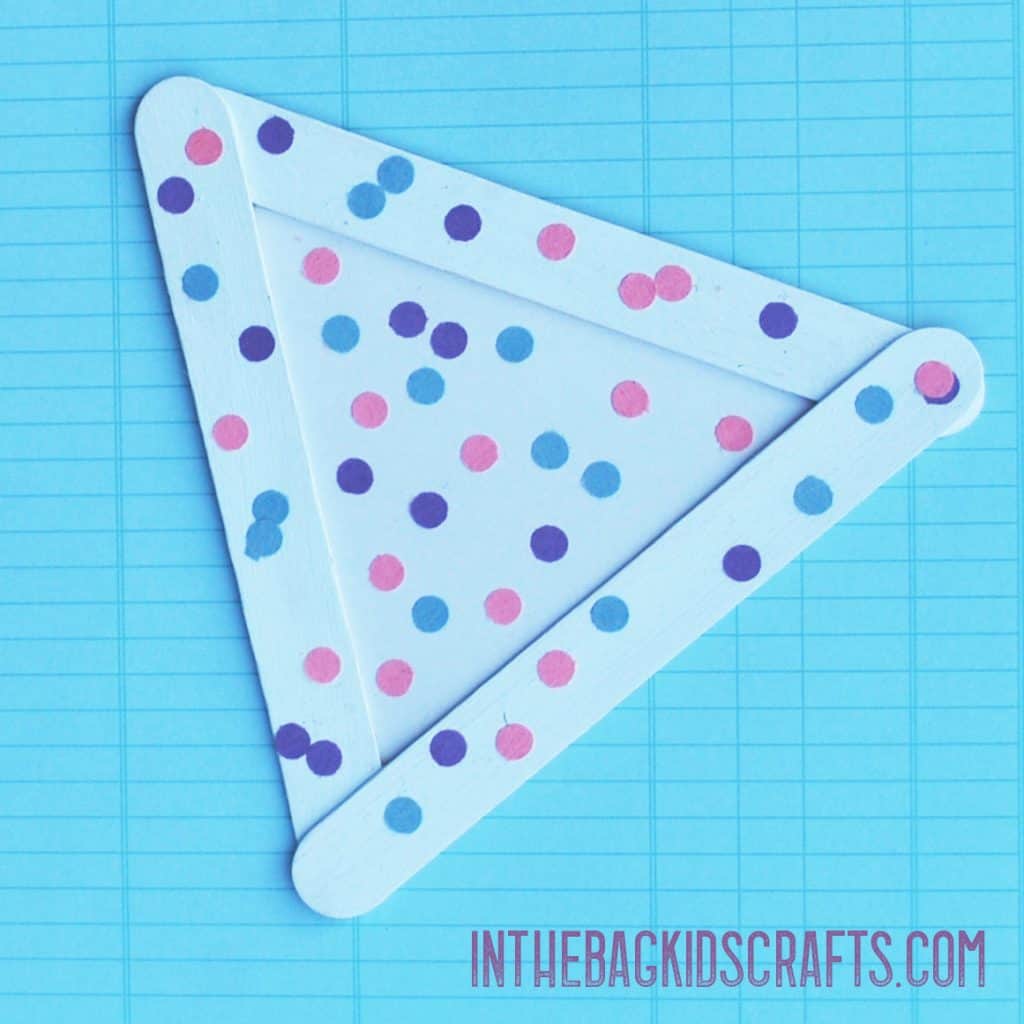
Step 4: Decorate the egg
- From the pastel construction paper, cut out shapes that you want to add to your Easter egg. You can even use the hole punch to make dots like the one pictured below.
- *If you have a little one who has not yet learned cutting skills, let them color the egg with crayons or markers. You can even present them with the egg completed up to this point and just have your kiddo do the decorating.
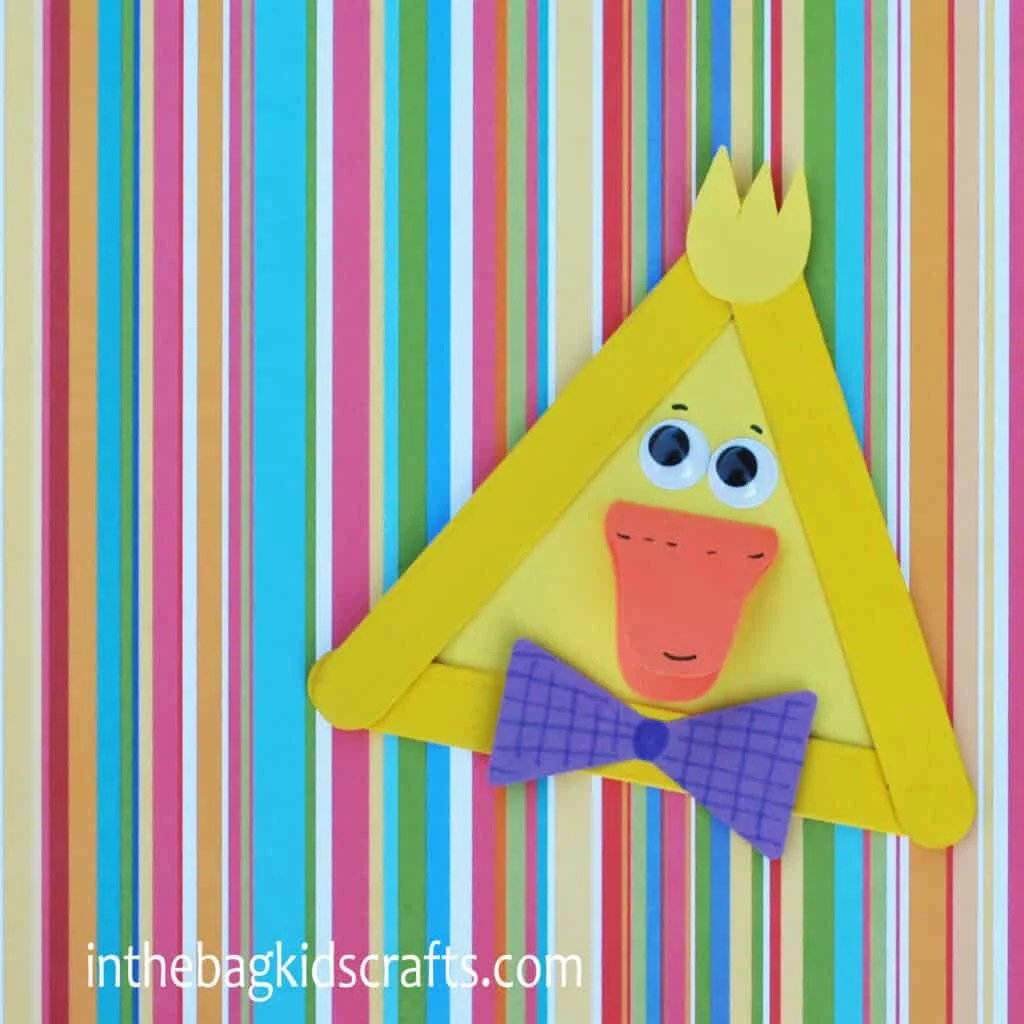
CRAFT #5: Easter Duck Craft
SUPPLIES FROM THE BAG
- 3 Large popsicle sticks
- Elmer’s glue
- Newspaper
- Medium pompom
- Clothespin
- Yellow construction paper
- Glue stick
- Yellow paint
- Scissors
- Pencil
- 2 Googly eyes
- Scraps of yellow, orange and purple (optional) construction paper
- Markers
- Easter Duck Printable Template
Step 1: Glue the frame
- Glue the 3 popsicle sticks together at the ends to form a triangle frame
- Allow the glue to dry thoroughly
- *You may want to complete this step the night before. And make extras so that you are ready for more crafting!
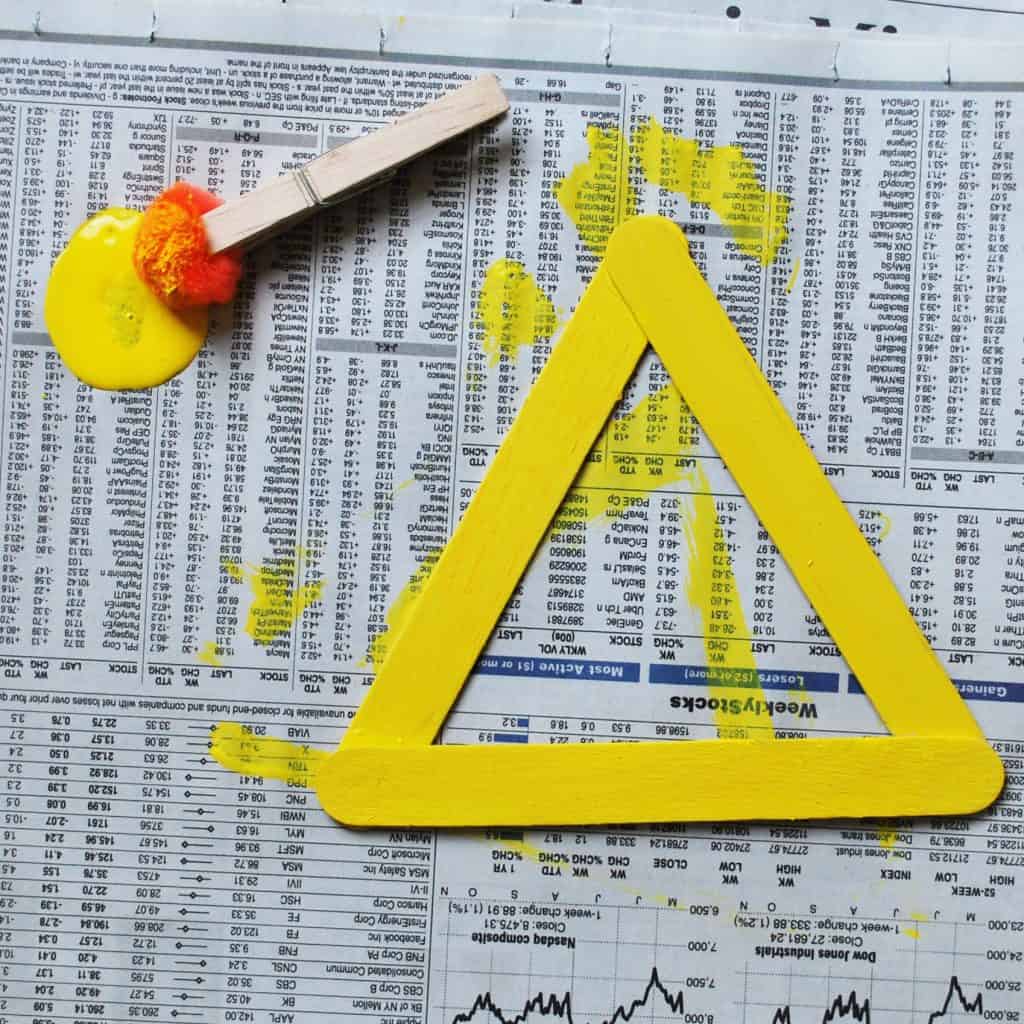
Step 2: Paint
- Place the triangle frame on the newspaper and squeeze a little yellow paint on the newspaper too.
- Pinch the pompom with the clothespin to form a “paint brush”
- Allow the paint to dry
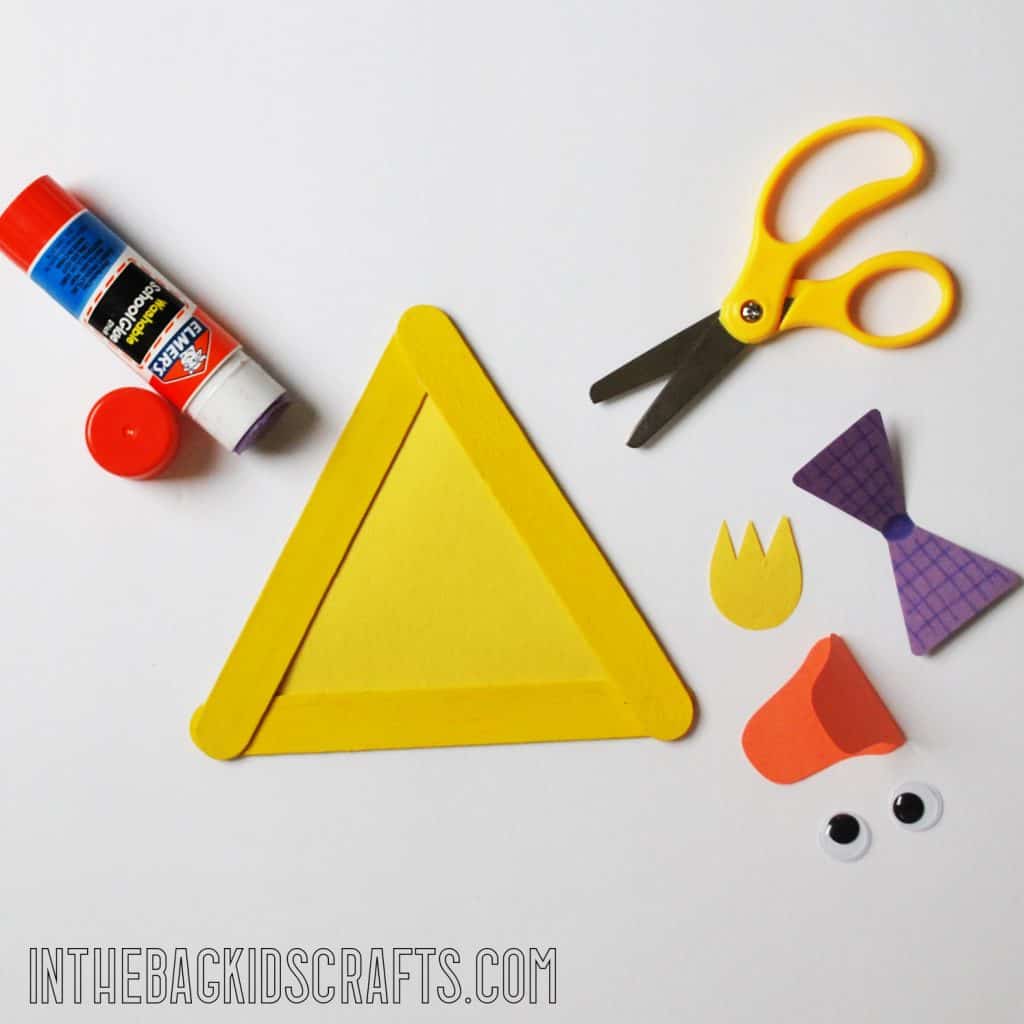
Step 3: Cut and glue
- First, place the painted triangle on the yellow construction paper and trace around the outside.
- Now draw a second triangle inside the one you have drawn, about 1/4″ in
- Last, cut that triangle out and glue it onto the back of the frame.
- *For kids that are just learning to cut simple shapes, go over the pencil mark with a sharpie to make it easier to cut.
- OR…you can use the printable Easter duck template for this step and the next step.

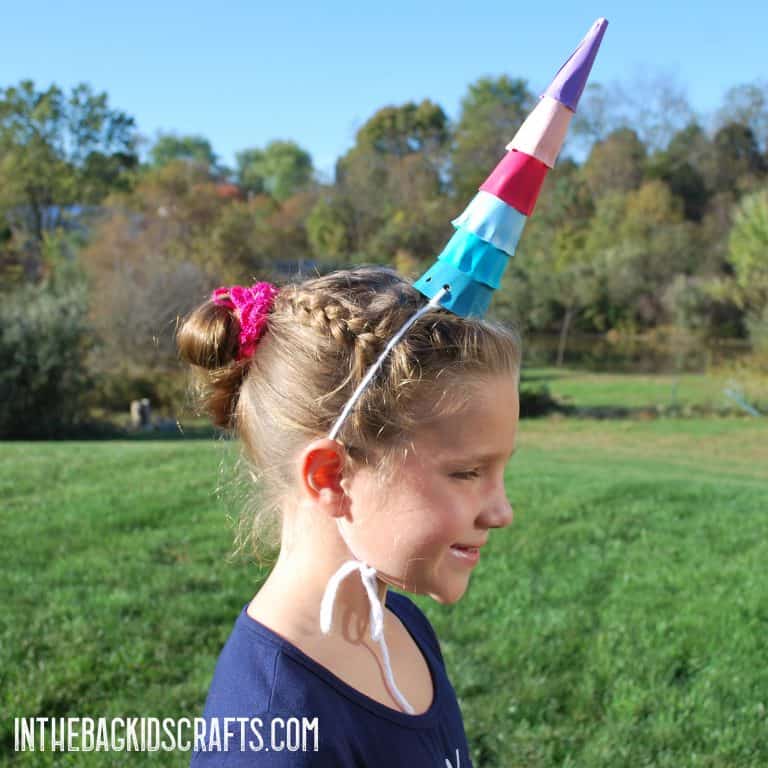
Want to know how to make the cute pencil in the picture? Check out the post HERE.
Step 4: Add the details
- Cut out a couple of details…
- Fold a small piece of orange paper in half and cut out a bill shape so that the mouth opens. Just a ‘U’ shape works fine.
- Cut a half circle about 1/2″ across and a zigzag on top for the little fluff at the top of the duck’s head
- My duck is also wearing a bow tie that is cut from purple paper, but feel free to make your own accessories! Your duck should be as unique as you are! Cut out whatever you want it to wear and use whatever colors you like best.
*These details can be found on the printable template, but feel free to make your own too.
- Glue all of the details that you have made in place using the glue stick and add the eyes too.
- Finally, use your marker to add little details as you like too.
These Easter crafts ideas can be used in so many fun ways. You can include them on your Easter dinner table as decorations. Or you can put magnets on the back and put them on the fridge. They can be used for imagination free play and story telling. Or you can just tape them to the wall for an Easter decoration anywhere in the house. Put two back to back and then hang them in the window or from the ceiling. Just enjoy your easy Easter crafts.
Save these Easter Crafts Ideas for later. Pin to your favorite Pinterest board…