3D Christmas Ornament Card
Next in the 12 DAYS OF CHRISTMAS CARDS SERIES…this fun and simple 3D Christmas Ornament Card. Just pull out your favorite red and green patterned washi tapes, and you are good to go. Or if you prefer, class it up a little and go with a black or white background and pick shiny silver and gold washi tapes. (Have I mentioned that washi tape is one of my very favorite things in the whole world!)
Giving a card, made from the heart and with your own hands, is such a wonderful way to tell someone you are thinking of them this Christmas. In our family, we put cards in the tree (yes, I said IN the tree), and they are the last thing that is opened. My parents, those adorable mushy old people, have always left sentimental cards for each other that they read after all of the presents have been opened. It is a tradition that I have seen since I was a small child and has left such an impression. A card is not just a card...it is LOVE.
SUPPLIES FROM THE BAG
- Black (or green, or white) construction paper
- 1/2 piece white construction paper
- 1/2 piece of red construction paper
- Glue stick
- Elmer’s glue
- Christmas patterned washi tape (2-3 patterns)
- 2 Red pipe cleaners
- Scissors
- Markers
Wondering what to put in your bag so that you can craft along with EVERY…SINGLE…PROJECT…on this blog? Oh, did I mention that every single craft is made from the same master list of supplies. That is intentional. It is meant to make your life easier. I know that, since you are here, you know that crafting with your kids is something that you don’t want to miss out on. But life is hectic, and creating can be messy and time consuming. It is my mission to make it actually do-able.
Step 1
- Fold the black construction paper in half to form the base of the Christmas card
- Take the half piece of white construction paper and glue it, using the glue stick, to the inside of the card to use as the writing surface for your holiday message
- Write your message on the inside
Step 2
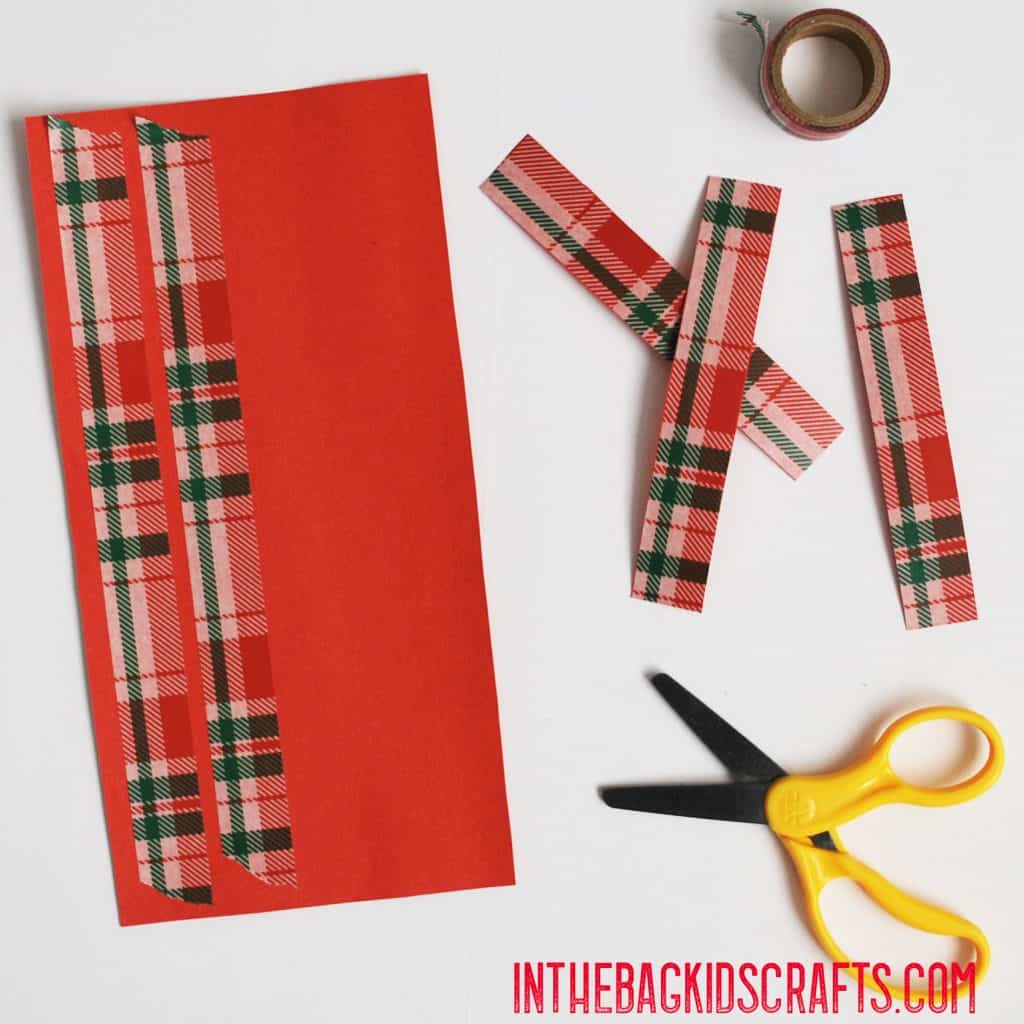
- Tape 2-3 strips of each of the washi tapes onto the red construction paper
- Trim around the tape
- For wider washi tapes, cut down 3 equal pieces to about 5-6 inches long
- For thinner washi taps, cut 4 equal pieces to about 4-5 inches long

Step 3
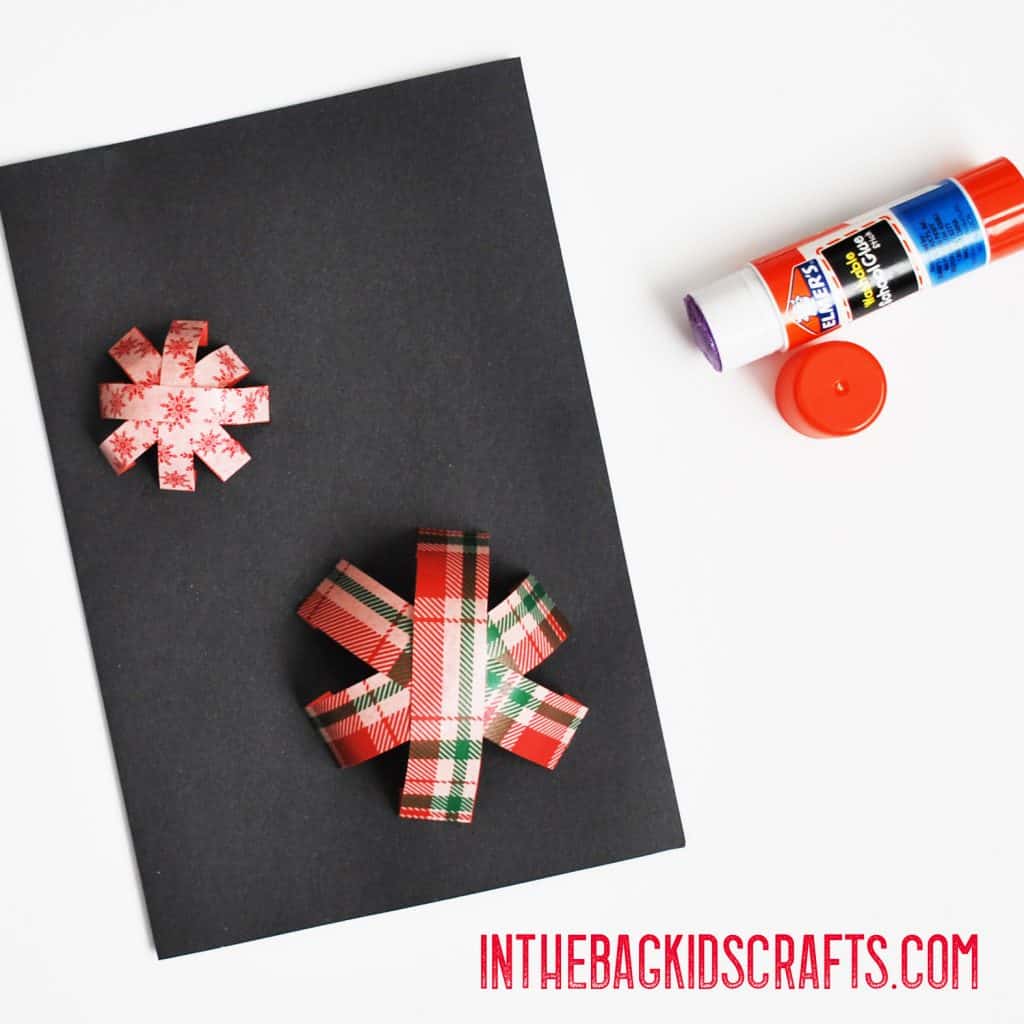
- With the glue stick, glue a set of washi tape strips into a 6 point star (for wider washi tapes) and 8 point star (for thinner washi tapes). Secure at the center with plenty of glue as you place each strip in place.
- Fold a tab onto the end of each piece of washi tape
- Again with the glue stick, glue down the tabs of the washi tape, creating a dome shape for each ornament. Stagger each one on the card. I placed 2 on my card, but if you are using smaller washi tape and cut them shorter, you may fit three. If you put more on your card, you will need extra pipe cleaners.

Step 4
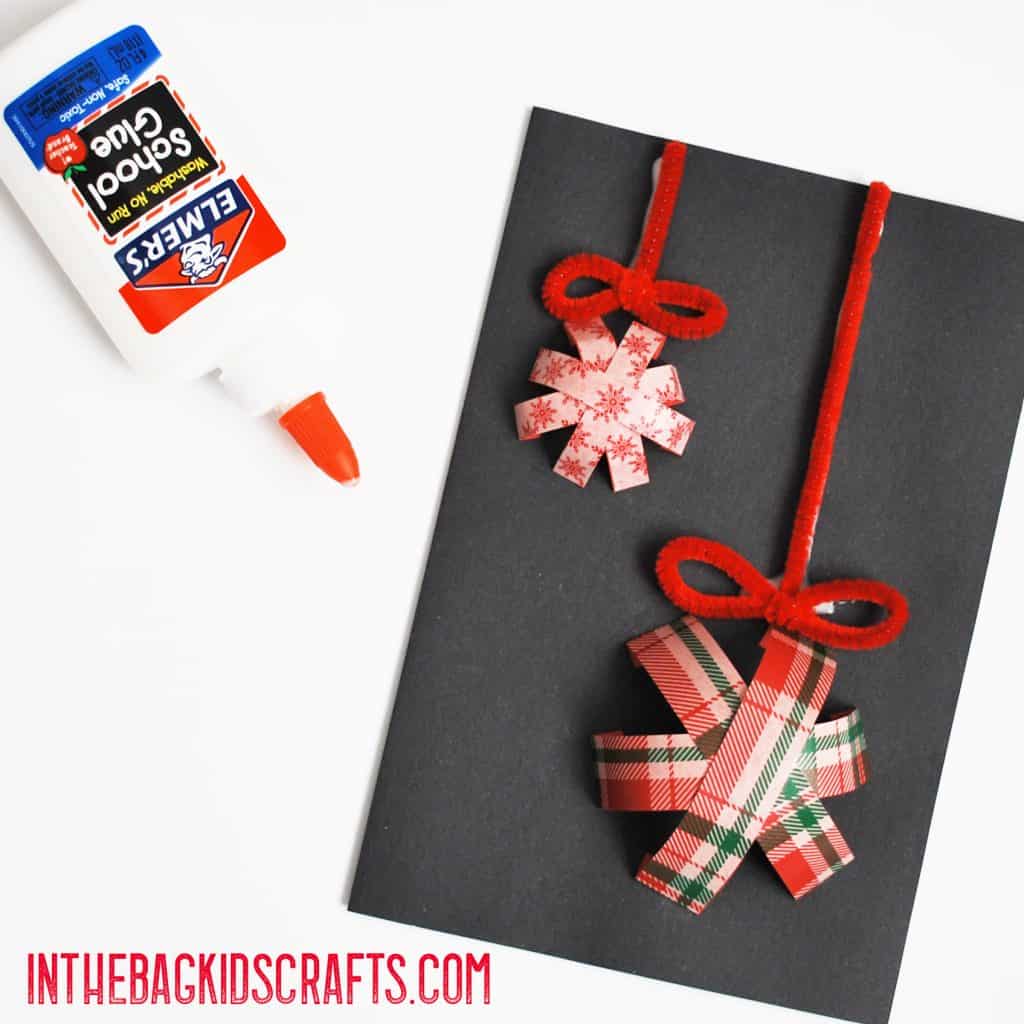
- Take one of the red pipe cleaners and make a small bow shape on one end.
- Trim it to the proper length so that the bow touches the ornament, and the remaining long piece of pipe cleaners goes to the top of the card.
- Secure in place with Elmer’s glue.
- Repeat this process for other ornaments on the card
- Set the card aside to give the glue time to dry

Save this for later…pin it to your favorite Pinterest board!
