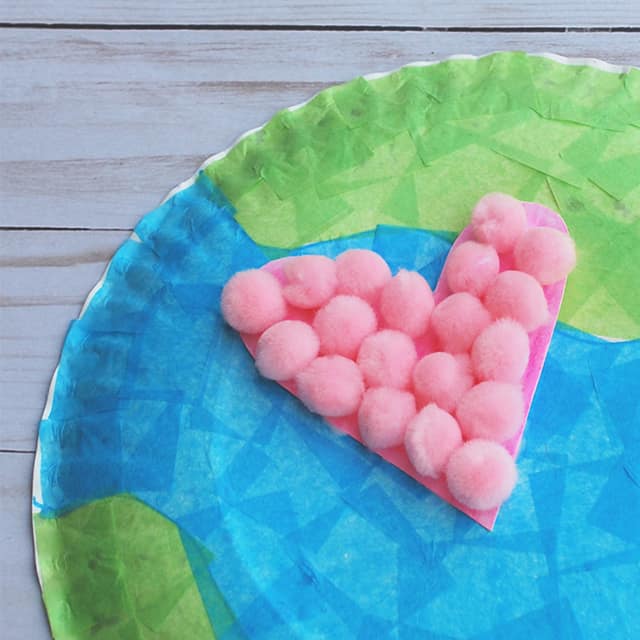
Earth Day Kids’ Craft
Earth Day is coming around again, and it is such a great time to remind children of wonders of our world and our responsibility to take care of it. The Earth Day kids’ craft today is not all that new in concept, but we are making it with a twist. We will only use things that are already in our craft supply bag, filled with the items from the master list that EVERY project on this site uses.
As you will see, every craft here at “In the Bag Kids’ Crafts” is simple (actually doable for kids’ little hands to make). And using the approach of sticking to the master list makes it super simple to spend time with your family creating. Just fill up your bag, and you are ready to go at a moment’s notice. Now crafting is something to be cherished and enjoyed rather than one more thing on the to-do list that you never actually get around to doing (been there!). Happy to help! Learn more and find out what to put in your bag HERE.
SUPPLIES FROM THE BAG
- 2 Paper plates (9-inch coated)
- Tissue paper squares (green and blue)
- Pink (or red) and blue markers
- Glue stick
- Scissors
- Elmer’s glue
- Mini pink (or red) pompoms
Encourage your kid all along the way, no matter what their craft looks like. It is important to encourage them to keep trying so that they can build skills!
Step 1: Make a Puffy Heart
- Draw and cut a heart shape out of the middle of the other paper plate (since this is sturdier than just a piece of paper)
- Color it with your pink marker on the rough side of the plate (bottom)
- Then cover it with mini pink pompoms using the Elmer’s glue
- *the last 2 steps can also be completed using another color, such as red (or your child’s favorite color)
- Set it aside to allow the glue to dry

Step 2: Make the Earth
- Using the blue marker, draw shapes on the bottom of a plate to mimic land masses of the earth. This is just symbolic and does not need to be an actual map of the world.
- Then, glue green tissue paper squares onto the land masses and blue into the water areas of the earth. Use your glue stick for this for best results.
- Last, smooth things out if you want by going back and gluing down tissue paper pieces sticking up.


This repetitive action of pinching the tissue paper pieces and putting them in place is a great way to work on fine motor skills. With the proper set up, this is also an excellent way to work on crossing midline. What is that, you ask? Crossing midline is when one side of the body moves into the space of the other side. Imagine an invisible vertical line that divides the body in two halves. This is a foundational skill for so many other skills, such as writing, ready and playing ball. To set it up for promoting crossing midline, place the tissue paper pieces on the opposite side of your child’s preferred hand (or dominant hand if that is established). Then keep encourage your kiddo to reach across the body to pick up each piece.
Step 3: Put it Together
- Once the glue has dried, glue the heart onto your finished Earth.
- Optional: cut a pipe cleaner in half and make a loop. Then glue or tape it onto the back to make a hanger for your art.

Step 4 (Optional)
- Add a poem that you write for Earth Day. Just write it or type it out, cut out the paper and glue it to your Earth. It could be something like this one…
Treat the world well.
It was not given to you
By your parents.
It was loaned to you
By your children.
      -Kenyan Proverb
Save this for later! Pin it to your favorite Pinterest board…

