Easy Watermelon Slice Craft for Kids
Looking for an easy watermelon slice craft for kids? This colorful summer activity is a fun way for preschoolers, kindergarteners, and elementary-aged kids to get creative using simple supplies. Whether you’re planning a summer theme, fruit lesson, or rainy-day craft, this watermelon slice craft is easy to personalize and fun to make.
One of the best things about this easy watermelon craft is that younger kids can keep it simple while older children can add extra details and decorations. That flexibility makes it a great fit for classrooms, homeschool activities, and summer crafting fun.
More Watermelon Craft Fun
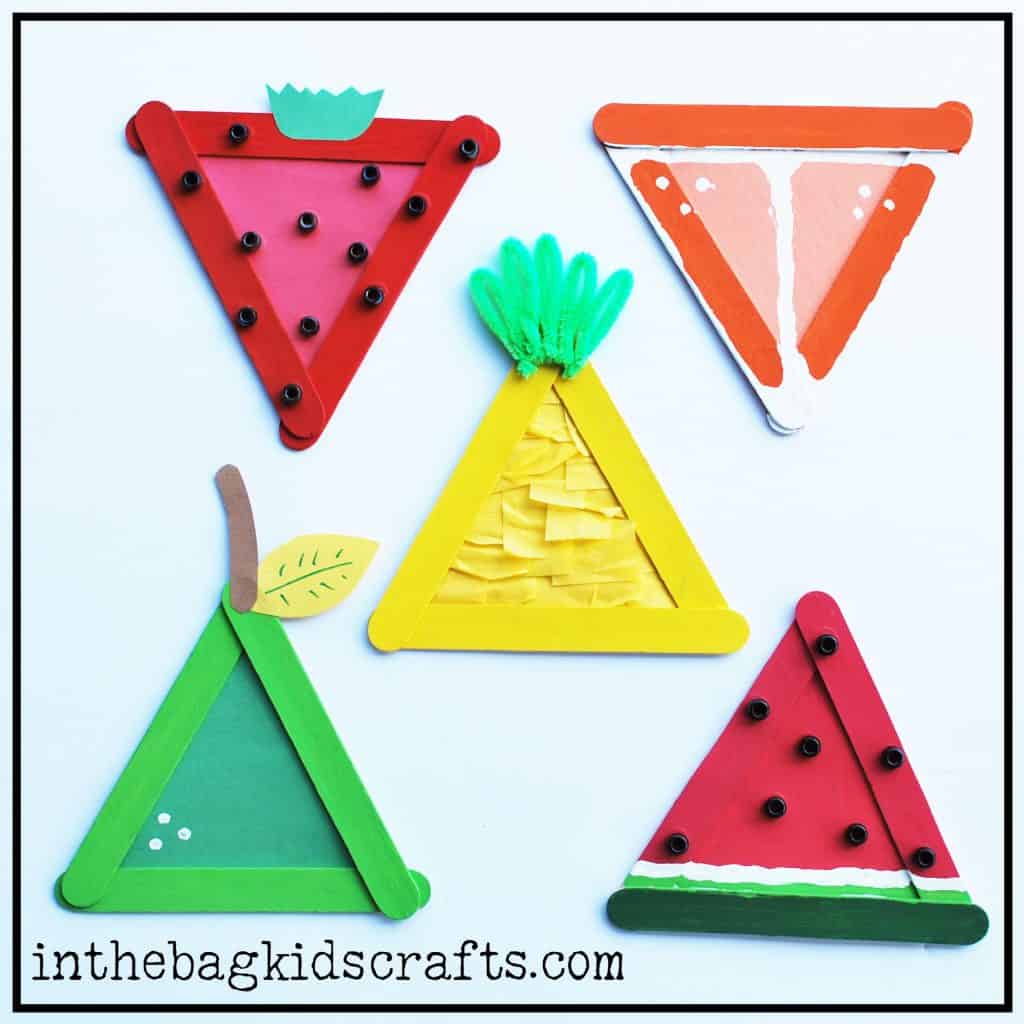
Also, find the rest of the fruit basket collection that we have made so far here: STRAWBERRY, PEAR, PINEAPPLE. Frame them for a great piece of artwork in your kitchen or put magnets on the back to put on the fridge!
Skills This Watermelon Slice Craft Builds
This watermelon slice craft is more than just a fun summer activity—it also helps kids practice important developmental skills while creating something colorful and creative.
- Fine Motor Skills
- Hand-Eye Coordination
- Creativity & Self-Expression
- Following Directions
- Color Recognition
Best Ages for This Watermelon Slice Craft
Preschoolers
This watermelon slice craft works especially well for preschoolers because of its simple shapes and easy assembly. Younger children may need help with cutting but can easily glue and decorate independently.
Kindergarteners
Kindergarten-aged kids can complete much of the craft on their own while practicing scissor skills, creativity, and following directions.
Elementary Kids
Older kids often enjoy adding extra creative details like faces, glitter, patterns, or personalized decorations to make their watermelon slice unique.
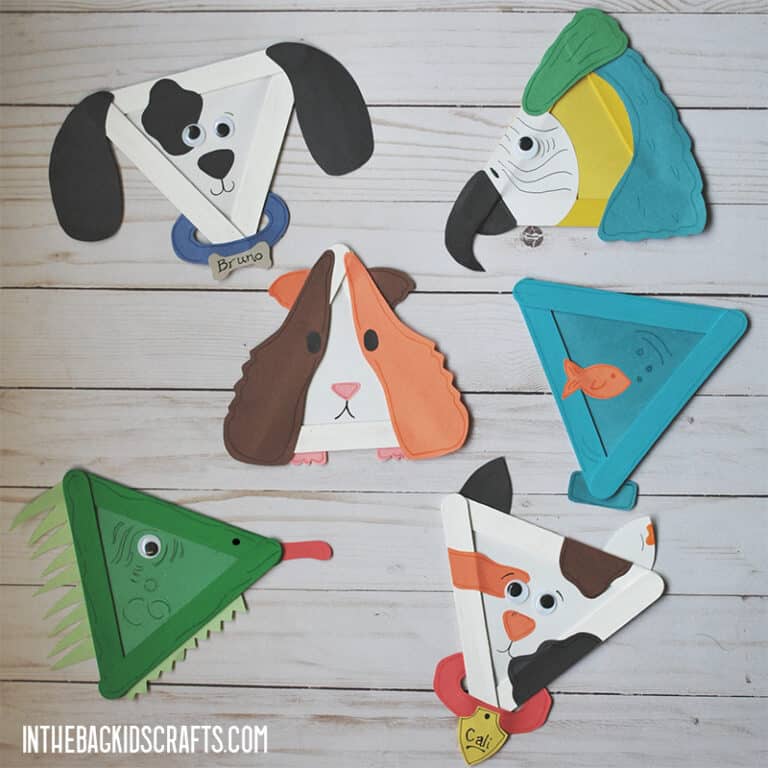
Get this simple triangle shaped craft, along with all of our fan favorites!
Summer Books to Pair With This Watermelon Craft


SUPPLIES FROM THE BAG
- 2 Paper plates
- Hot pink, dark green, light green and white paint
- 3 Large popsicle sticks
- Elmers glue
- Scissors
- Pencil
- Glue stick
- Black pony beads
- 2 Medum pompoms
- 2 Clothespins
- Q-tips
We’re so glad to have you here at In the Bag Kids’ Crafts! Our mission is to help you make crafting with your kiddo a habit using fun, easy ideas with supplies you already have on hand.
Be sure to visit the “Fill Your Bag” page for our go-to supply list—we use it for every project to keep crafting simple, affordable, and mess-free. No extra store runs, no missing pieces—just grab your bag and start creating!
Want to make it even easier? Check out our quick shopping list on Amazon and Walmart to stock up on everything we love.
And if you use our printables, don’t miss our Favorite Printing Essentials. We’ve found a reliable, no-hassle printer that won’t leave you dealing with constant issues or dried-out ink—plus all the extras you need so you can print and craft without the frustration.
All activities require adult supervision. By using this site, you are agreeing to our terms of use. This post may contain affiliate links. If you choose to purchase through these links, I may earn a small commission at no additional cost to you. These commissions help support our site and allow us to continue creating free craft ideas and resources. I only share products I personally use or genuinely recommend. Click here to read my full disclosure policy.
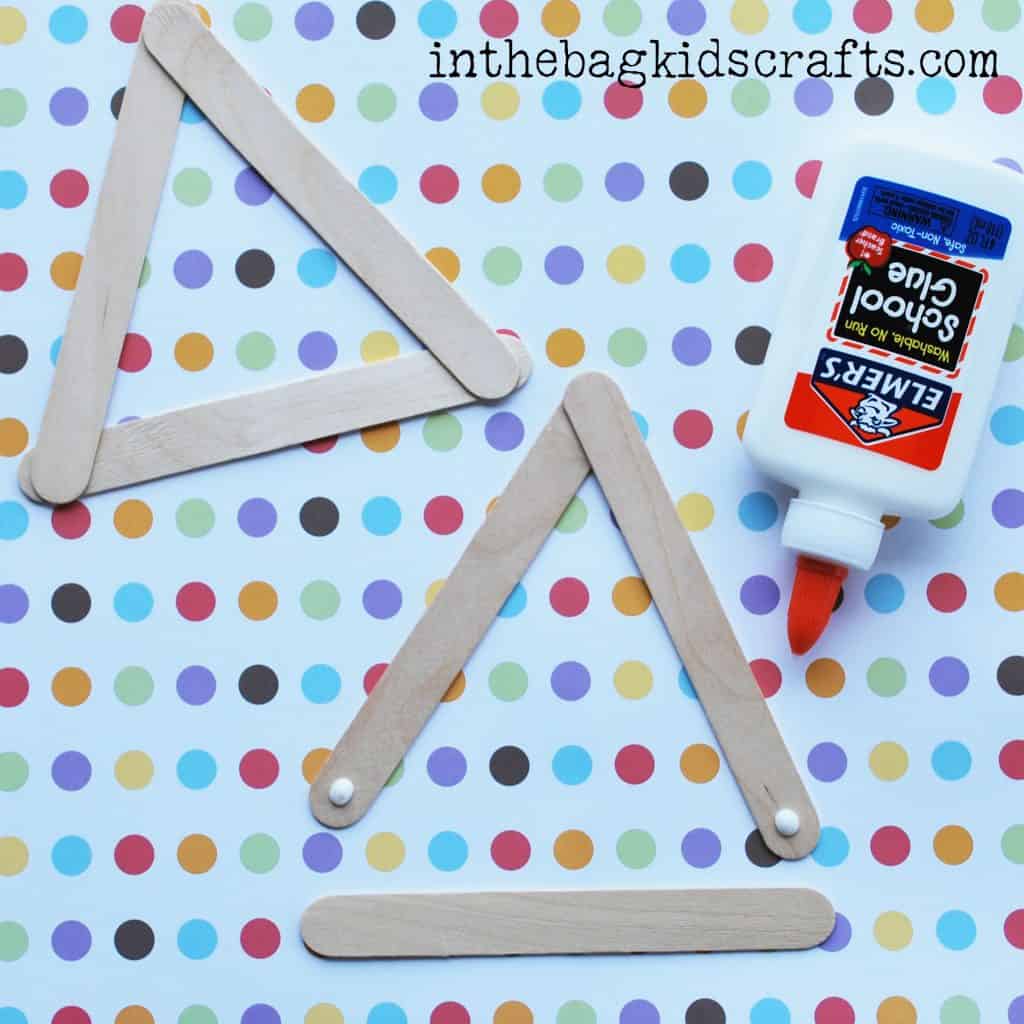
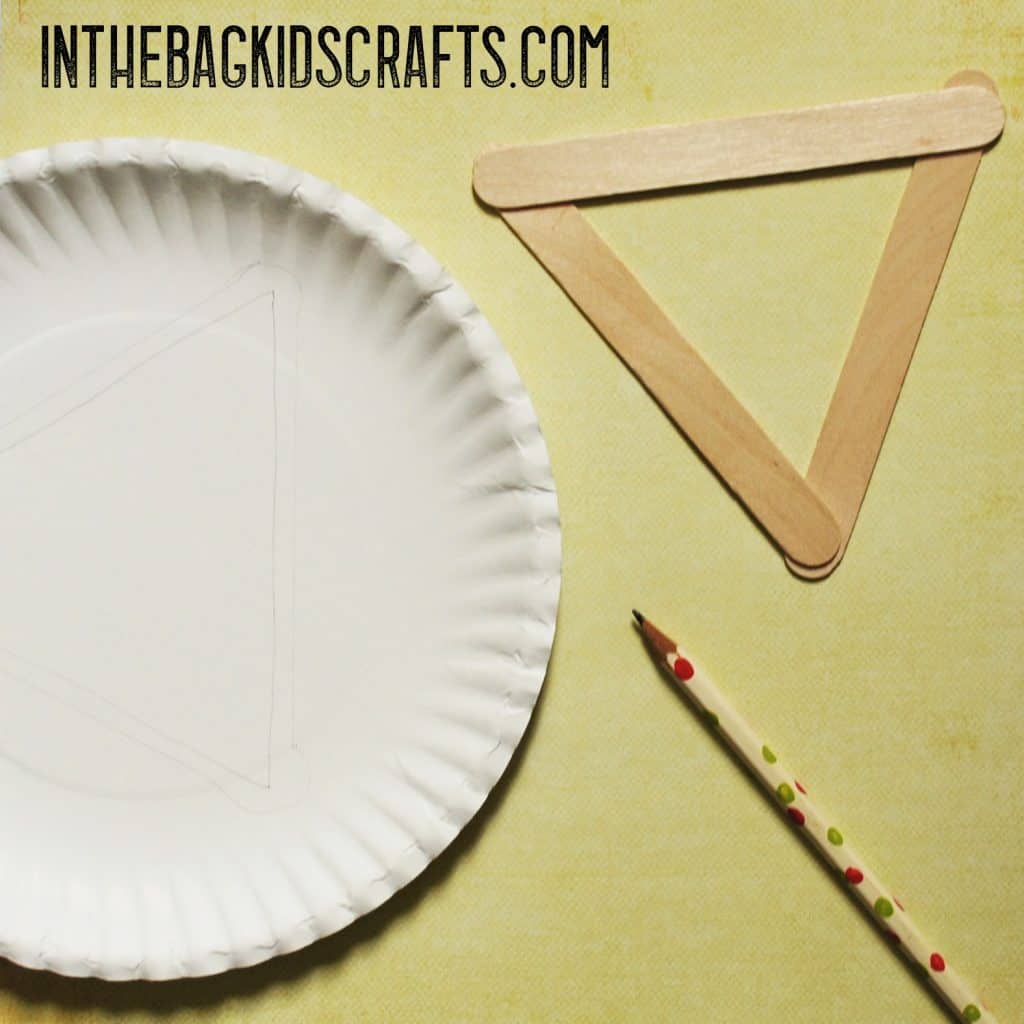
Step 1
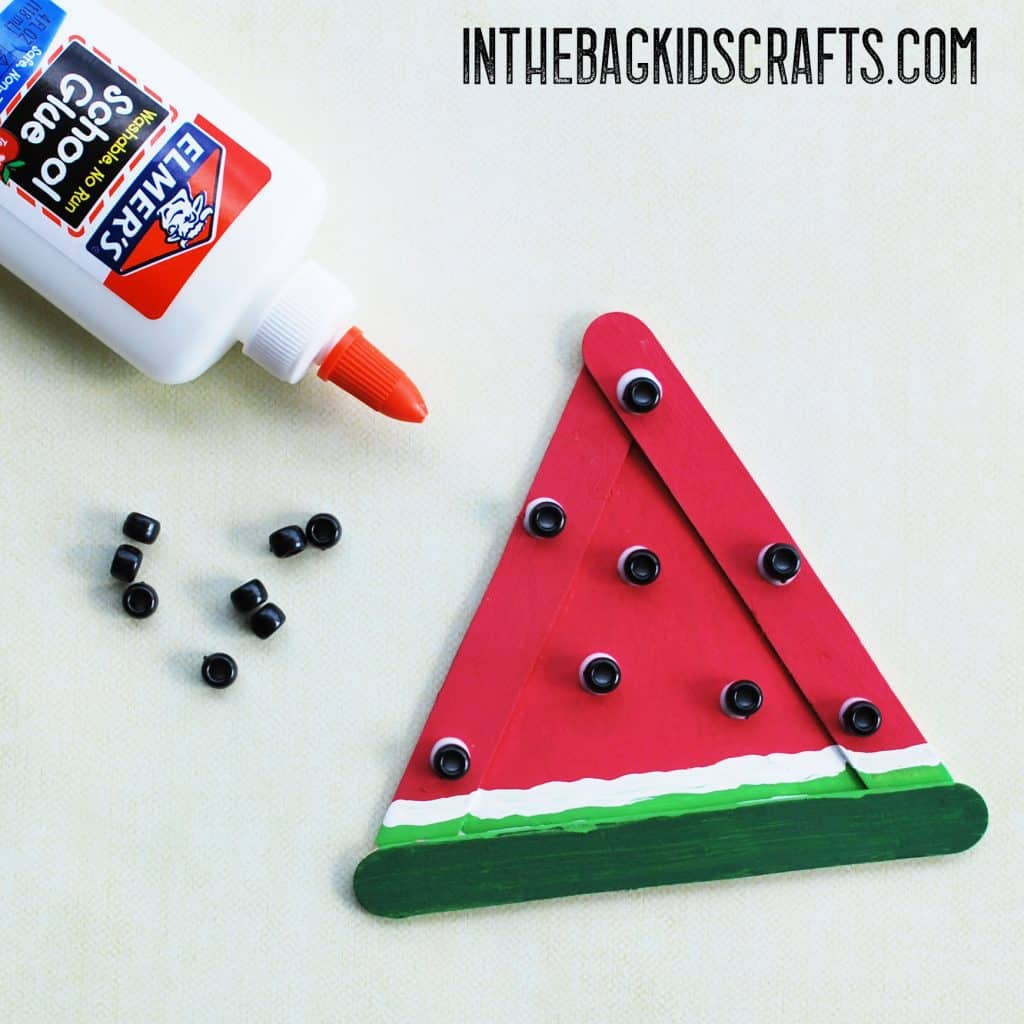
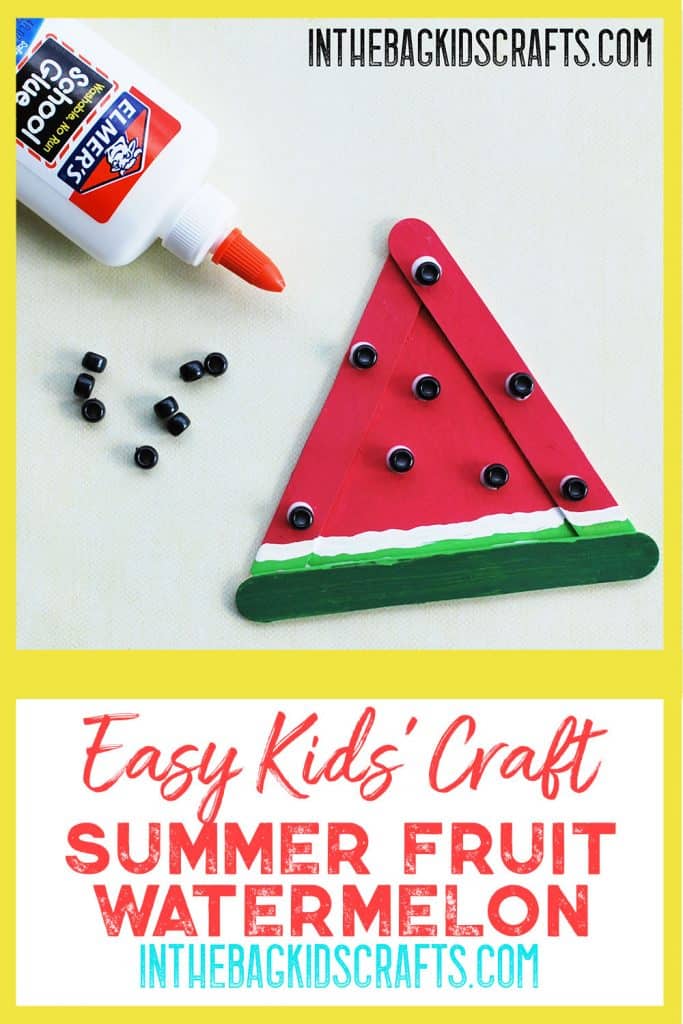
- Glue together 3 large popsicle sticks using Elmers glue, forming a triangle
- Let the glue dry thoroughly
- While you are at it, make several…like 5 at least…so that you are ready to make other projects too. Just keep them in your bag.
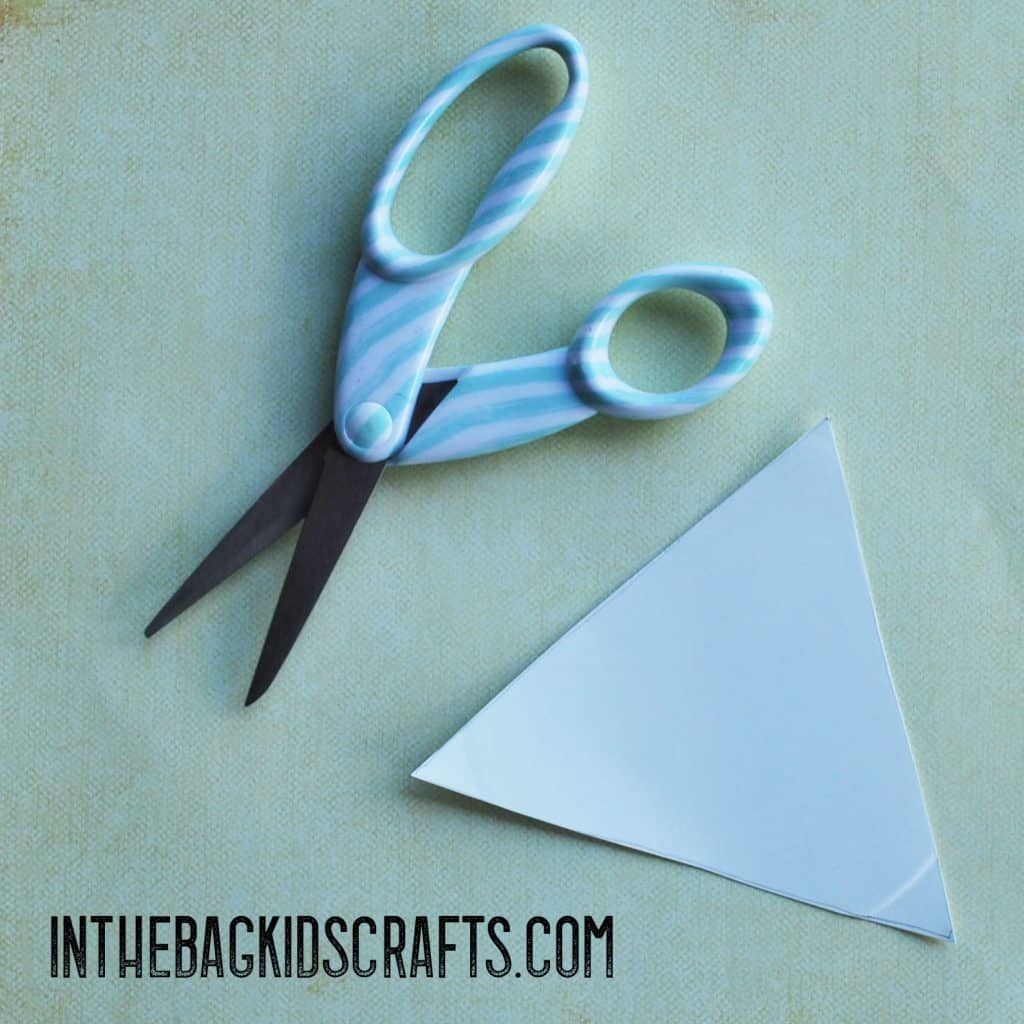
Step 2
- Trace the triangle frame onto the center of a paper plate
- Draw another triangle just inside that triangle, approximately 1/4 inch inside the original
- Cut out the triangle
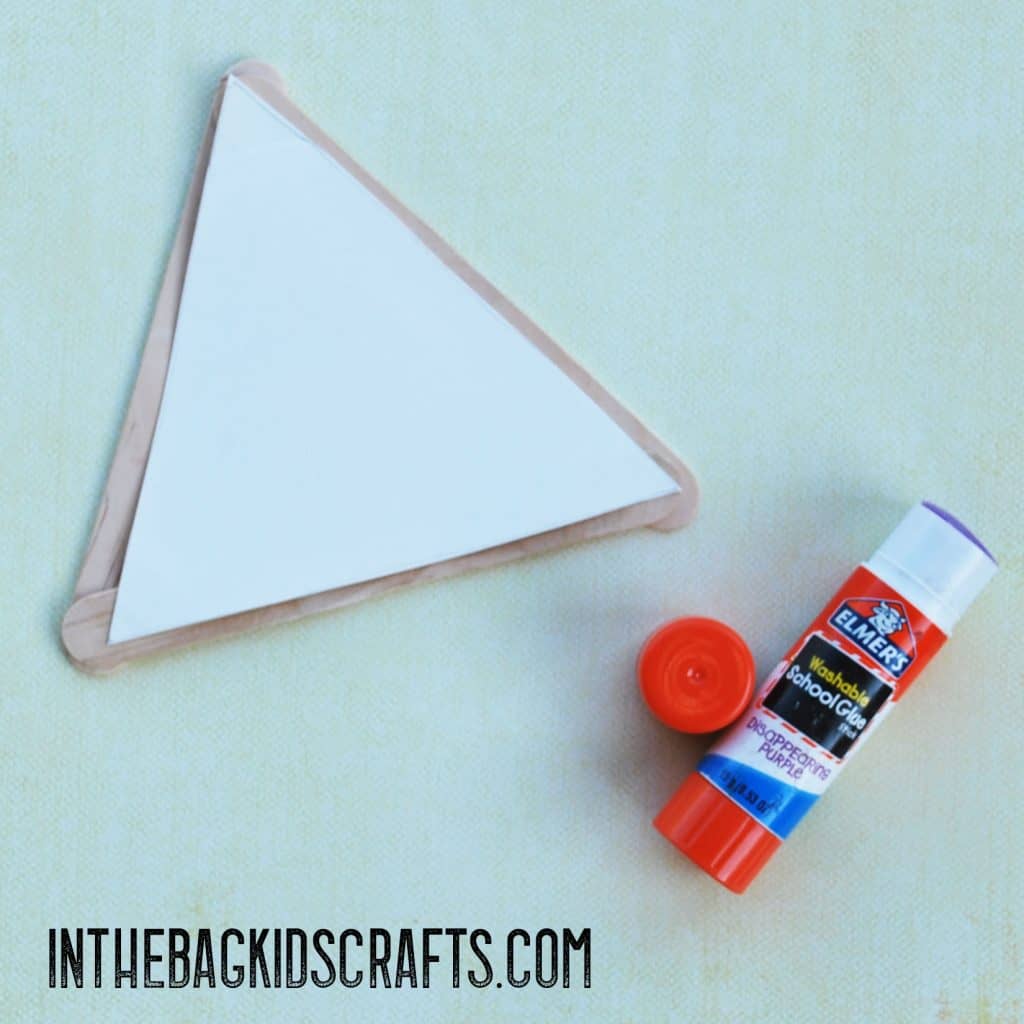
Step 3
- Glue the triangle to the back of the popsicle stick frame using the glue stick
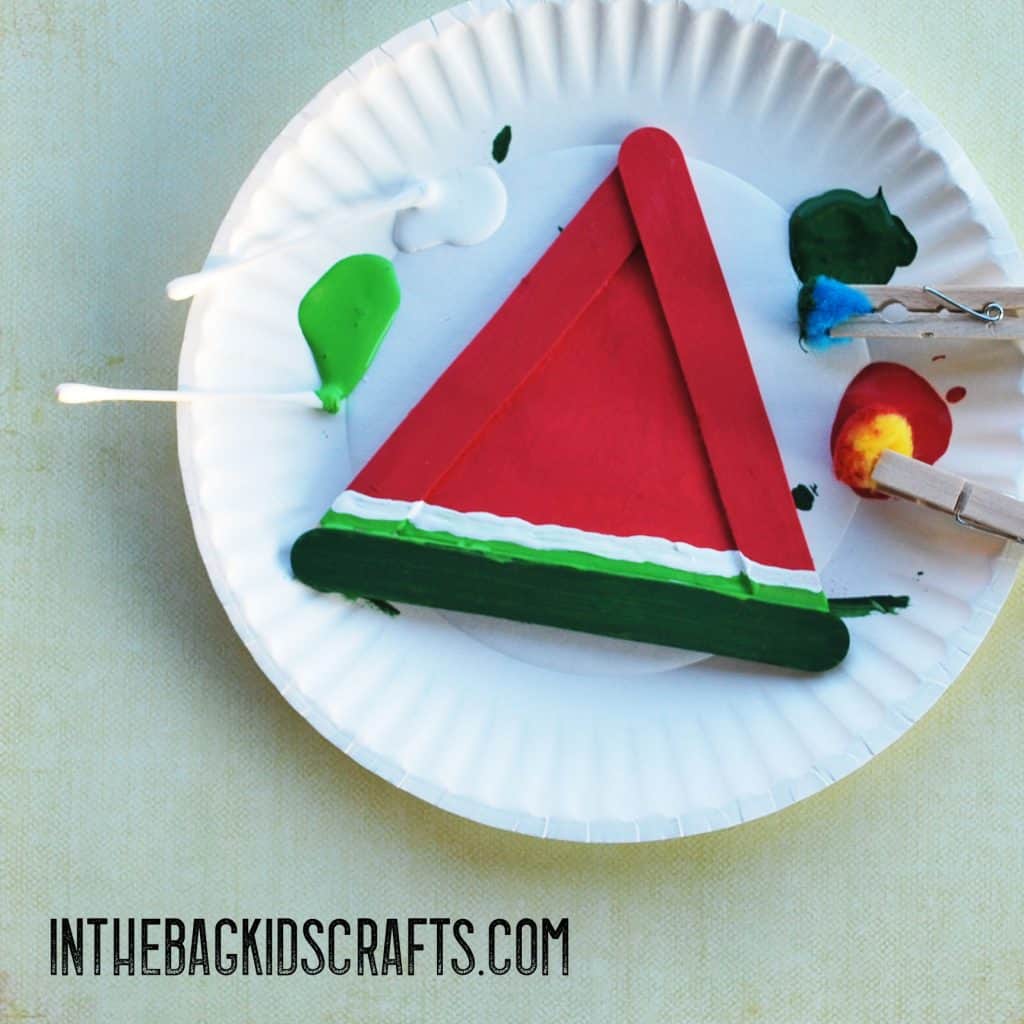
Step 4
- Place the project on the other paper plate
- Pinch each pompom with the clothespins to form a “paint brushes”
- Squeeze some of the dark green and pink paint on the plate
- Start to paint the watermelon slice
- Use the q-tip to paint on the white and light green stripes
- Allow the paint to dry
Step 5
- Glue black pony beads on with the Elmers glue in a random pattern to form the seeds
- Allow the glue to dry completely
If you enjoyed this craft, save it to your favorite Pinterest board!
When you make this craft, share it with the community! You can reach me at hello@inthebagkidscrafts.com any time. I would love to see what you make and include you in our gallery, with credit given of course!
Classroom Uses for This Watermelon Craft
Summer Theme Activities
This watermelon slice craft makes a perfect addition to summer classroom themes, camps, or seasonal learning activities.
Fruit & Healthy Eating Lessons
Use the craft to spark conversations about fruits, healthy eating, seeds, and where food comes from.
Preschool & Kindergarten Art Centers
The simple setup makes this a great low-prep craft for classroom stations and independent activities.
Letter W Week
Pair this watermelon craft with lessons about the letter W and beginning sounds for extra literacy practice.
Rainy Day Indoor Activity
Looking for easy summer fun indoors? This colorful craft works great for quiet time or creative afternoons.
FAQ about this Preschool Watermelon Craft???
Yes! Younger children can participate with help from an adult. Pre-cutting the pieces makes the activity easier for little hands.
Construction paper works great, but cardstock makes the finished craft sturdier and easier to display.
Definitely. Set out craft supplies and let kids decorate their watermelon slices in unique ways for a fun group project.
Yes! Because of the simple shapes and easy steps, this craft works especially well for preschool and kindergarten-aged children.