Scissor Activity: Fingerprint Bugs in the Grass
As a school based pediatric occupational therapist, my job is to help students achieve their educational goals. Often my focus is improving handwriting. For preschoolers, it is getting them using their hands to explore their world and use classroom tools. For kiddos to be success, they need to have a solid foundation of fine motor and visual motor skills. This craft is not only fun to make but it promotes so many valuable skills in the process. Primarily, it is a great scissor activity.
When making the fingerprint bugs, a kiddo needs to isolate his/her index finger and use the appropriate amount of pressure to make a print. They need to place dots close together, tapping into the skill of spatial awareness, to make an ant or caterpillar. Then they get to fold and cut, coordinating their hands together with efficiency. This is a lot to ask of some kiddos, so stick around to the end, and I will give you some strategies for students who have not mastered all of these skills and may need some modifications to continue to progress but also feel that they are being successful.
If you like this scissor activity craft, you’re also going to love this Top 5 Tips for Cutting with Scissors (from an OT), Fine Motor Tiger Craft, and this Fine Motor Bumble Bee Craft.
As usual, remember that it is important to let a kiddo try and even fail, giving only as much help as is absolutely needed. If we as adults just take over and do it when things get a little challenging, we are only teaching kids that we can do it better. So, why should they even try? Find that balance between encouraging independence and working through a challenging task, while helping them to be successful. And without further ado…Fingerprint bugs in the grass…
SUPPLIES FROM THE BAG
*See the “Fill Your Bag” page for details
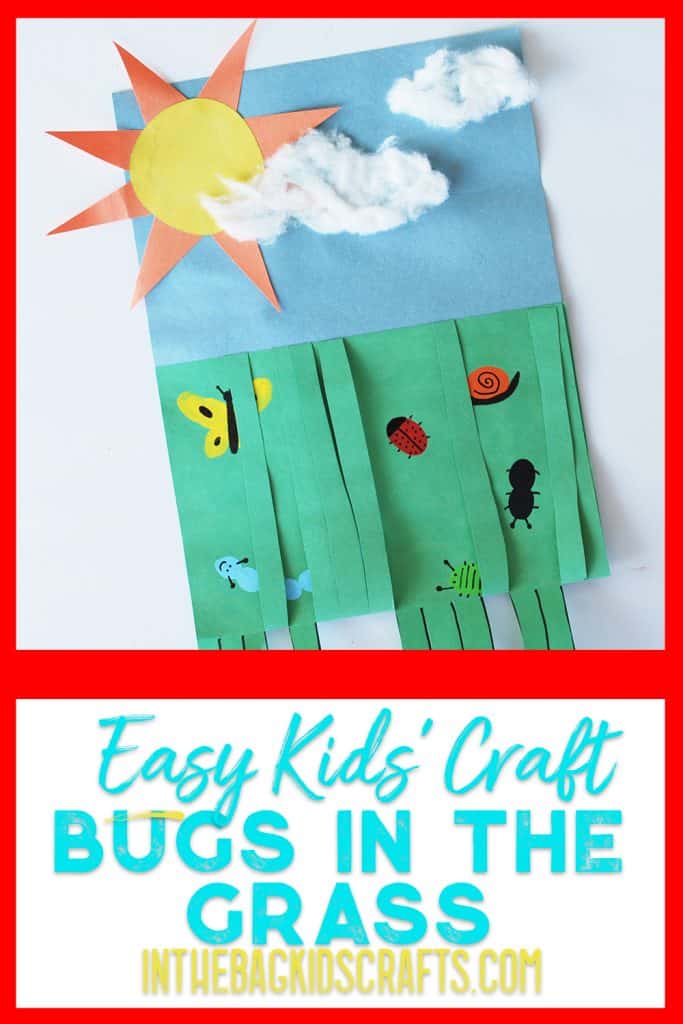
- One sheet of light blue construction paper
- One sheet of green construction paper
- Assorted paints
- Black sharpie marker
- Scissors
- Scraps of yellow and orange construction paper
- Elmer’s glue
- Glue stick
- Cotton balls
- Paper plate
This post may contain affiliate links. If you choose to purchase through these links, I may earn a small commission at no additional cost to you. These commissions help support our site and allow us to continue creating free craft ideas and resources. I only share products I personally use or genuinely recommend.
We’re so glad to have you here at In the Bag Kids’ Crafts! Our mission is to help you make crafting with your kiddo a habit using fun, easy ideas with supplies you already have on hand.
Be sure to visit the “Fill Your Bag” page for our go-to supply list—we use it for every project to keep crafting simple, affordable, and mess-free. No extra store runs, no missing pieces—just grab your bag and start creating!
Want to make it even easier? Check out our quick shopping list on Amazon and Walmart to stock up on everything we love.
And if you use our printables, don’t miss our Favorite Printing Essentials list. We’ve found a reliable, no-hassle printer that won’t leave you dealing with constant issues or dried-out ink—plus all the extras you need so you can print and craft without the frustration.
INSTRUCTIONS
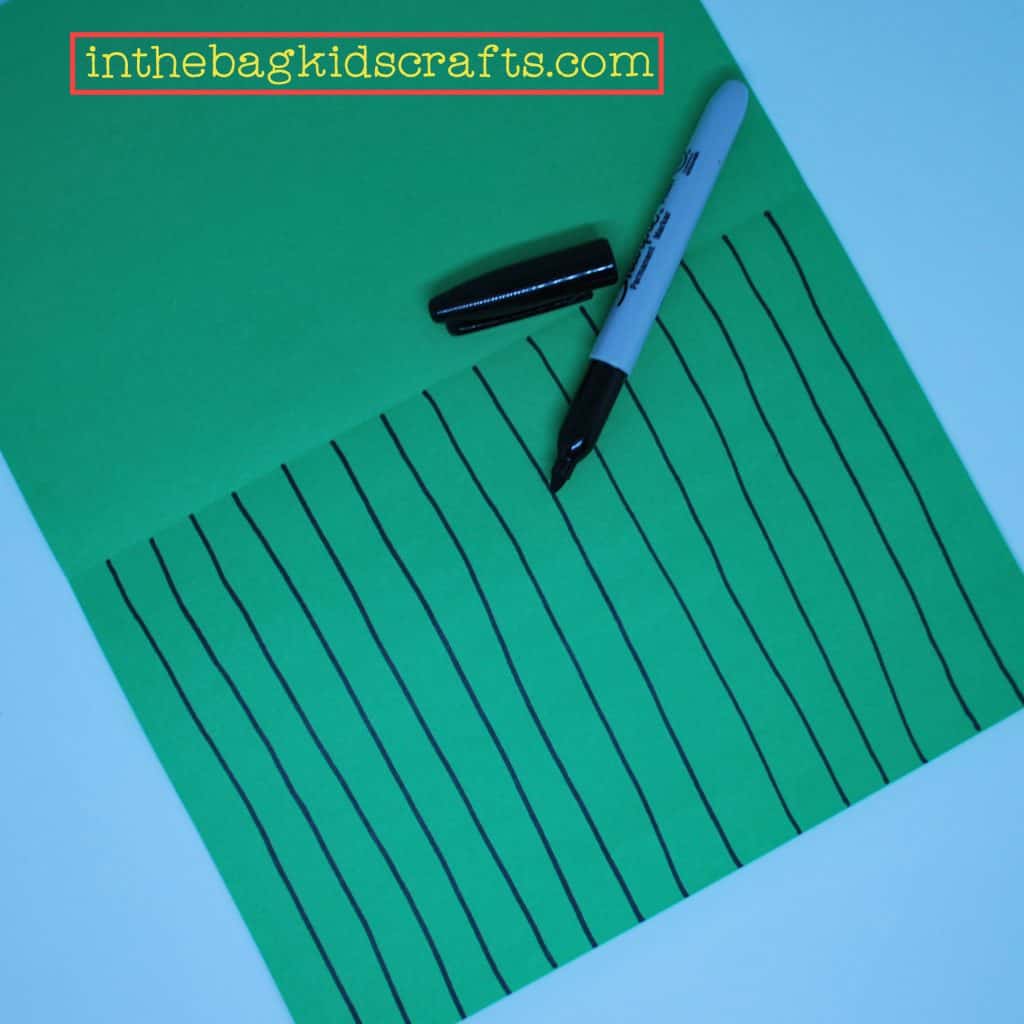
Step 1
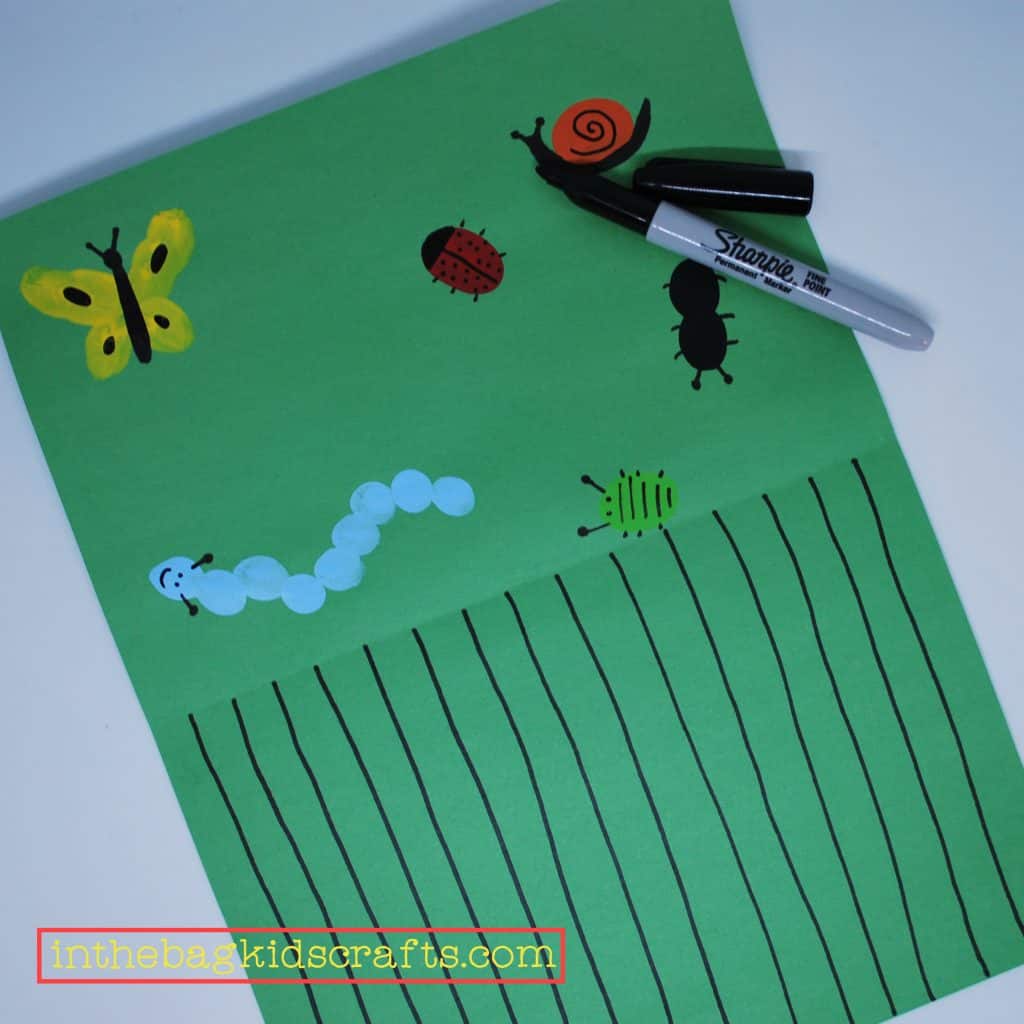
- Fold the piece of green construction paper in half
- Draw lines (using the black sharpie marker) on vertically on the bottom half of the paper, approximately 1 inch apart
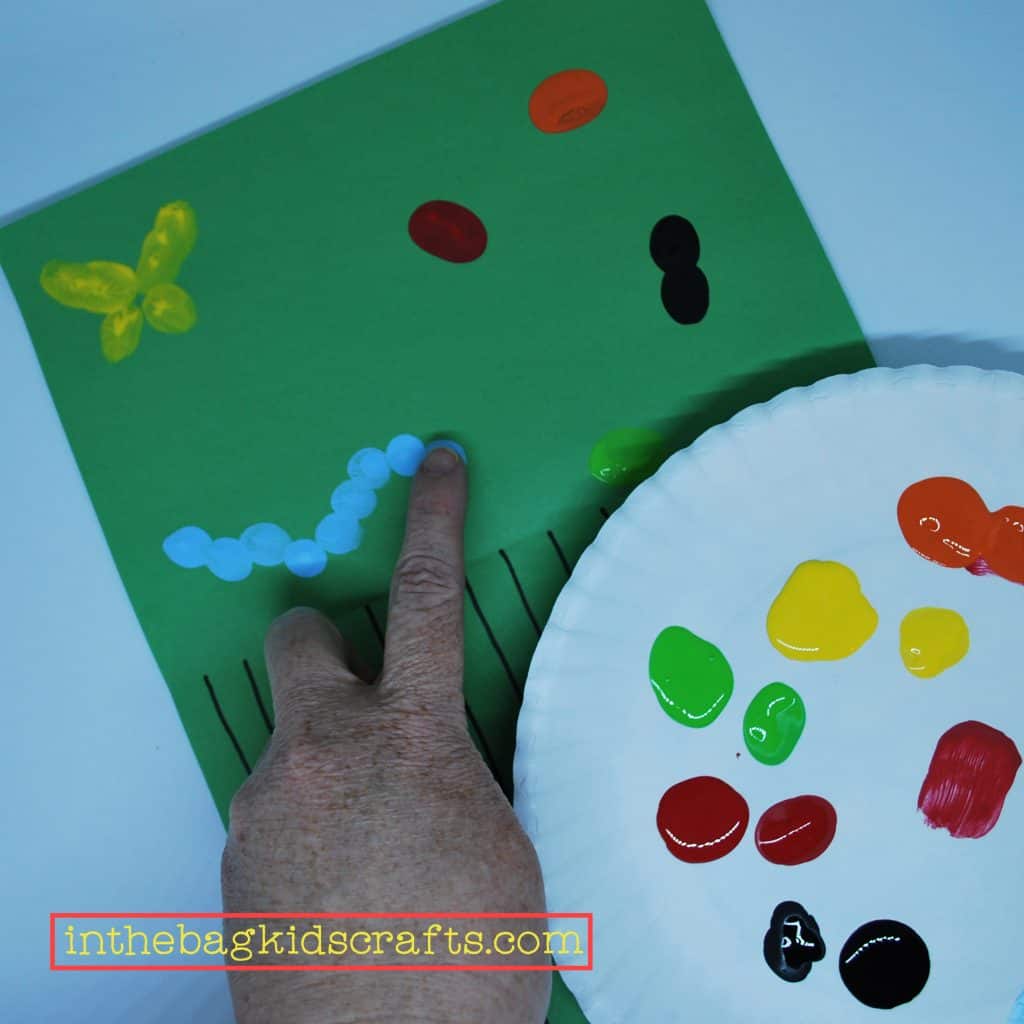
Step 2
- Squeeze little bits of paint onto the paper plate in desired colors
- Use the pads of your fingers and thumb to make insect shapes. Don’t use too much paint.
- Allow to dry
Step 3
- After the paint has dried, use the black sharpie to add details to the insects.
Step 4
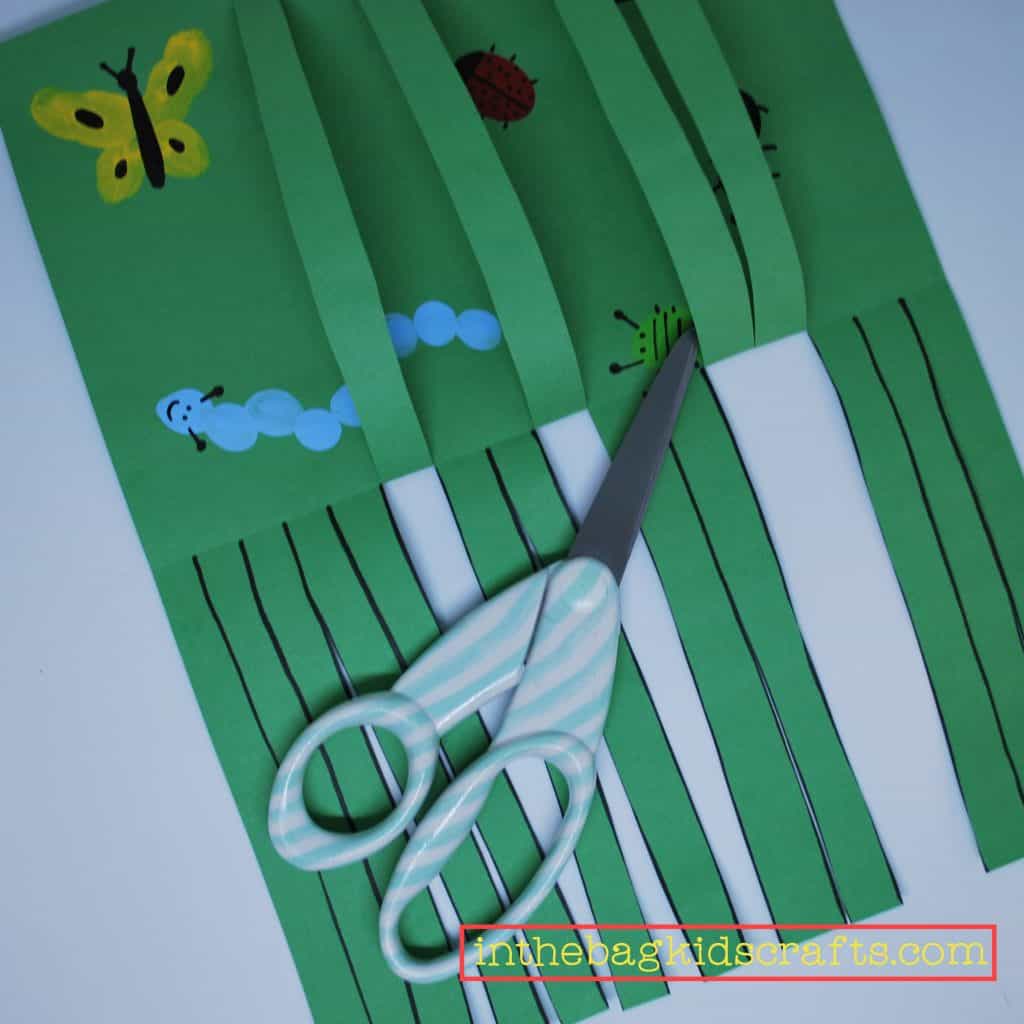
- Cut the blades of grass. What a great scissor activity! For kiddos that have not yet mastered using scissors, complete cutting using self-opening scissors and give as much hand over hand assistance as needed.
- Refold the paper in half so that the bugs hide behind the grass.
Step 5
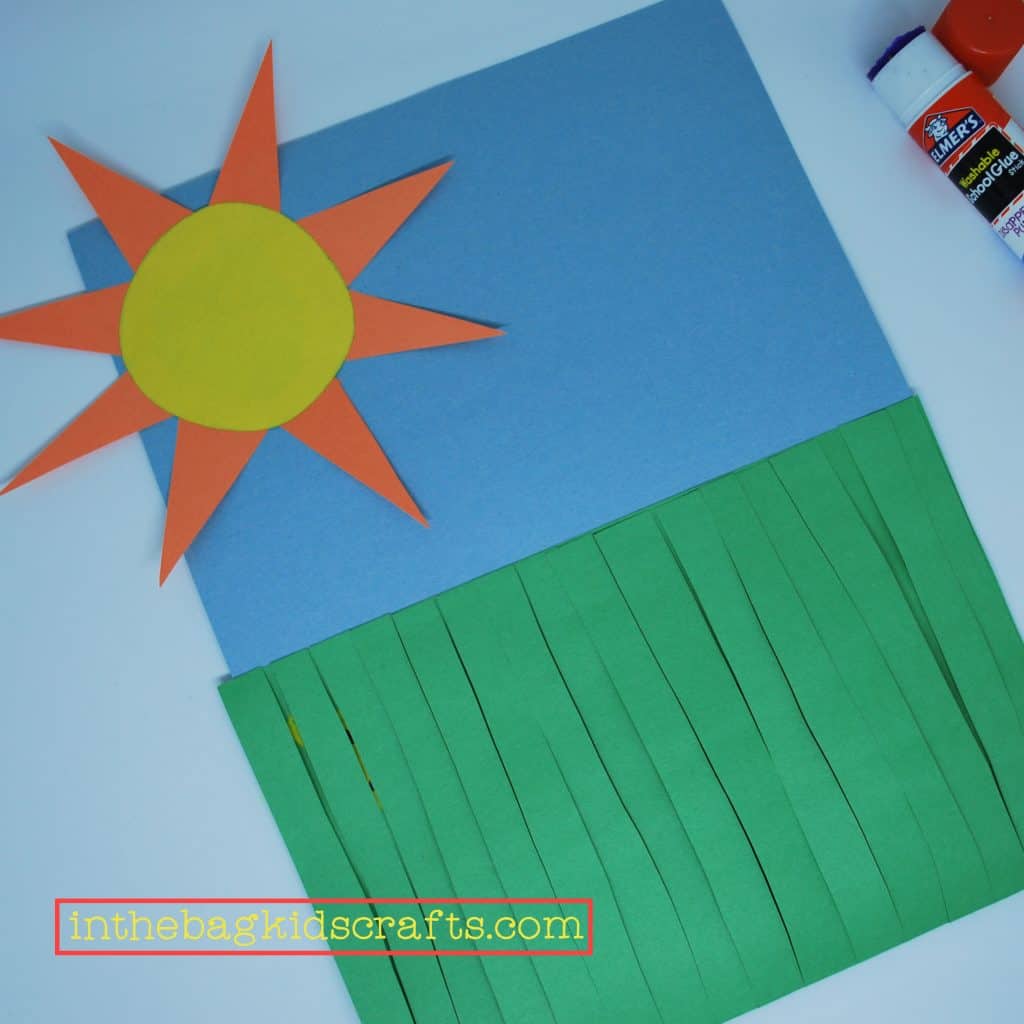
- Use the glue stick to adhere the green paper to the bottom half of the blue paper.
- Cut a sun shape from the scraps of orange and yellow paper. For littles who do not yet cut with precision, precut the sun pieces.
Step 6
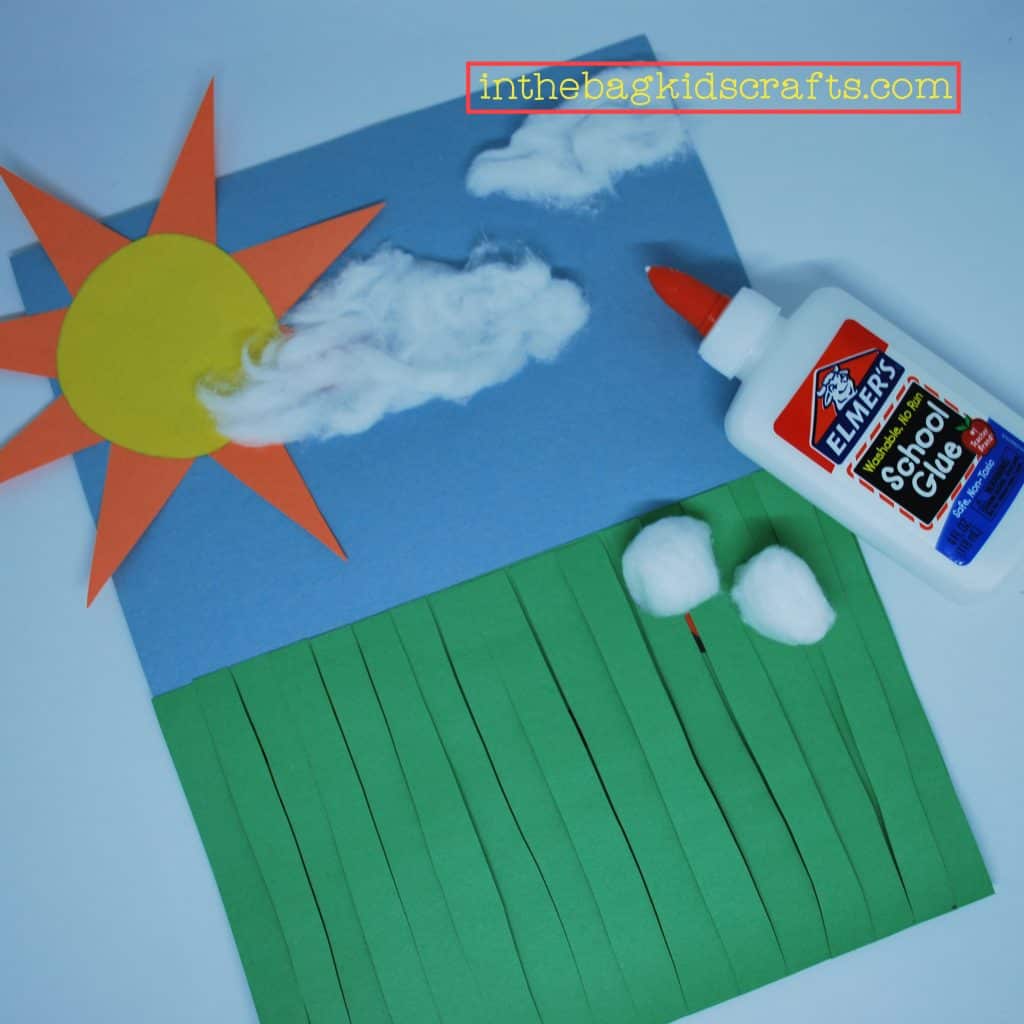
- Pull cotton balls to make them fuzzy
- Use Elmer’s glue to adhere the cotton in place to make clouds
Not only do kiddos need to learn how to use scissors, but they also need to learn how to stop the scissors at the right time. This is a great scissor activity for teaching that. To start, if a student is just learning how to use scissors, low the expectations by making the grass wider or even taking turns where they cut one, and you cut one. You can use self-opening scissors if they are having difficult with the mechanics of opening and closing them.
Children learn so much by demonstration, but they do not learn by having things done for them. First, before starting a cutting task, I always remind the child how to make their fingers open and close and to point the thumb up. If a kiddo is not able to manipulate the scissors this way, we may use self-opening scissors to start. Next, I help them to maintain proper body position, elbow down. Finally, another key element of cutting is learning the pacing and rhythm. I often see new users of scissors wanting to push hard forward and to move very quickly. To help with this, I sing a little song (a mantra really). In a rhythmic manner, I say “Take…your…time…cut…on…the…line”. You would be amazed at how it slows the kiddo down, improves focus and helps them to be successful.
To help a kiddo know when to stop cutting, draw a bold or dotted line along the crease of the green paper, where the scissors would stop. Or, better yet, add a tactile element to this scissor activity. By that I mean, place a wikki stick or a line of Elmer’s glue (allowed to dry thoroughly) at the end of the cutting line so that they can feel (and see) where to stop.
Save this project for later! Pin it to your favorite board…
Most FAQ about this Fine Motor Scissor Activity???
To make this scissor activity craft, you’ll need blue and green construction paper, paint, scissors, glue, a black marker, cotton balls, and small scraps of colored paper. These simple supplies make it an easy, low-prep activity for kids.
Yes, this craft is perfect for preschoolers and toddlers who are learning to use scissors. Younger children may need guidance or pre-drawn lines, but it’s designed specifically to build early cutting skills.
This craft helps children build fine motor skills, hand strength, and coordination. It also supports visual motor skills, spatial awareness, and proper scissor control—important foundations for writing and classroom tasks.
Kids practice cutting by snipping vertical lines into folded green paper to create “grass.” This helps them learn how to control scissors, follow lines, and stop at the correct point—key beginner cutting skills.