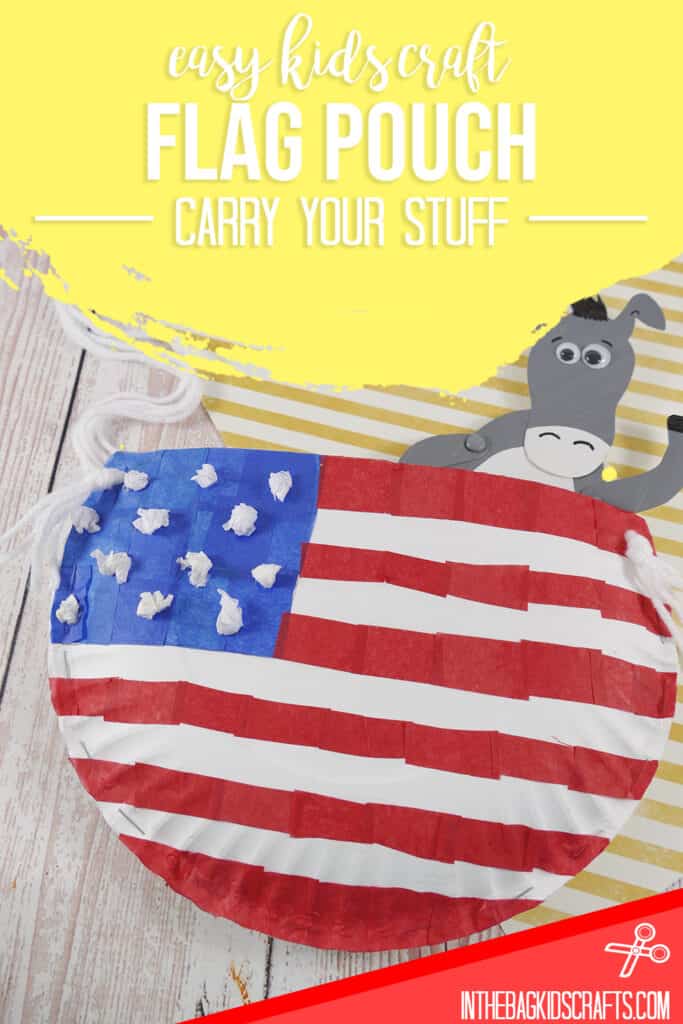
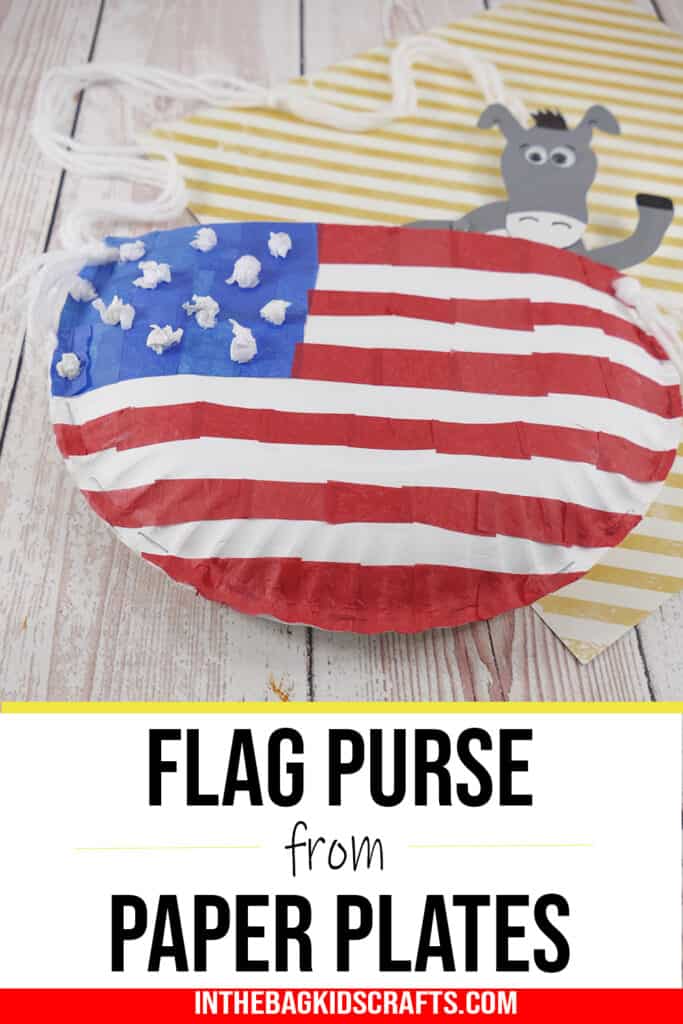
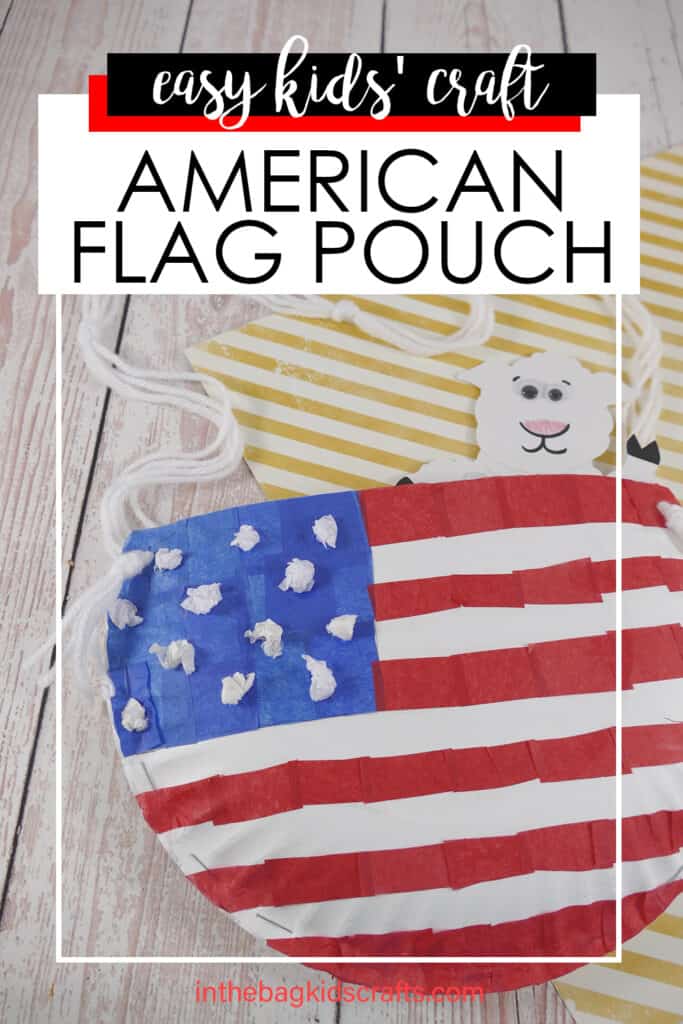
Flag Craft for Kids (It’s a Pouch!!!)
This flag craft for kids is a great patriotic craft to create for the 4th July, Veterans Day, Memorial Day or just because. Placing the little tissue paper squares is also the perfect way to practice those fine motor skills that are so important for everyday activities, like holding a pencil properly or fastening buttons. Of course, the size of the paper plate doesn’t allow for an exact replica of the American flag. So, don’t get too crazy about the exactness of things.
If you like this paper plate flag craft, you are going to love this American flag kite craft, these free patriotic coloring pages and this bald eagle craft.
Here are a few fun facts about the American Flag
- There have been many versions of the American flag over the years.
- Over the years, there have been 6 American flags planted on the moon’s surface.
- Each of the colors on the flag have a meaning. Red symbolizes hardiness and valor, white symbolizes purity and innocence and blue represents vigilance, perseverance and justice
- Pennsylvania (that’s my state!) is the only state that observes Flag Day as a state holiday.
- There are 50 flags surrounding the Washington Monument in our country’s capital, Washington D.C.
For more American flag facts, you can go to the National Flag Foundation.
Save this Patriotic Craft for later. Pin it to your favorite Pinterest board…
All activities require adult supervision. By using this site, you are agreeing to our terms of use. This post contains affiliate links, which means if you make a purchase through these links, I may receive a small commission at no extra cost to you. Click here to read my full disclosure policy.
SUPPLIES FROM THE BAG
- 2 Paper plates (9-inch coated)
- Scissors
- Single hole punch
- Tissue paper in red, white and blue (cut into 1″ squares)
- Glue stick
- Elmer’s glue
- Pencil
- Stapler with staples
- White yarn
I love a craft that only takes a few supplies to make. And, of course, these are nothing special, but turn into something fun and creative. Every single item you see on this list is part of the master list of supplies that we use for every single creative project on this site (and in our shop). This may seem a little odd, but we do this to make crafting with your kids so much easier and actually do-able, even when life is hectic (and when isn’t it?). You have good intentions, and now you have the system to be able to follow through and make crafting with your kids a regular thing.
Fill your bag and craft along! And if you like this craft, the next best step to helping you find more time to craft with your kids is to get our free craft-a-week calendar. This will keep you crafting all year long!
Learn about America with these books for kids
Combining a fun craft with a good book is the best way to elevate the creative experience. Here are some of our favorite American flag themed books for kids.


How to Make a Flag Craft for Kids
Step 1: Cut and Staple the Pouch
- Layer together 2 paper plates. We used 9-inch coated plates so that the pouch will be sturdy.
- Cut about 2 inches off the top of the plates.
- Then flip the plates so that they are facing each other with a pocket in the middle.
- Attach them by stapling all around the round outside edge, leaving the top open.

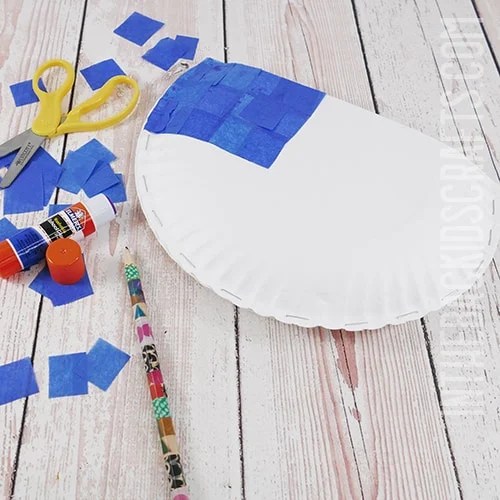
Step 2: Add the Blue to the Flag
- Draw a rectangle in the upper left corner of your paper plate.
- Then fill the space in with your glue stick.
- Next fill in the rectangle with blue tissue paper squares, gluing down any edges of tissue paper as needed.
- Once finished, trim away excess tissue paper from the outside edge of the plate.
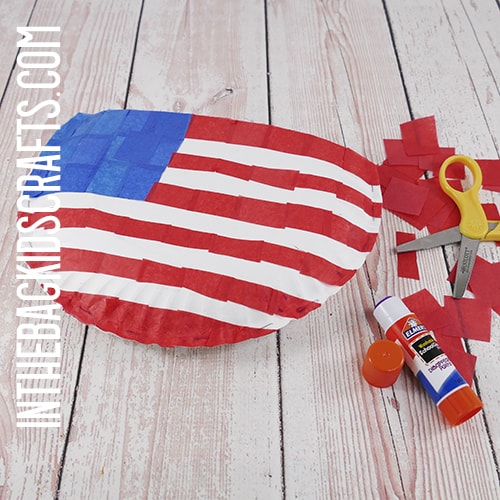
Step 3: Glue on the Red and White Stripes
- On the top edge of the paper plate pouch, create a line with your glue stick from the blue to the opposite edge.
- Layer pieces of red tissue paper squares onto the glue.
- Do this again from the bottom edge of the blue rectangle.
- Again, make a line of glue going from the center of the blue rectangle to the edge of the plate, and cover it in red tissue paper squares. There should be white space left in between the lines of red tissue paper.
- Continue making lines down in this way, with white space in between until you have covered the entire paper plate in red and white stripes.
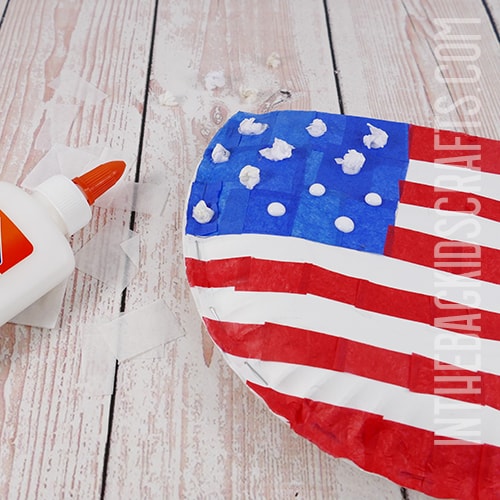
Step 4: Add the “Stars” to Your American Flag Craft
- To create the stars on the flag, tightly crumple up small pieces of white tissue paper squares.
- Place dots of Elmer’s glue where you would like your stars to be on the blue rectangle.
- Then place a crumpled up tissue paper ball onto each of the dots of glue.
- Give the glue a few minutes to set up before completing the final step.
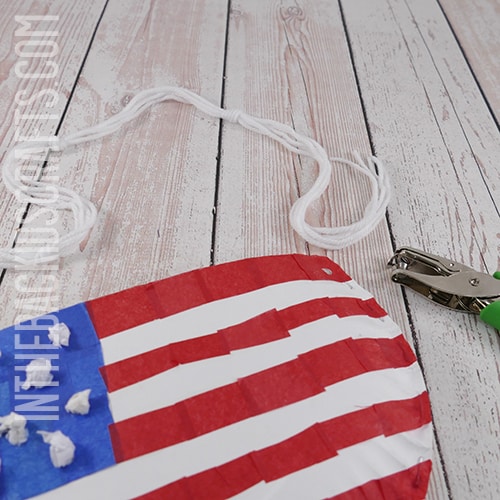
Step 5: Give Your Flag Craft Pouch a Handle
- Punch a hole on each side of the pouch opening.
- Cut 5 lengths of yarn about 1 yard long each.
- To create the pouch handle, tie the 5 pieces of yarn together using a few knots at intervals.
- Once the glue on the stars has dried, lace the end of your yarn handle through one of the holes. Tie a knot so that it cannot slip out of the hole and trim slightly. You will have what looks like a tassel.
- Do this again on the other side of the flag craft pouch.
*If you prefer, you can also make a braided handle. For this you will need at least 6 pieces of yarn at least 2 yards long.
Now that you know how to make this flag craft for kids, what will you carry in it? Maybe it will hold your snack for the day or some crayons and folded coloring pages or just some rocks that your kiddos found along their travels. There are no limits to what you can use this patriotic craft paper plate pouch for throughout your adventures.
Save this American Flag Craft for later. Pin it to your favorite Pinterest board…