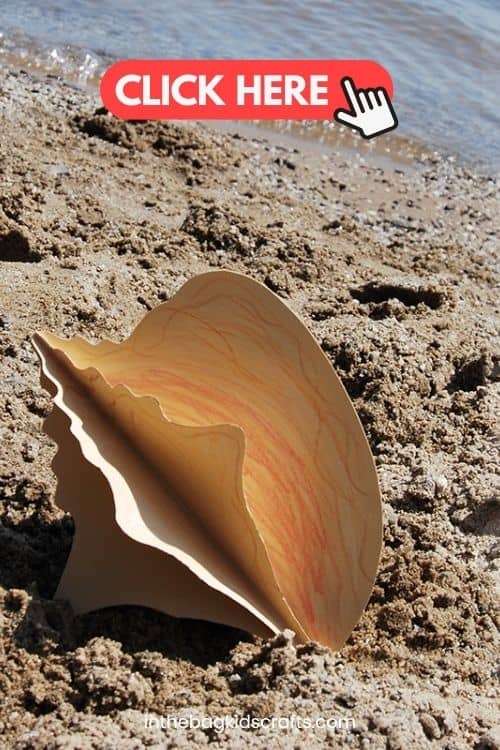
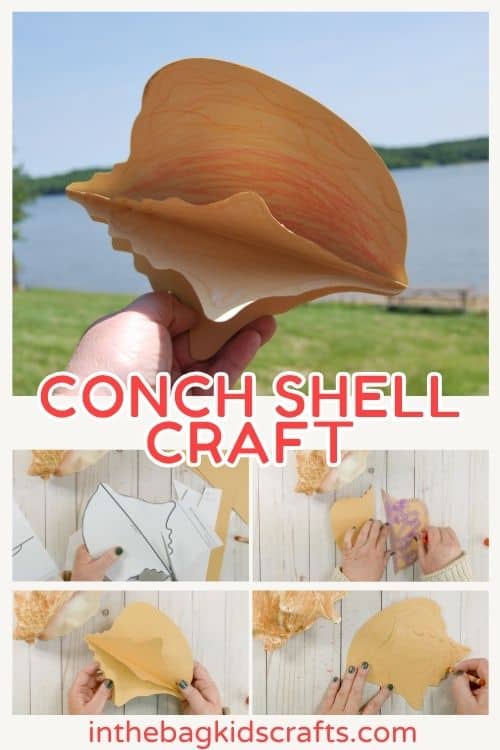
3D Paper Conch Shell Craft
One of the best parts of going to the beach is finding that perfect shell. And finding a conch shell is a very special experience. Now you can make your own at home! Just add creativity and a little sunshine for the full experience.
If you making this craft, you’re also going to love making this school of fish banner, this dolphin craft and this collection of sea animal crafts. Be sure to grab these beach coloring pages too.
Save this Ocean Craft for later. Pin it to your favorite Pinterest board…
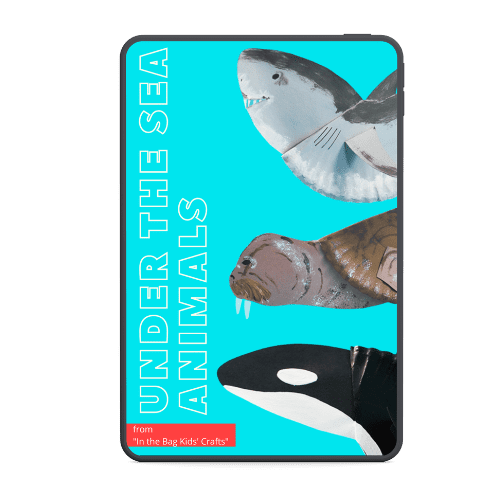
Get This Under the Water Animals Craft Collection
Fun Facts About Conch and their Shells
- A conch is a sea-dwelling mollusc.
- The shells are often used for decoration and as a musical instrument.
- Shells can be up to 13 inches long and weigh 5 pounds.
- This shell is often sold as a souvenir, and it’s said you can hear the sound of ocean waves if you put a conch (pronounced “konk”) shell to your ear (although what you’re actually hearing is your own pulse).
- Conch shells consist of 95% calcium carbonate and about 5% organic matter.
To learn more about the conch, check out this article from Kiddle.
All activities require adult supervision. By using this site, you are agreeing to our terms of use. This post may contain affiliate links, which means if you make a purchase through these links, I may receive a small commission at no extra cost to you. Click here to read my full disclosure policy.
Check Out These Shell Themed Books for Kids
The only thing better than making crafts is combining creating with reading a good book on the same topic. It’s a great way to also encourage a love of reading.


How to make a Shell Craft
This conch shell is absolutely beautiful and so simple to put together. Though this is a more complex craft and not great for little ones due to the scissor and direction following skils needed. We used traditional colors for our shell, but feel free to mix up the colors and really make it your own.
SUPPLIES FROM THE BAG
- Tan construction paper
- Scissors
- Glue stick
- Crayons
- Conch shell template
To make crafting with your kids actually do-able and fun (like it should be), we always stick to a list of basic supplies that fit into one bag for all of the crafts that you see on this site. We never stray from the master list so that once you fill your bag, you’re ready to craft along over and over again, even when time and money is tight. Now let’s craft some memories!
Check Out the Video Tutorial for this Conch Shell Craft
Step-by-step Instructions:
Step 1: Use the Shell Craft Template
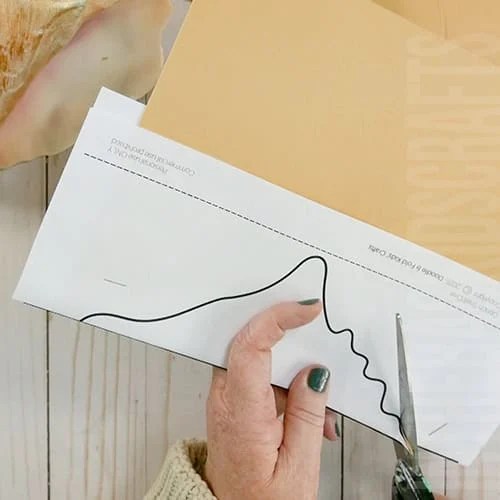
- Grab the conch shell template and print it out.
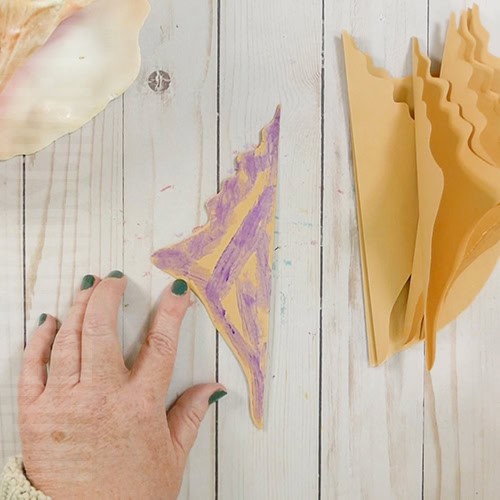
- There are 2 parts to your shell. We’ll first be working with the part of the template that only shows half the shell and says to make 6.
- Take 2 sheets of your tan construction paper and fold it in half.
- Then fold the template in half over the crease and cut out the shell.
- Repeat this process 2 more times until you have 6 cutouts.
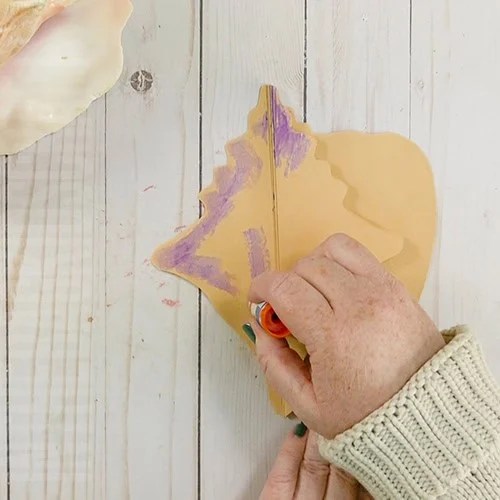
Step 2: Cut It Out
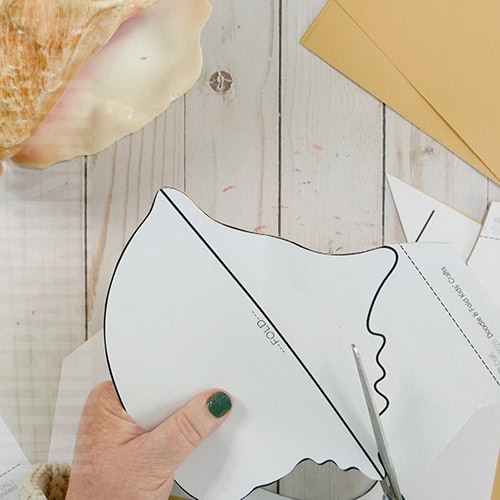
- Now take the other part of the conch shell template.
- Again, take 2 pieces of tan construction paper, but this time do not fold it in half.
- Place the larger template on top and cut out 2 pieces of the shell.
*If you’re having trouble managing the layers of paper, use a couple of staples around the edges to hold them together.
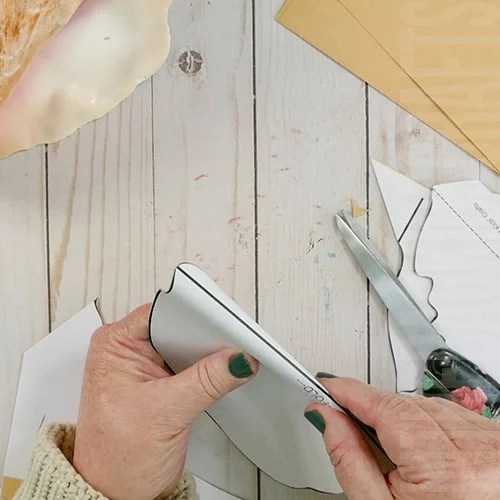
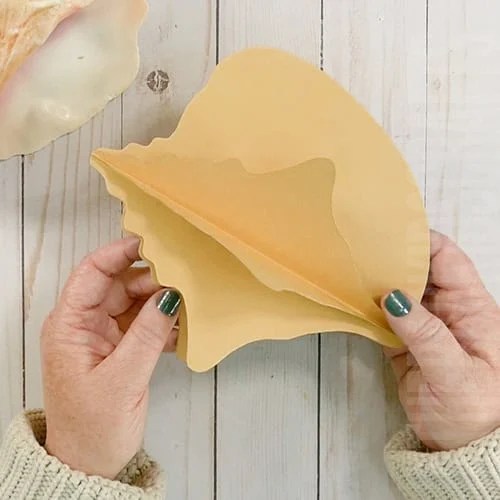
Step 3: Fold
- Once cut out, fold the 2 large shell pieces in half, using the template as a guide.
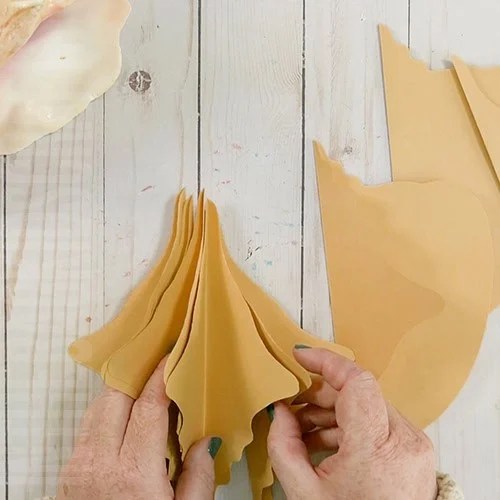
Step 4: Begin Assembly
- Before gluing the shell together, organize the layers so that they oriented correctly to line up perfectly.
- Just create a pile of your shell pieces.
Step 5: Layer the Conch Shell Craft Pieces
- Now begin to assemble your conch shell by place glue on one half of one of the pieces.
- Take the next piece and layer it on top, pressing firmly so that the glue takes hold.
- Repet this process until all of your shell pieces are stacked in an orderly fashion.
- The last 2 to be added will be the large pieces.

Step 6: Close Up the Shell
- Once all of the pieces are stacked, it’s time to finish off your 3D paper conch shell.
- Place glue on the 2 pieces that are not yet connect and press them together.
- Once assembled, your shell should look like this.
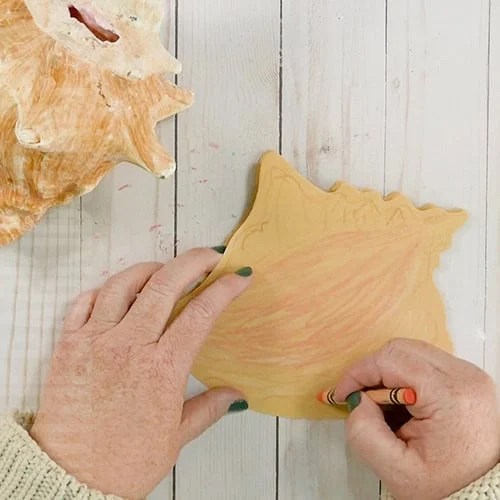
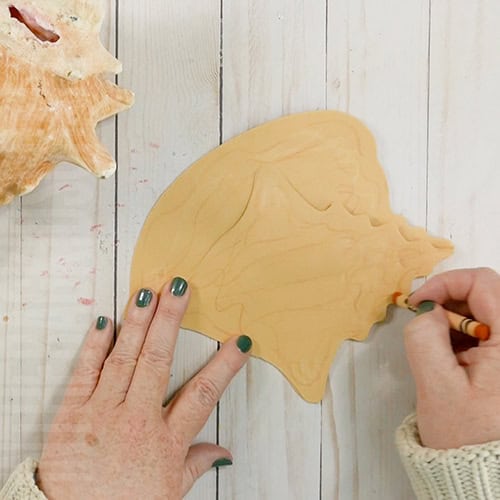
Step 8: Add Some Color
- To finish off your beautiful beach creation, grab your crayons and begin adding details.
- I chose shades of tan, white, peach and pink and just scribbled. Don’t forget that the inside of the large portion of the conch shell has a pink tone to it.
Now that you’re made a conch shell, create more shells to add to your beachy scene.
Keep the Crafty Fun Going!
Here are even more Beach Crafts to make
Clam Shell Craft
Starfish Craft

Oyster Craft
Share With Us
Did you make this activity with your kids or students? We’d love to feature them on our social media!
For a chance to have your child’s project featured, simply snap a picture of the completed project and email it to us directly by clicking here or use #inthebagkidscrafts on your social media!