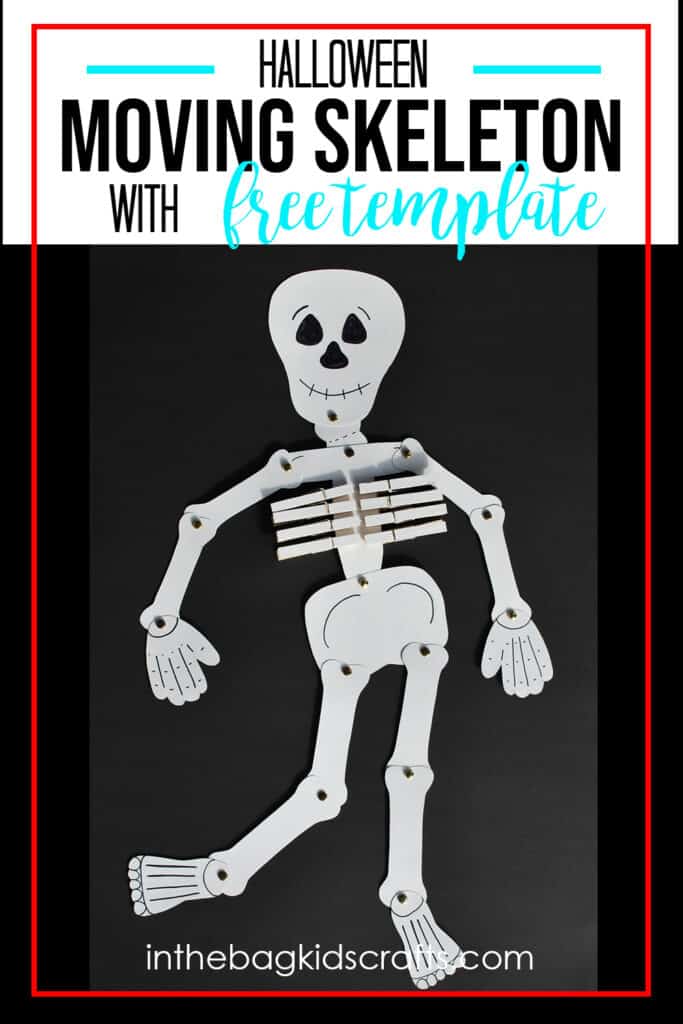
Easy Skeleton Craft {with FREE template}
You are going to absolutely love this easy skeleton craft. Stick around to the end, and I will tell you how I make this moveable paper skeleton craft into a dancing skeleton.
The Occupational Therapist in me really came out on this craft. I just can’t help it sometimes. When I see clothespins, I always think of developing fine motor skills. And, for some reason, I also thought…”Hey, those clothespins would make great ribs!” I cannot explain why my mind works likes this (believe me, people have been trying to figure me out for years), but this time my strange thoughts lead to a really fun and interactive craft for the halloween season! I know that your kiddo will love it (and maybe even learn a little something along the way…just don’t tell them that).

Save this Easy Halloween Craft for later. Pin it to your favorite Pinterest board…
Skeleton Facts
- Infants start off with around 270 bones. However, by the time they reach adulthood, the human body has 206.
- The largest bone in our body is called the femur (thigh bone).
- Generally bones are divided into four groups; long, short, flat, and irregular.
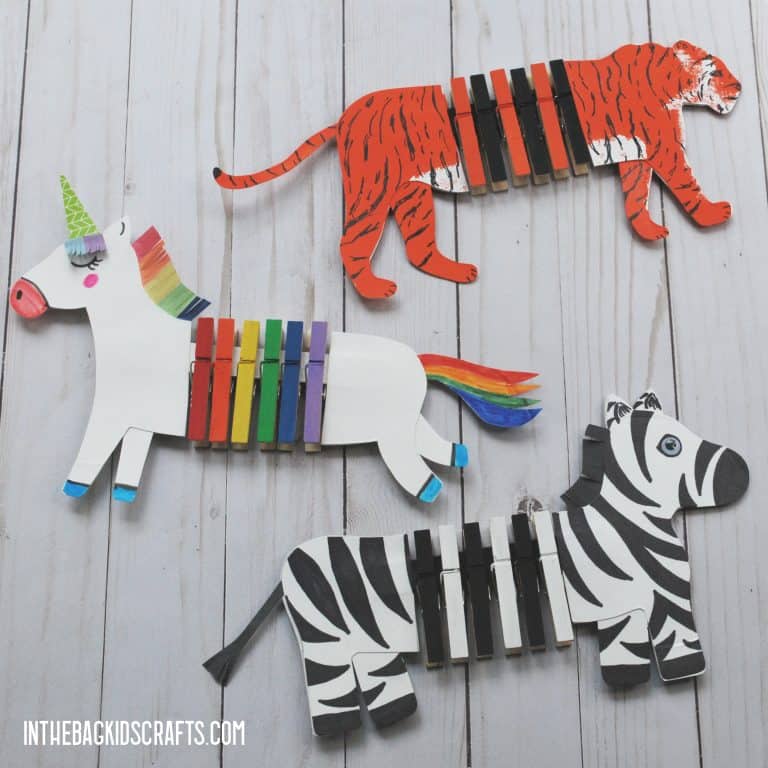
You might also like these other Halloween crafts
Or for Día De Los Muertos
CRAFT SUPPLIES FROM THE BAG
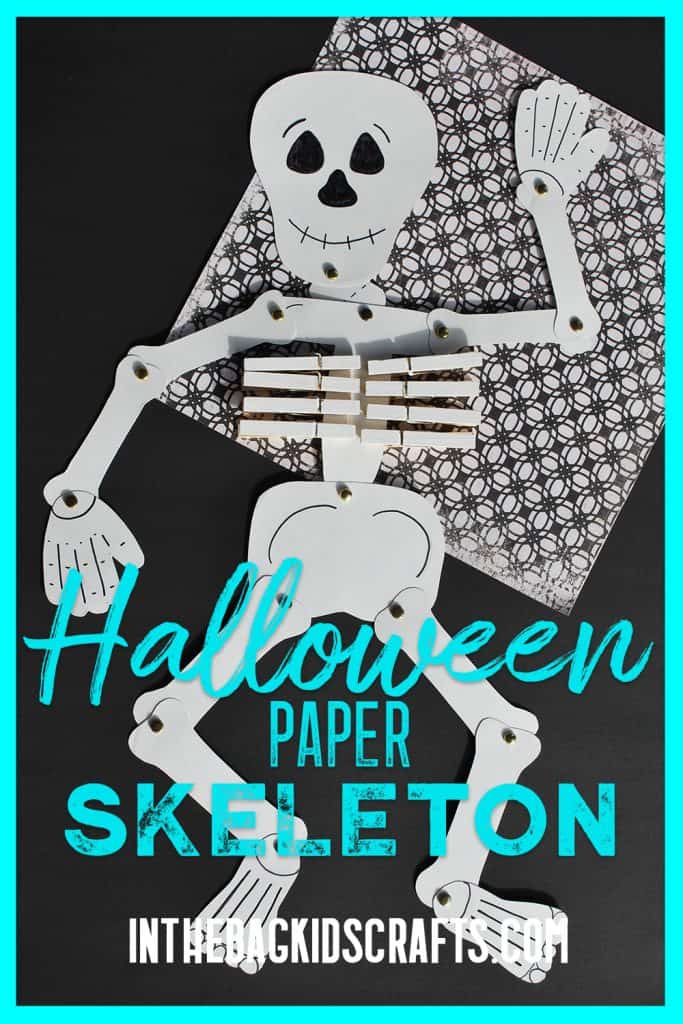
- 9 paper plates (9 inch coated)
- Scissors
- Hole punch
- Metal brads (15)
- Pencil
- Black sharpie marker
- Newspaper
- 9 clothespins
- White paint
- Medium or small pompom
- Skeleton craft template
I truly believe that crafting together as a family has so many benefits…from helping your kids develop needed life skills to simply creating memories together. But I know that you are busy, and getting out a bunch of supplies just leaves a mess to clean up later. So, in an effort to make crafting with your kids more do-able, every project on this blog is made from the same list of craft supplies that can fit into one bag. Make up your craft kit using our free printable master list, and you will be good to go! (And did I mention that this a glitter-free zone? You’re welcome!)
Easy Skeleton Craft Instructions
Step 1: Paint Your Skeleton’s Ribs
- Lay out 8 of the clothespins on the newspaper
- Pinch the pompom with the remaining clothespin to form a “paint brush”
- Squeeze out some white paint onto the newspaper and paint one side of each of the clothespins
- Allow the paint to dry while you move on to step 2
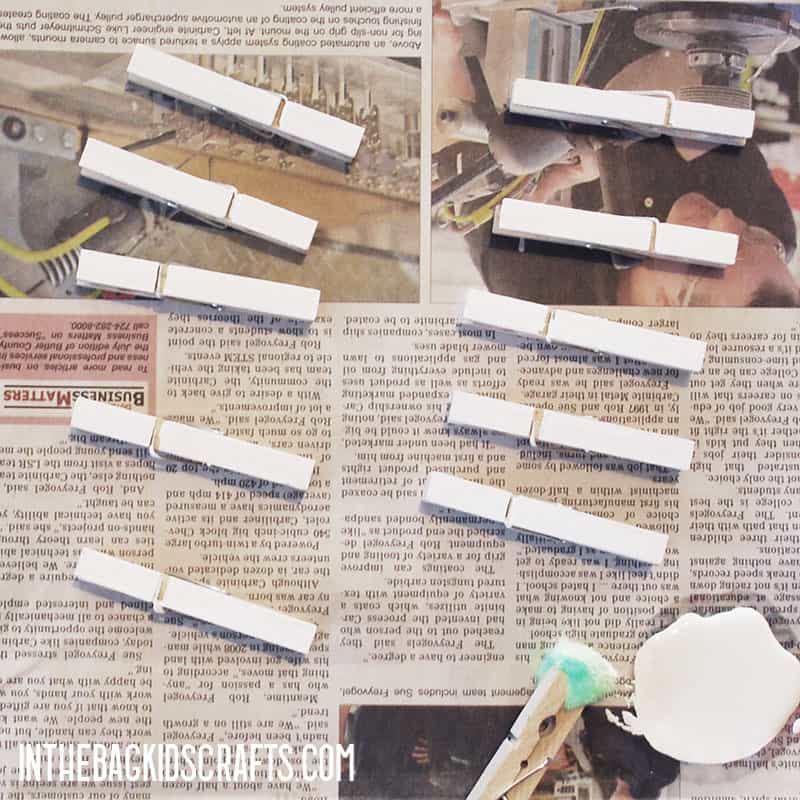

Clothespins are such a great way to practice fine motor coordination. Given their size and design, they almost force the user to use a mature pinch grasp to manipulate them. Plus they take a little bit of strength. The ribs can be placed and removed in repetition for lots of fine motor practice and finger strengthening.
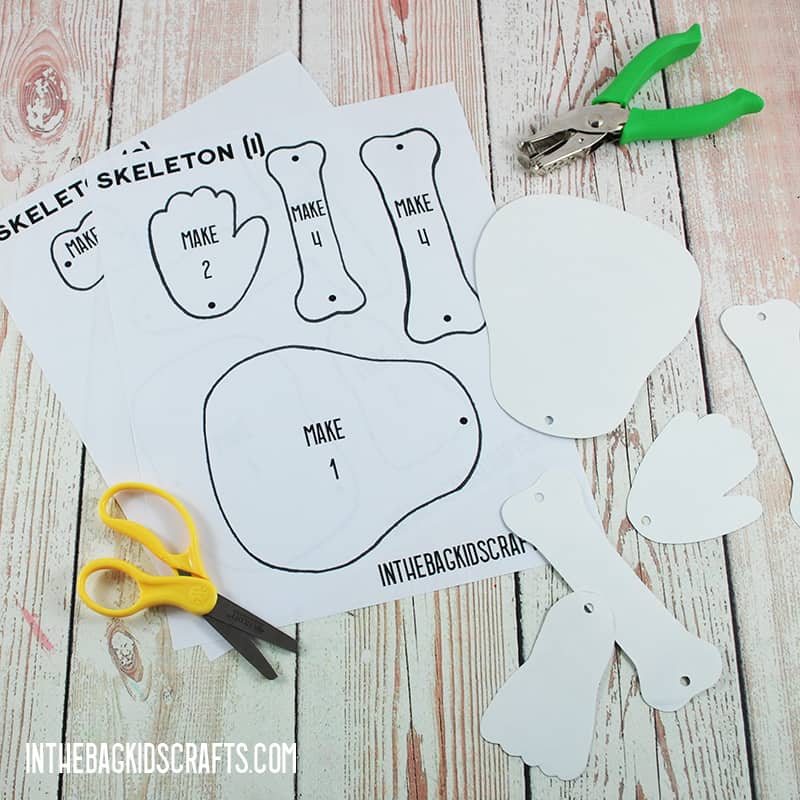
Step 2: Use the Skeleton Craft Template
- Use the printable skeleton template to cut out the parts of this fun skeleton craft from paper plates.
- Punch the holes where indicated.
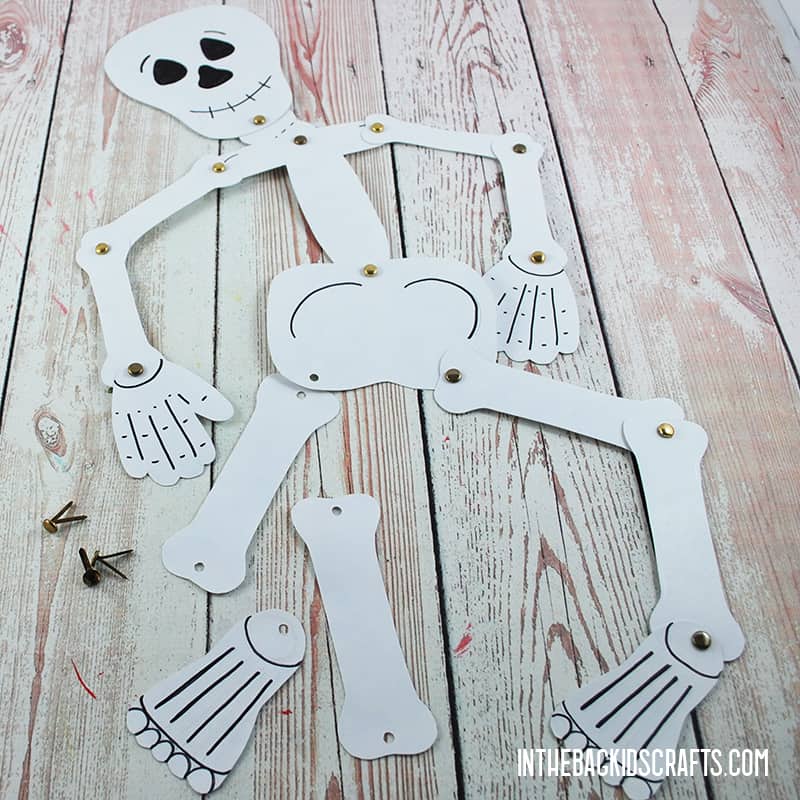
Step 3: Give Your Spooky Skeleton Craft Some Details
- Now it’s time to add some details. My recommendation is to first draw with a pencil and then go over it with your black Sharpie marker.
*Pay attention to which side you are drawing on. There is a matte and a glossy side to the paper plates. Choose which side you prefer and stick to it to give it a cohesive look.

Step 4: Put Together Your Skeleton Puppet Craft
- Now it’s time to connect the bones with brads at each joint
- Start at the top and work your way down the skeleton body, placing one brass fastener at a time. If you have white fasteners, you can use those so that they blend into the bones.
*Be sure to make both sides exactly the same for the best look. For example, if you put the hand on top of the arm bone on the right, also put it on top on the left.
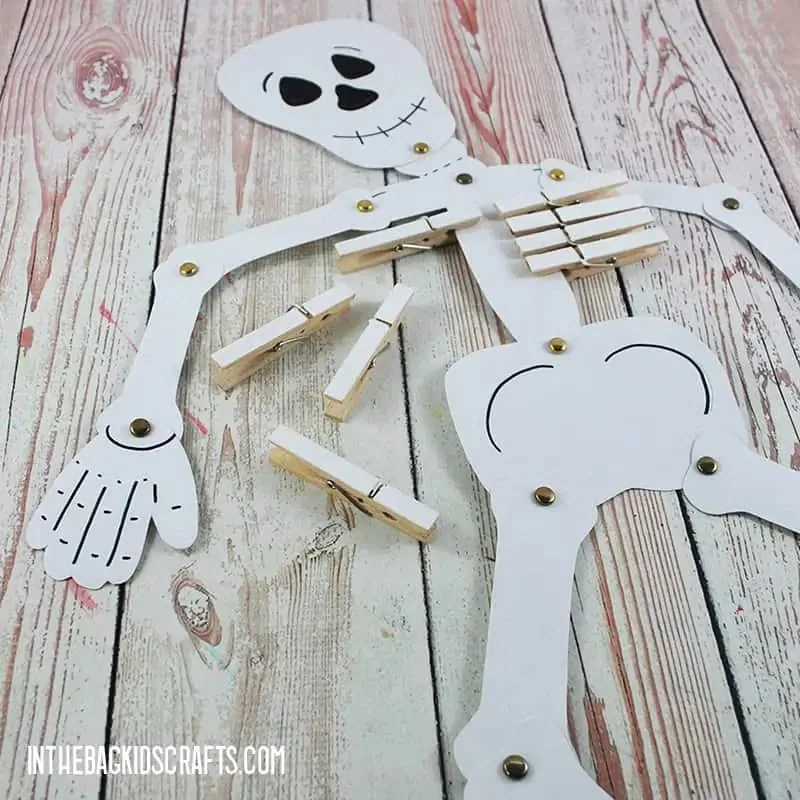
Step 5: Add the Skeleton’s Ribs
- Now that the paint has dried on your clothespins, attach 4 to each side of the breast bone as pictured.
Now that you know how to make a skeleton craft, it’s time to have some fun with him. Since all of his parts move, you can use him like a puppet. Or you can try this fun video activity…
How to Make This a Dancing Skeleton Craft
- Find a flat neutral background somewhere in your house (or outside) where the lighting is good.
- Place your skeleton there and position your skeleton however you want for a starting position.
- Now put your camera over the skeleton craft pointing down at it. The camera and skeleton should be in the same place for every single picture that you take. If you have a tripod, use it. But if not, just figure out a way to prop your camera in a place where it is stable. One time, I taped my phone to the edge of a chair for this project.
- Take a picture, move the skeleton a little, take another picture, move the skeleton a little, take another picture…and so on…until you have at least 20 pictures, if not more.
- Then upload you photos into a video editor. There are lots of apps. I use Videoshop, and there is a free version in the app store. Once you have all of your photos in, reduce the time of each pic to about 30 seconds (or less if you want the skeleton to move faster).
- Add some music or whatever other effects you want and download.
Here are even more Spooky Crafts for Kids
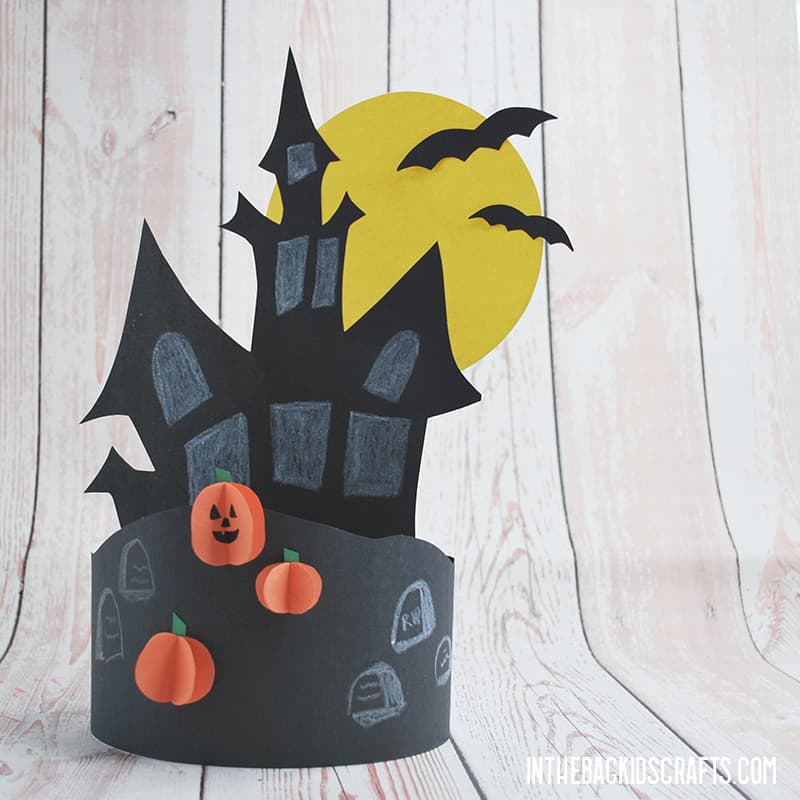
Haunted House Craft
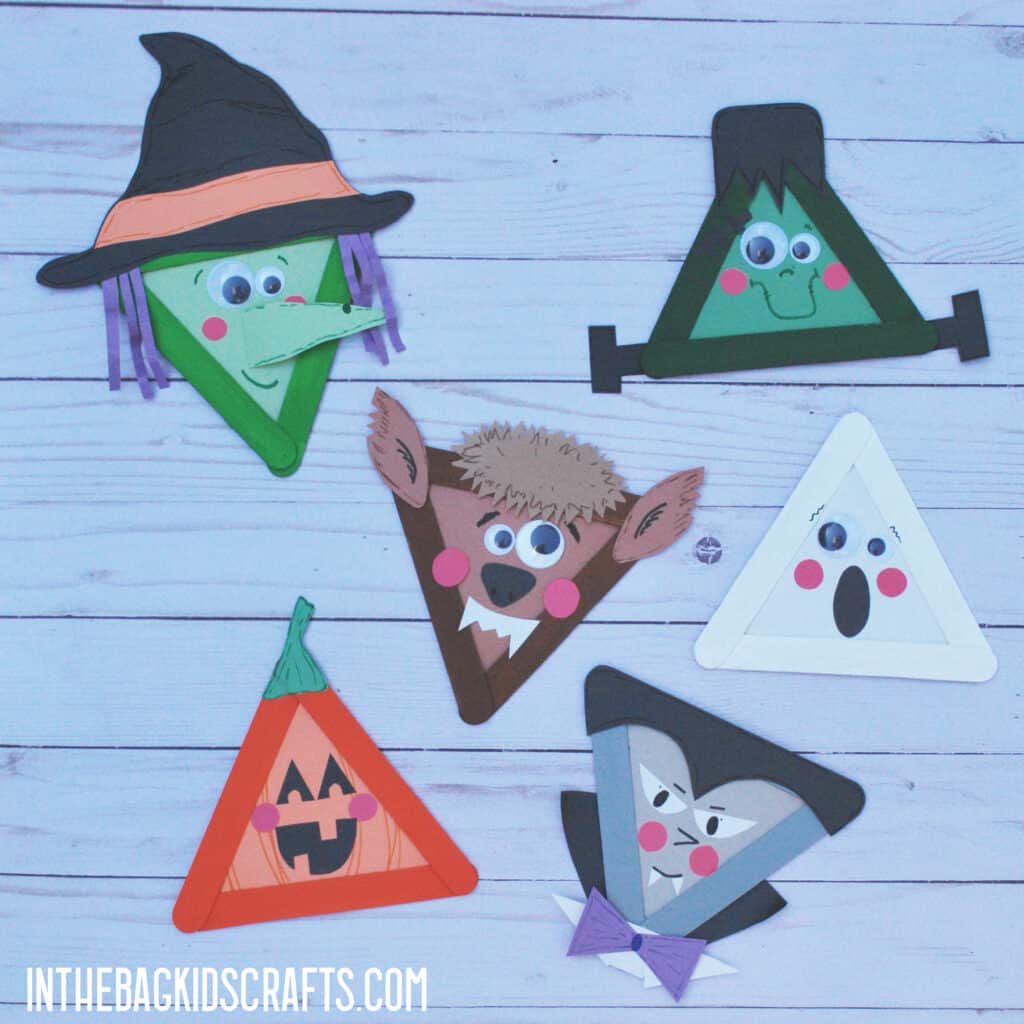
Halloween Monsters Crafts
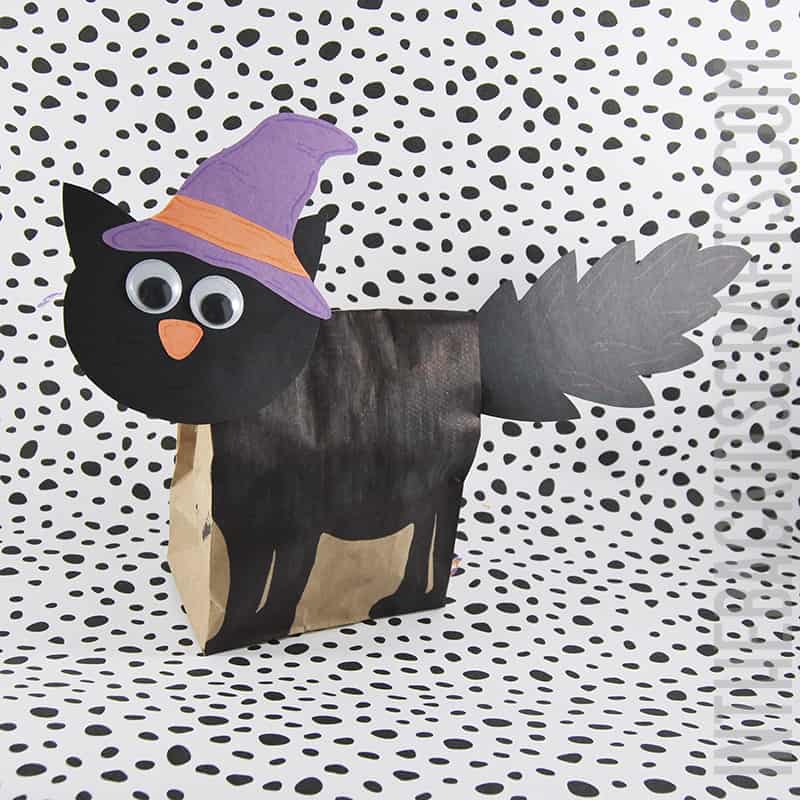
Black Cat Craft
Save this Skeleton Paper Craft for later. Pin it to your favorite Pinterest board…