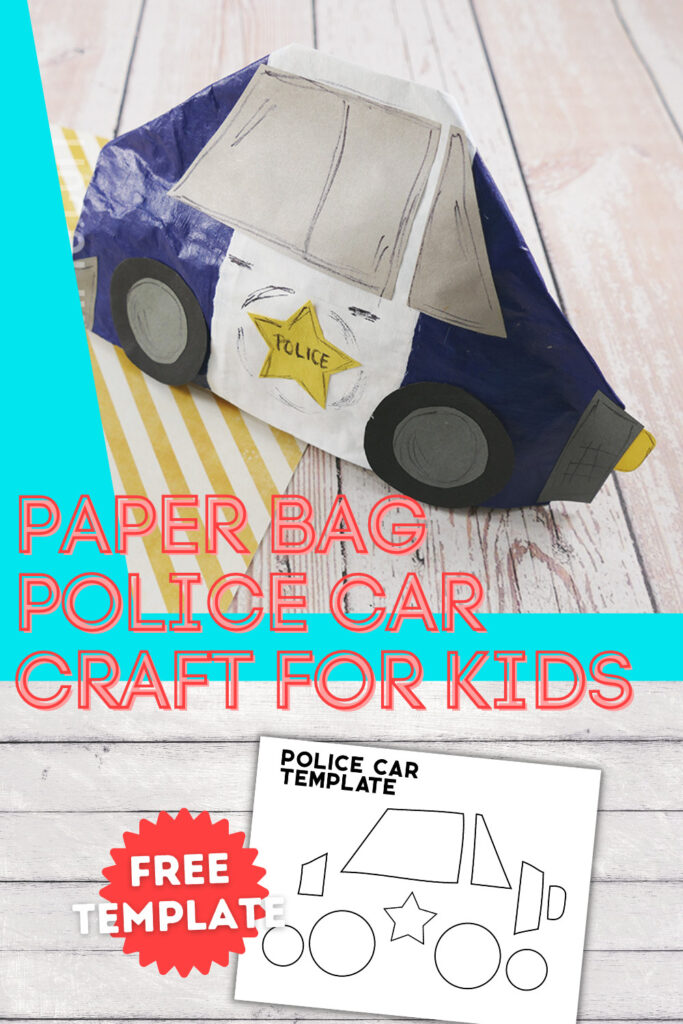
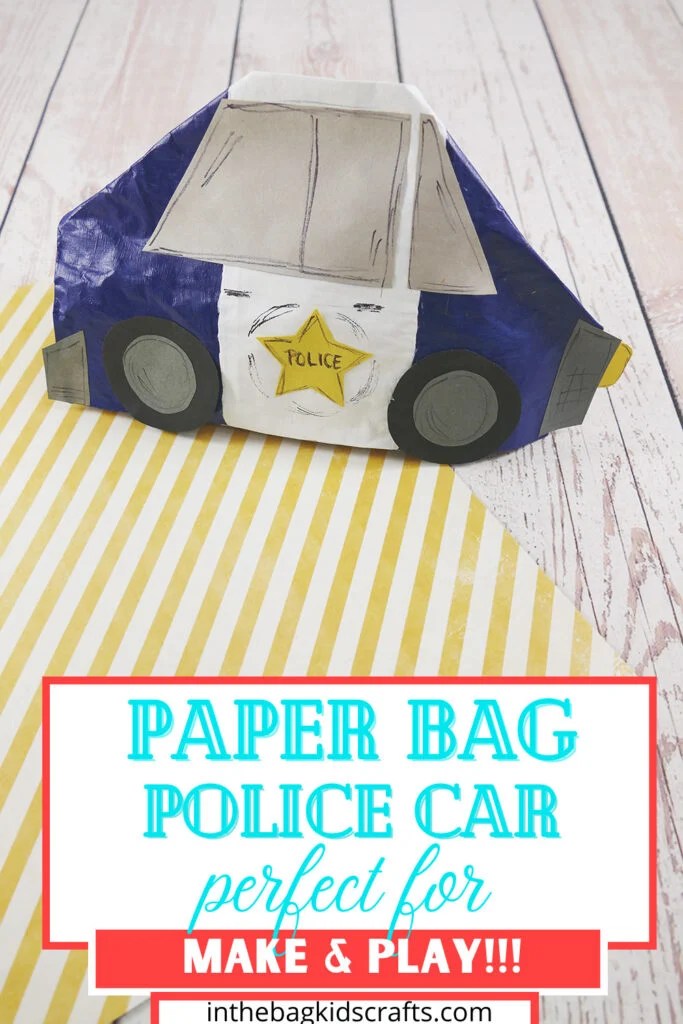
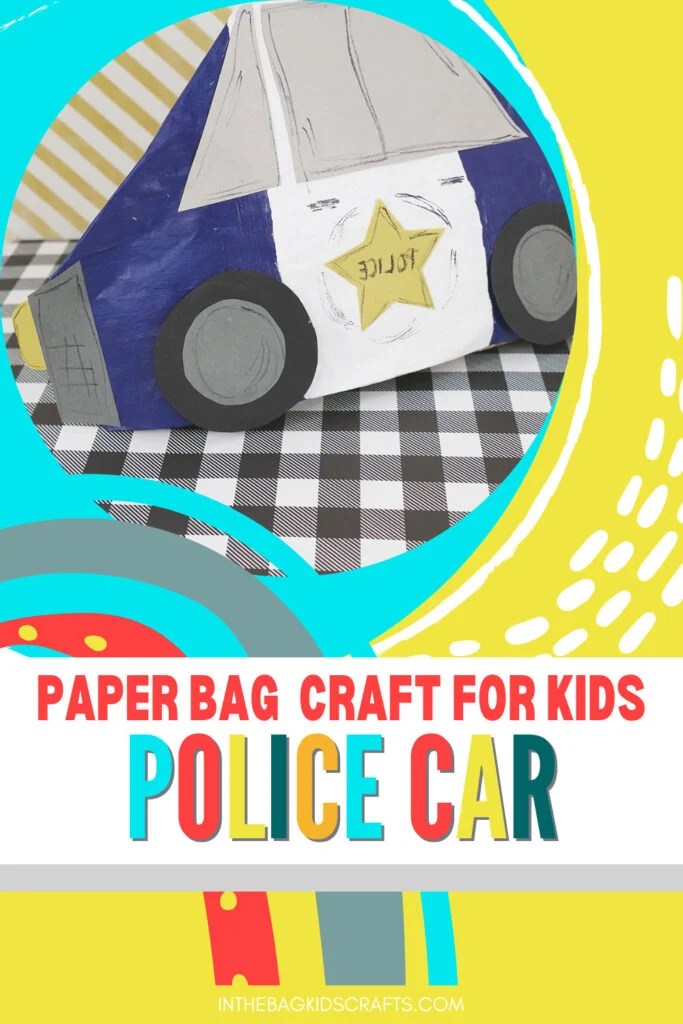
Police Car Craft (with FREE Craft Template)
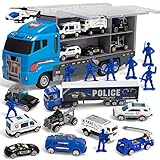
Who didn’t want to be a policeman at some point when they were little? It was either that or Spiderman…am I right? This police car craft starts with a paper lunch bag and takes just a few steps until you’re able to play with your new creation. Combine other toys with this new DIY police toy and play out whatever stories you can think up.
If you like this paper bag craft, you will also love making these paper bag dogs and this paper bag city. As a matter of fact, the police car craft can drive around your craft city. If you’d prefer, create this paper bag village instead.
Save this Police Craft for later. Pin it to your favorite Pinterest board..
Time to Play and Grow
Once you have your police craft completed, combine crafting with other fun activities, like reading or playing make believe. Here are some things to get you started with this fun play and learn experience.
All activities require adult supervision. By using this site, you are agreeing to our terms of use. This post contains affiliate links, which means if you make a purchase through these links, I may receive a small commission at no extra cost to you. Click here to read my full disclosure policy.


SUPPLIES FROM THE BAG
- Paper lunch bag
- Paint
- Clothespin
- Pompoms
- Q-tips
- Construction paper
- Newspaper
- Stapler with staples
- Glue stick
- Scissors
- Markers/Black Sharpie marker
- Police car craft template
Have you filled your craft bag yet using our master list of supplies? Trust me…you are going to want to. This one step will make it possible for you to craft with your kids any time anywhere. We give you the ideas here, and you will already have everything that you need to jump right in.
How to Make a Police Car Craft
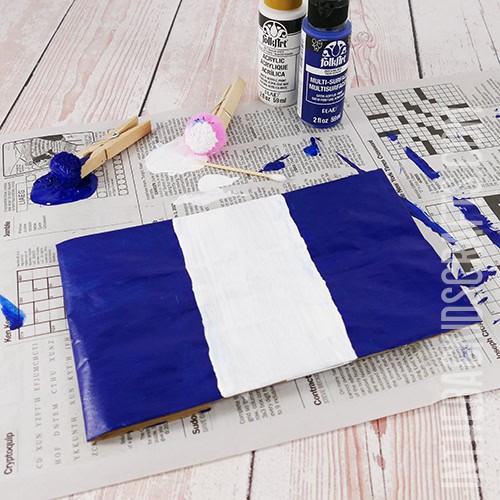
Step 1: Paint the Bag
- Fold down the top couple of inchs of a paper lunch bag
- Pinch a pompom with a clothespin to form a “paint brush”
- Lay the bag out on some newspaper and paint it whatever colors you would like your police car to be. We painted ours with stripes, but you can paint the entire thing the same color. *Matte paint works best.
- Set it aside and give it time to dry.
*If you really don’t want to bother with the “messiness” of paint, use crayons or markers instead to color the front of paper lunch bag.
Step 2: Use the Free Police Car Craft Template
- Print out the template for your police car craft
- Use it to cut out all of the parts of the car, including the wheels, windows, bumpers and star for decoration.
*If you do not have access to a printer, draw your own parts for your police car. Use the picture below as a reference.

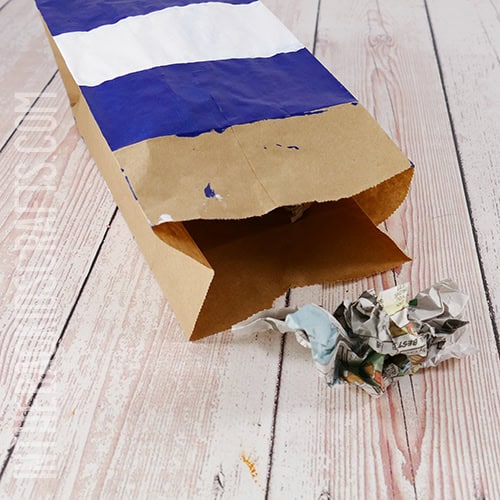
Step 3: Fill the Bag
- Once the paint has dried, open up the top of the paper lunch bag.
- Tear strips of newspaper and crumple them up.
- Fill the bag until it is full but not overstuffed.
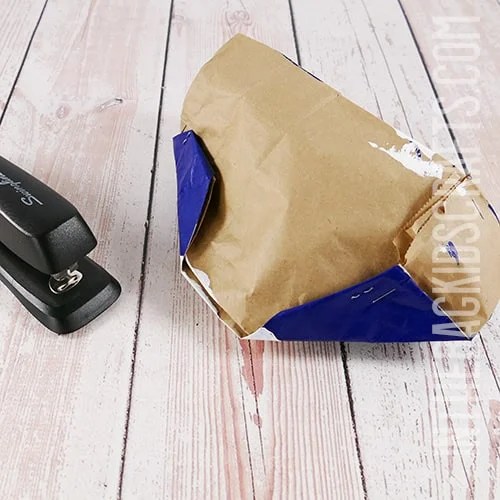
Step 4: Fold and Staple
- Fold down the top of the bag and secure it on each side with a couple of staples.
- Place the bag on its side.
- Then fold each side of the top of the bag down at an angle (about 45 degrees) and secure with staples.
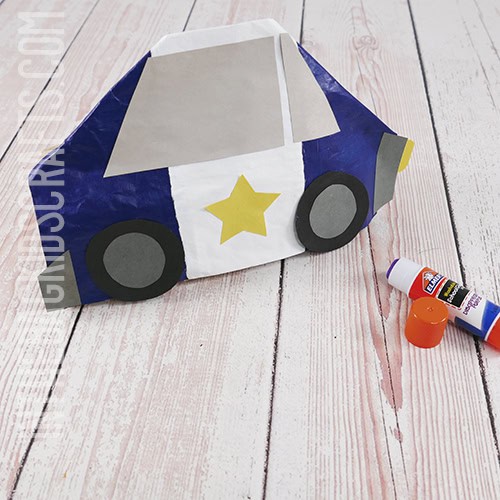
Step 5: Glue it Together
- Use your glue stick to place the cut out pieces of your police car.
- Be sure to press firmly to give the glue a minute to set up.
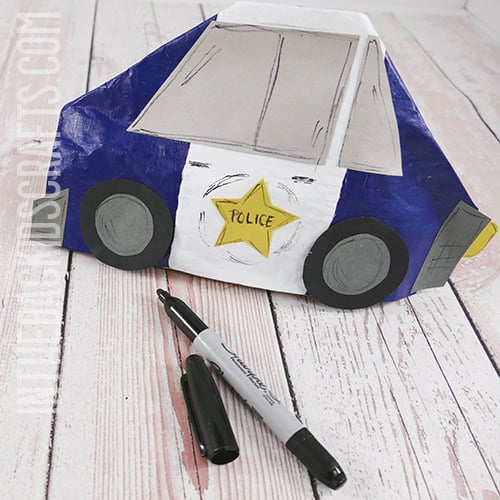
Step 6: Draw on Some Details
- As a final touch, use markers to add whatever details you would like. We wrote “police” on the star and other subtle details. This is your chance to make the design your own.
Save this Easy Kids Craft for later. Pin it to your favorite Pinterest board…