Learning Craft with Resist Painting
Learning with resist painting is one of the funnest ways to work on a difficult problem. Doing school work will no longer feel like “work” when you do it this way. The first thing that came to mind when I was creating this project were the times tables. I feel like it took me FOREVER to memorize those. And once I did, I would review them over and over again. (Now my 40something year old brain needs a review once in awhile…sorry to say.) Turning school into play is the best way for kids to actually learn! I can’t wait to hear what new skills your kiddo is able to master by using this technique and how you use this learning craft in your own way.
What is Resist Painting?
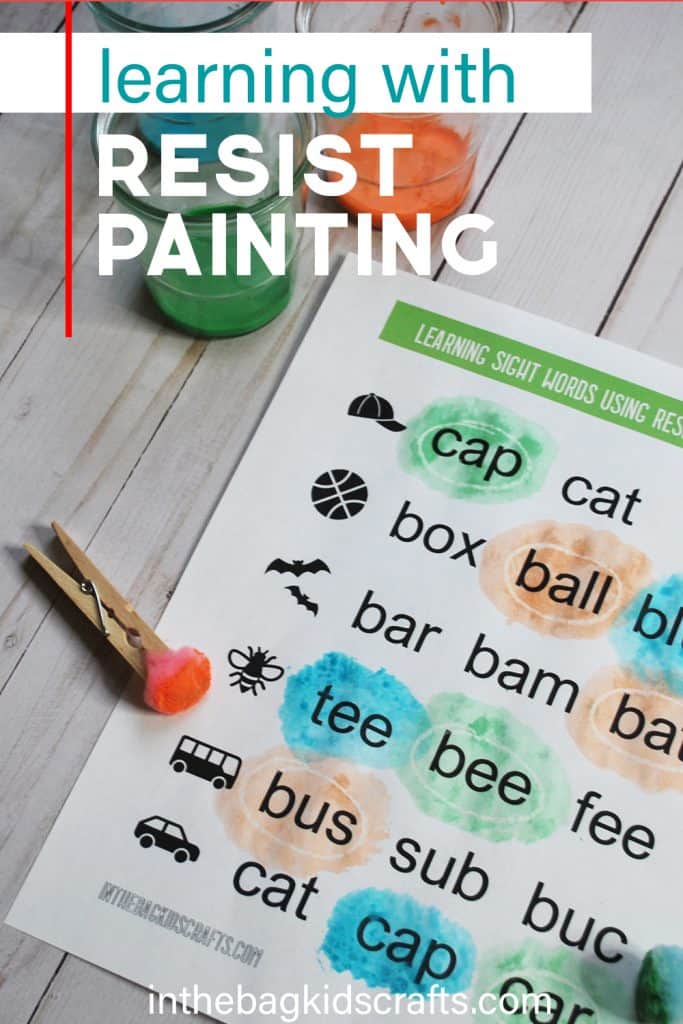
Before we get into the details of this craft, it is helpful to have an understanding of what resist painting is…The first step is to put down a layer using something the paint will not adhere to (like the white crayon we will use). Once that is down, you paint over it, and you will see what you have drawn outlined by your layer of paint. The paint “resists” sticking to the waxy markings. It is a super simple technique, but there is so much you can do with it. Today, we are going to use it to make learning fun!
SUPPLIES FROM THE BAG
- White crayon
- Paint (any colors you like except white)
- Small pompom
- Clothespin
- White Paper (print if you are using the templates and construction if you are making your own)
We are here to make your life easier and to foster creativity in families. But I know how busy you are! Believe me, I have lived it…running, running, running. So, even if you love making crafts (or if it is a struggle, but you know that it is beneficial), stopping to craft often gets put on the back burner. I told you that I am here to help. With that in mind, we take a different approach here than most craft blogs. First of all, you will only find simple projects (with the rare exception). Second, and most important, we use the same MASTER LIST of supplies for every…single…project. If you prep your bag with using our FREE printable supply list of items that fit into one bag (many of which you already have on hand!) you will be ready to craft at a moment’s notice without all of the fuss. Just pick a craft, pull out the bag and MAKE SOMETHING…even if you only have 5 minutes. Seriously, there are plenty of projects on the site that can be made with very limited time. Time spent crafting with your kids is never wasted time…you will be glad that you did! Find out what to put in your bag…
Step 1: Parents Prep
Before the kids can participate in this educational craft, you parents out there will need to do just a smidge of work first (Don’t worry. This is VERY limited prep.) The first thing you can do is simply to print one of the FREE sets of printable templates which are located in our secret resource library. **See below. Some of the options you will find there include the times tables, simple math problems, beginner sight words, and letter sounds. Then you will just follow the directions given on the templates for writing the answers in “invisible” white crayon.

OR
You can also make your own worksheets using a piece of white construction paper. Maybe you want to use your child’s specific school work. For example, take your kiddos’ spelling list and have lines with the words written in the white crayon. Your child will spell the word out loud and then see if they are right (we will get to that in a minute). Or write their math problems on a piece of paper in marker with the answers written in white crayon. After they say the answer they will check their work. What about a vocabulary list? This can be done a couple of ways…maybe by numbering the answers (which are in a mixed order). Then each word has a line after it with the number of the correct answer in “invisible” white crayon. The possibilities for using this technique are endless.
Step 2: Painting
- Pinch the pompom with the clothespin to form a “paint brush”. (You can use a regular paint brush is you have one on hand. We are doing it this way to stick to the things that we already have in our supply bag.)
- Water down a couple of paint colors (or use water colors if you have them on hand)
- Now go through one of the worksheets. Have your child say the answer to a question and then check their work by painting over it. The invisible answer (which you wrote in white crayon) will now show up like magic.
- *When using the pompom paint brush, I found it was easiest to tap the paint on.
We here at “In the Bag Kids’ Crafts” have been making a concerted effort during this time when parents are having to take on so many of the teaching responsibilities to post more learning crafts…ways to make learning a hard subject fun! Check out these other crafts that you might find helpful during your “home schooling” efforts. Just click on the picture for more details.


Save this learning craft for later! Pin it to your favorite Pinterest board…

