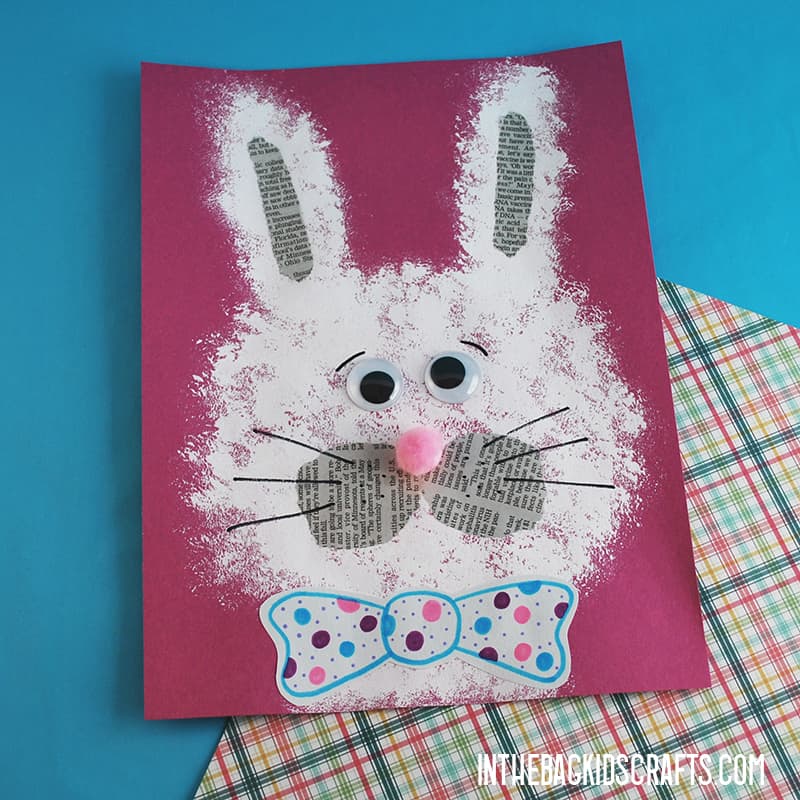
Easter Egg Art for Kids
This Easter egg art is so fun and simple to make!!! And it might just tell you something about yourself as you see the Warshak test design that it creates. Of course, you can use this interesting painting technique for other things too. Really, cut out any form, squeeze a little paint and squish away to create a work of art! For example, make an Easter cross too.
SUPPLIES FROM THE BAG
- Construction paper (any color)
- Scissors
- Newspaper
- Assorted paints
- Pencil
- Hole punch (optional)
- White yarn (optional)
- Scotch tape (optional)
Don’t you just absolutely love crafting with your kids? But, truly, who has the time!?! I totally get it. Life is hectic and passes us by so quickly. You know that saying, the days go slowly but the years go quickly? So, let’s make it a little easier for you!!! Truly!!! Every craft that you find on this website is designed to be simple and is made from the same master list of supplies. You fill you bag once, and it is ready to go at a moment’s notice. Finally, a system that actually works and lets you spend time on what matters most, family! Less mess, less stress, less prep. Find out what to put in your bag!
Step 1: Cut out the egg
- First, fold your piece of construction paper in half. Choose whatever color you want to use for the base of your decorated Easter egg.
- Then, draw a large half egg coming out from the crease.
- Last, cut the egg out. You can always make little tweaks if you don’t like the shape. But really, any oval type shape will do.
- *For toddlers, you will want to complete this step for them. For little ones who are still mastering scissor skills, draw over the pencil marks with a bold marker so that the line is easier to cut.
Step 2: Decorate
- Place your egg, opened up, on your newspaper to avoid making a big mess
- Squeeze a little paint, in various colors, here and there on one side ONLY of the cut out egg. Don’t get too much paint or you will just have a big blob instead of a decoration.
- Fold the egg and apply gentle pressure (not too much or the sides might stick together and not open cleanly). Some paint may squeeze out the side. Don’t worry. That is why the newspaper is there.
- Open your egg back up and see the pattern you have made. Beautiful!!!
- Allow the paint to dry completely before moving on to step 3 (which is optional)

Be sure to praise your kids for a job well done…and even a job NOT so well done, but man did they TRY!!! Here are some ways to encourage your kiddos all along the way so that they keep trying over and over again!
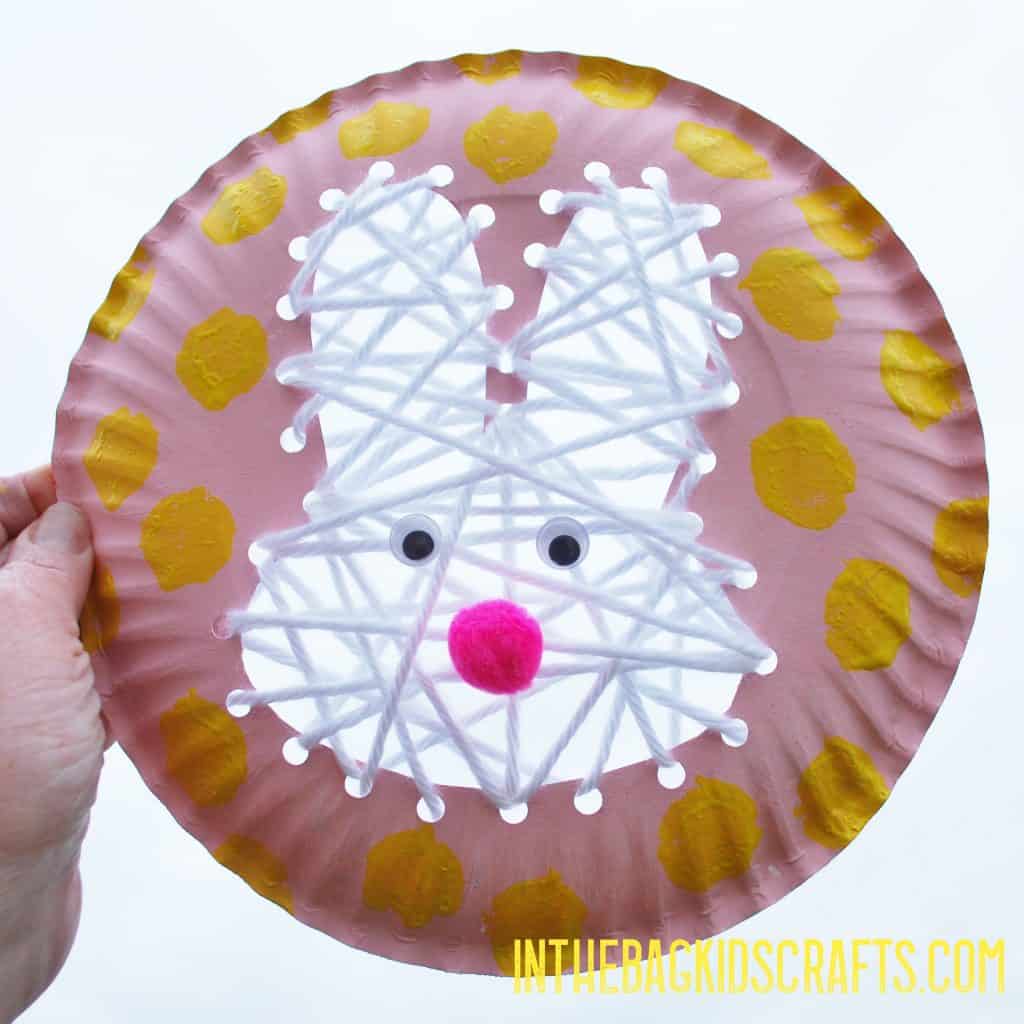
Step 3: Lacing (Optional)
- Now that the paint is dry, punch holes all around the edge, approximately 1/2″ apart
- Cut about 1 yard of white yarn and wrap tape around the end.
- Pull the yarn through the first hole and secure it in the back with a piece of tape.
- Now lace through the holes, around and around or in and out. If you run out of yarn before you get to the end, just tape the end down, get a new piece and start over again in the same way.
- When you have laced through all of the holes, Cut off the excess yarn and secure the tail in the back with a piece of tape.

Easter Crafts for Kids

- Popsicle Stick Easter Characters
- Easter Basket
- Bunny Wreath
- Easter Chick
- Popsicle Stick Ducky
- Popsicle Stick Easter Eggs
- Fluffy Bunny
- Popsicle Stick Bunnies
Save this for later! Pin it to your favorite Pinterest board…